Modern house impossible to imagine without insulation elements. And this determines the wide offer of the necessary materials, both in form and in composition.
Suitable as a heater "from heaven to earth". Granules insulate the roof and walls, fall asleep under the floor for the same purposes, provide thermal insulation of the foundation.
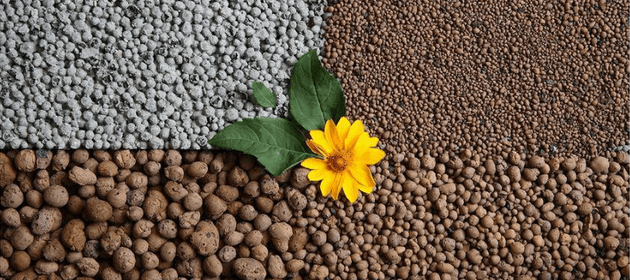 The term "claydite" implies several types of insulation, united by a common raw material for production. Gravel of three fractions, sand and crushed stone stand out.
Gravel looks like round or oval granules. It is produced by roasting fusible rocks in rotary kilns. Application features are determined by the diameter of the fraction:
- Expanded clay gravel fraction 20 - 40 mm. It has the lowest bulk density. It is used where a thick heat-insulating layer is needed: backfilling of foundations and cellars, backfilling of ceilings in attics.
- Expanded clay gravel fraction 10 - 20 mm. Serves as a heater for a roof, floors in the house and walls with a well way of a laying.
- Expanded clay gravel fraction 5 - 10 mm. Goes on filling as the basis under a "warm" floor. The grains of this fraction are used for facade insulation, when a mass of a small amount of cement and expanded clay is poured between the masonry and the facing layer.
Sand obtained by sifting clay fines and crushing large pieces of expanded clay in shaft furnaces. Areas of use:
- Expanded clay sand fraction up to 5 mm. Indispensable for laying cement screed floors.
- Expanded clay sand fraction up to 3 mm. Allows you to get a unique "warm" masonry mortar. The thermal conductivity of such a solution is 0.34 W / (m * C), and for a mixture based on quartz sand- 1.15 W/(m*S).
rubble also comes from crushing large pieces of caked clay. Used as a filler in production concrete structures lesser specific gravity and better heat and sound insulation.
Advantages and disadvantages of the material
As a result of the analysis of these varieties of expanded clay, the conclusion suggests itself that it is better to choose gravel as a heater. His advantage confirmed by a set of properties:
- Durability. Retains its qualities for a long time.
- Fire resistance. The material is absolutely non-flammable.
- chemical inertness. Unaffected by acids and other chemicals.
- Biostability. It is steady against formation of a fungus and does not allow to get to rodents.
- Frost resistance. Stable with temperature fluctuations. Tolerates more than twenty shifts of freezing and thawing.
- small bulk density. From 250 to 800 kg/m 3 . The larger the fraction, the lower the density.
- High strength.
- Good heat and sound insulation. Consequence of low thermal conductivity, about 0.16 W/m and porosity.
- Ecological purity. Does not emit harmful substances.
Worth considering separately reaction of claydite to water. It has solid water resistance and if the gravel is dried after wetting, all parameters will be restored.
But at the same time, expanded clay has a noticeable moisture absorption. Moisture-soaked gravel gains weight and loses its insulating qualities. Therefore, do not forget about waterproofing.
Important! When insulating horizontal and inclined surfaces with expanded clay gravel using the dry filling method, use a dense polyethylene film for vapor barrier or roll material bitumen based. For tightness, the sheets are overlapped, and on the side walls they are bent to the level of the backfill.
Compare specifications various kinds heaters will help table 1.
| Name of insulation | Specific gravity, bulk density, kg / m 3 | Thermal conductivity, W / (m * C) | Moisture absorption coefficient,% |
| Expanded clay (gravel) | 250 | 0,099 | 10-20 |
| Same | 300 | 0,108 | 10-20 |
| " | 350 | 0,115 | 10-20 |
| " | 400 | 0,12 | 10-20 |
| " | 450 | 0,13 | 10-20 |
| " | 500 | 0,14 | 10-20 |
| " | 600 | 0,14 | 10-20 |
| Foam glass | 200-400 | 0,07-0,11 | 0,05 |
| Fiberglass mats | 150 | 0,061 | 10-130 |
| 40-180 | 0,036 | 50-225 | |
| 40-80 | 0,029-0,041 | 18-50 | |
| 125 | 0,052 | 3-5 |
Table built from data SP-23-101-2004 and advertising sites.
gravel consumption It is not difficult to determine, given its loose form. When backfilling large arrays, you just need to calculate the required volume. And 0.1 cubic meters are spent on warming surfaces. m per layer of 10 cm per 1 m 2.
positive moment the use of expanded clay in measures for warming the home should be recognized:
- A guarantee that after completing all the work correctly, the house will be insulated for the entire period of operation.
- The material does not emit harmful substances.
- The ability to do everything with your own hands. Minimum skills required.
Coefficient of thermal conductivity expanded clay gravel is slightly higher than that of modern synthetic and mineral heaters. This implies the main drawback, which manifests itself in a significant thickness of the insulating layer and an increase in the thickness of the walls. It is advisable to take this incident into account at the design stage.
How is expanded clay insulation work performed?
 Expanded clay gravel very easy to work material. It does not require any special tool. You will need shovels, buckets (stretchers), a tamping bar, a building level, as a rule, a tape measure, beacons.
Of the consumables: vapor or waterproofing, tapes, etc. for gluing seams, cement for preparation of milk.
Foundation
For foundation thermal insulation is needed to protect against annual temperature fluctuations. The technology of its protection by backfilling with expanded clay is as follows:
- A trench is dug around the finished foundation with a depth corresponding to the amount of soil freezing. The width of the trench is at least 50 cm.
- In the resulting cavity, formwork is placed from improvised materials (boards, slate sheets).
- Waterproofing works are carried out along the bottom and side surfaces (film, roofing felt, etc.).
- Expanded clay gravel is filled up to zero level, compacted. The surface is leveled.
- From above, the insulation is also isolated from moisture.
- Then a blind area is made around the foundation or a thin layer of soil is poured.
Floor
Isolate the floor on a concrete base from the cold from below will be obtained as a result of the phased implementation of such operations:
- The surface is carefully prepared. All rubbish is removed and all sorts of irregularities are leveled.
- Provides vapor barrier. The film along the perimeter is bent onto the wall to the height of the expanded clay layer.
- Beacons indicate a given level. You can fix the rails of the beacons with small lumps of mortar.
- Expanded clay falls asleep when the mortar sets under the strips of beacons. Better take granules of different fractions, to obtain a more durable layer.
- The embankment is leveled by beacons with a rail or a rule. And then poured from above "cement milk".
- The final stage is a cement screed. It is advisable to lay it on expanded clay in front of it metal mesh reinforcing. The thickness of the screed is selected at least three centimeters.
Walls
 Exterior walls in the house are responsible for the preservation of heat to the greatest extent. But the technology for insulating them with expanded clay is more complicated than for the floor or ceiling. Such walls should be erected by a professional bricklayer.
Masonry in progress in two layers: internal (main) and external from facing brick. The gap between the masonry is about ten centimeters, where expanded clay is poured. Between the masonry jumpers-ligaments are required.
Ceiling
wooden ceiling can be insulated different materials, including expanded clay. First, the ceiling must be prepared. Check beams and ceiling boards. Replace the unusable and, if necessary, kill the boards more densely. After all, with warming, the load will also increase.
Procedure then like this:
- We cover the structure with a vapor barrier material. The joints must be glued. Bend the edges to the height of the backfill.
- Pour expanded clay to the height of the beam.
- Apply to gravel cement screed or at least cover with waterproofing.
- If the attic will be used as a living space or for storage, lay a floorboard on top.
From the foregoing, we can conclude that expanded clay rightfully occupies one of the leading places among heaters.
How environmentally friendly expanded clay insulation is obtained and applied - see the video:
In the country, personal plot or in the courtyard of an honest house they arrange a separate facility for storing vegetables, conservation, winter preparations, twists and other things. The right device the cellar involves insulation to create an optimal microclimate in the storage. The cellar and basement differ in a number of parameters, which means that the approach to warming them for the winter will differ in several ways.
What is the difference between a cellar and a cellar
Basement- a room located under a residential building. The key characteristic is the presence of indirect heating. IN this case, during the heating period in the basement is much warmer than in the cellar. In addition, it contains communications. As a result, the requirements are stricter. Among other things, the basement ceiling is a serious source of heat loss from the heated rooms on the ground floor.
Cellar- an object located separately or under summer kitchen, garage, outbuildings. The temperature in it is more stable throughout the year, which means that preservation, vegetables or wine are stored much better.
This is what leads to the fact that if there is free space on the site, the owners tend to build a cellar on the street. And already in the process of operation, the question invariably arises whether it is necessary to insulate the cellar. After all, from an excess of heat, vegetables will begin to wither and rot, and from a lack of heat, they will freeze.
Of course, it is better to carry out thermal insulation work during the construction of the cellar. But what about those who already have a cellar in the country. How to insulate the cellar from freezing without serious costs?
The choice of insulation method involves work in one of the following areas:
- cellar insulation from the outside;
- cellar insulation from the inside;
- combined insulation. The most efficient way, because is complex.
Types of cellars for a private house
When deciding how to insulate the cellar from the inside or outside, the type of cellar is taken into account first of all:
A separate room with a penetration into the soil up to 0.5 m. It can be freestanding or wall-mounted (one of the walls of the cellar is a wall outbuildings or garage). From the point of view of insulation, this is the simplest option, because. It is possible to insulate the walls and roof from the outside and from the inside.

buried cellar
The lower point of the building is located at a depth of no more than 1.5 m from the ground surface. In this case, in addition to warming, you should also think about neutralizing the effect ground water and frost heaving of the soil.

Underground (bulk) cellar
Distinguishes the location of the floor at a level of 2-3 meters underground. With proper waterproofing, this is the most advantageous cellar in terms of operation, which perfectly keeps the positive temperature, approximately constant, throughout the year.
Despite the differences in construction, the design of the cellar is not diverse.
Standard cellar design:
- walls - with dense soil - earth, with movable - brick or stone;
- floor - absent, or rather it is unpaved;
- ceiling - reinforced concrete or wood.
Accordingly, the ceiling, walls, and floor are insulated. Those. all cellar surfaces through which heat loss is possible.
Cellar insulation materials
Despite the significant variety of thermal insulation materials, it should be taken into account that not every one of them is suitable. The material for cellar insulation must have properties such as the ability to maintain geometry, withstand the pressure of water and soil, have high insulating properties (table), and absolute hygroscopicity.

For these reasons, mineral wool or ecowool is of little use for thermal insulation.
If you arrange the materials in descending order, then the following sequence will appear:
- cellar insulation with styrofoam. Most popular insulation. After all, in addition to thermal insulation characteristics, the foam is distinguished low price and ease of installation. Styrofoam does not rot, is not hygroscopic, biologically inert, has a low weight, does not require application vapor barrier films and arrangement of the crate. Mounted both outside and inside the room;
- cellar insulation with sawdust or peat soil, which retain heat well and are unattractive to rodents;
- basement insulation with polyurethane foam. PPU refers to sprayed heaters. Possessing all the properties of its predecessors, it is distinguished by incombustibility and the ability to fill the entire space (crevices, cracks). PPU creates a shell, which is the most reliable way to insulate the cellar both from the outside and from the inside. At the same time, the cost of polyurethane foam is high, and the application requires special equipment and the involvement of specialists;
- cellar insulation with polystyrene foam. Expanded polystyrene has all the characteristics of polystyrene. It is distinguished only by a higher price, which is due to the greater density of the material, the integrity of the sheet structure (the ability not to crumble during installation), the presence of a tongue-and-groove mounting system;
- cellar insulation with expanded clay. Expanded clay, like any other bulk material, is distinguished by a limited scope. As a rule, it is used for floor insulation. It can also be used for walls external insulation underground (dug) cellar.
- cellar insulation with black soil. Used for outdoor insulation. In this case, the earth is poured onto the roof of the cellar. However, with the current level of technological development, there are many more effective ways insulation while maintaining the absolute environmental cleanliness site.
Insulation technology depending on the type of cellar
Approach to thermal insulation, taking into account the design of the structure.
Ground cellar insulation
With this design, the main emphasis is on the insulation of walls and roofs. So, it is best to do outdoor work and use foam or polystyrene foam. Insulation work is carried out on the street, according to the installation technology of these materials. The roof is insulated from the inside. For these works, soft or hard insulation can be used.
Underground cellar insulation
The walls of such a cellar are half located in the ground. Therefore, there is a risk of flooding. To level it, you need to release (dig out) the buried part outer wall from the ground, treat it with any waterproofing solution (mastic) or wrap it with roofing material. Then lay a rigid insulation or polyurethane foam, re-wrap it with roofing material (this will protect the sheet from deformation) and cover it with soil. To minimize the influence of water, it is better to equip the drainage system.
Insulation of a bulk cellar (underground)
It is carried out both outside and inside. Below are detailed recommendations and advice on the phased thermal insulation of a building for storing agricultural products in the country.
How to insulate the cellar with your own hands
Different insulation technologies in the form of step-by-step instructions.
External insulation of bulk cellar
The most time-consuming part of the work, the implementation involves the implementation of a number of actions:
- the soil surrounding the roof and walls of the cellar is removed.
Note. It is sometimes not possible to excavate the soil. For example, when the cellar is dug in the ground, and the resulting slopes are finished with bricks. Such walls can collapse. In this case, users are advised to remove the soil at a distance of 100-150 mm. from the wall, and then gradually remove the rest.
Additional protection against moisture will be provided by the arrangement of a crushed stone-sand cushion at a depth of 200-300 mm. from the base of the wall.
- rigid insulation boards are mounted or polyurethane foam is applied;
- all defects from the surface of the walls are eliminated;
- for further work, it is necessary that the roof and walls are absolutely dry. Therefore, work is stopped until the walls are completely dry. As you can see, work is best done in the warm, dry season;
- roof insulation is, in fact, the overlap of the cellar with insulation. The technology provides for laying roofing material over the ceiling, backfilling the roof from above with a clay-straw mixture. The height of the embankment on the roof is 0.4-0.5 m. The mixture is carefully compacted and covered with a dense film. The edges of the film are wrapped on the wall with an overlap of 150-200 mm.
- waterproofing of the wall. Priming will not help much in this case. It is better to use a bitumen solution with diesel fuel (1: 3), mastic, roofing material or a special film;
- the joints between the sheets are blown with mounting foam;
Some craftsmen advise tightening the insulation with a polymer mesh to ensure the integrity of the sheet. Roofing material will more successfully cope with this task. But often the distance between the wall and the soil is simply filled with expanded clay, soil with a high content of clay, or a mixture of soil, sawdust / straw and clay.
In the absence of ventilation in the cellar, it is advisable to take care of it at this stage.
- the resulting hill is covered with a layer fertile soil 100-150 mm high. followed by disembarkation herbaceous plants, which will protect the cellar from the sun's rays, and strengthen the soil with their roots.
Cellar interior insulation
From the inside, walls, ceiling, floor and doors are subject to thermal insulation. A few photos as an example of the finished result.


Insulation of the cellar wall from the inside
Execution technology:
- walls are inspected for defects;
- the cellar is freed from the contents, shelves and drawers are temporarily dismantled;
- the detected defects are eliminated (the protrusions are knocked down, the slots are foamed with foam or sealant);
Increased attention is being paid to the quality of the surface, because. significant irregularities hinder quality installation polystyrene;
- the wall is waterproofed (with mastic or liquid rubber);
- rigid insulation boards are fixed.
For this, dowels-umbrellas or glue are used. The foam fixing starts from the bottom row and moves up. In this case, in each subsequent row, an offset of half the sheet is performed;
- a polymer mesh is attached to the insulated surface;
- the joints of the sheets are blown with foam. If the gap is significant, foam trimmings are placed in it;
- apply plaster.
Note. To eliminate pockets of mold formation, it is advisable to treat the walls with a solution of lime and copper sulfate.
Basement floor insulation
There are several methods of insulation that have proven themselves in practice. Consider floor insulation with expanded clay as the best option in terms of price / quality ratio.
Work order:
- after the concrete, on which the beacons are set and fixed, has hardened, expanded clay gravel with a fraction of 5-20 mm is poured. At the same time, the thickness of the gravel layer depends on the load that will fall on the floor;
- a vapor barrier film is laid on its surface with access to the wall. The height of the overlap is equal to the height of the backfill;
- the floor is deepened to the depth of the future heat-insulating layer (200-300 mm) and leveled;
- beacons are installed on the film. The first one is at a distance of 300-400 mm from the wall. The rest at a distance equal to the length of the rule, which will be equal to the screed;
- poured reinforced screed. The thickness of the screed also depends on the load.
The method of thermal insulation using sand and gravel. This method can only be used for bulk floor.
Work sequence:
- if the insulation is not used, then the floor is poured with hot bitumen. It will perform the function of waterproofing;
- the sand and gravel cushion is carefully rammed;
- a layer of crushed stone is poured (100 mm.);
- the floor is deepened to the depth of the future heat-insulating layer and leveled;
- a layer of sand is poured on top (50 mm.);
- hard heat-insulating material can be laid on the surface (for example, foam plastic, polystyrene foam boards);
- the prepared floor is poured with reinforced concrete screed.

Basement ceiling insulation
In the case of buried or ground cellar the roof of the structure needs to be insulated. Roof insulation works involve the use of soft or hard insulation, which is installed in accordance with the manufacturer's instructions.
As for the underground (dug, bulk) cellar, then in additional insulation the ceiling of the room is needed.
Work order:
- plaster is applied.
- a layer of rigid insulation is mounted;
- concrete slab or wooden beams treated with a penetrating waterproofing primer. The composition fills the capillaries and prevents water seepage. Wood is additionally treated with an antiseptic;
- heat-insulating material is closed with a mounting grid;
- whitewashing with lime and copper sulphate is performed.
Note. The ceiling in the cellar is the most vulnerable in terms of temperature regime place. Therefore, it is better to insulate it in two layers (100 mm).

Insulation of the entrance group: doors or hatch to the cellar
If the entrance to the cellar is located in the house or in the garage, there are no special requirements for its insulation.
But if the entrance is located on the street, then it is necessary to insulate the manhole into the cellar.
Work order:
- cellar door insulation previously carried out using felt and other soft materials. However, now it is considered justified to use rigid insulation that is glued to the door. Then the insulation is closed with a sheet of plywood, plastic or natural wood. Be sure to eliminate the gaps at the junction of the door to the box. In this place, a door seal is installed;
- cellar hatch insulation performed in a similar way. Only more attention is paid to the reliable fixation of the insulation on the surface of the cover. Otherwise, it may fall off.
An important point that you should pay attention to when insulating a door or hatch is to exclude the possibility of their arbitrary opening. Otherwise, all work on the thermal insulation of the cellar will be useless.
Insulation of a concrete or brick cellar is not difficult due to the optimality of their shapes and resistance to mechanical damage(brick, concrete walls can be drilled by fixing the dowel-umbrella or processed hot mastic for waterproofing).

But with modern caissons for cellars, the situation is somewhat different, because. thermal insulation measures can damage the tightness of the tank.
However, their insulation is also important, because the walls easily pass both heat and cold. Since the caisson is a one-piece structure, it does not need waterproofing. From the point of view of the material used, the caissons for the cellar can be (types):
- plastic (made of polymeric materials);
- reinforced concrete (made of concrete rings);
- metal (steel).
Please note that the materials are different indicator heat loss.
In this case, the cellar-caisson can have the shape of a cube or a cylinder, which leaves an imprint on the choice of a heat insulator. To insulate the caisson for the cellar, you can use bulk, rigid and sprayed heaters. Consider how they are used in descending order of popularity:
- hard insulation. They are used in cases where the caisson has the shape of a cube, square, rectangle with even walls. The insulation is glued to the surface of the caisson. The caisson is placed in the ground, the distance between it and the soil is filled up;
- bulk insulation: soil, expanded clay, sand, peat soil. In this case, the caisson is placed in the ground, and the distance between its walls and the soil is filled up;
- sprayed insulation - polyurethane foam. Provide the most effective thermal insulation. But the lack of PPU insulation in high price and the need to attract craftsmen with special equipment.
The indicated types of heat-insulating materials are suitable for insulating a metal cellar, as well as for insulating a plastic cellar. On construction market a plastic cellar with insulation is presented, which eliminates the need for do-it-yourself insulation work, it is enough to perform the installation correctly.
Conclusion
An insulated cellar in a country house or in the courtyard of a private house is a guarantee that the preparations for the winter will be safe and sound, despite the cold or heat “overboard”.
Advantages and disadvantages of expanded clay foundation thermal insulation, insulation technology outside and inside the building, recommendations for choosing a quality material.
Features of thermal insulation of the foundation with expanded clay

Expanded clay is a lightweight loose heat insulator from small fragments, which is obtained after firing clay rocks. Grain size from 5 to 40 mm is divided into three fractions: 5-10 mm (sand), 10-20 mm (gravel), 20-40 mm (crushed stone). Each type of product is designed for use in certain situations, but any granules are suitable for warming the foundation.
The insulating layer forms air layer directly next to the ceiling and diverts water from it. Grains are used to protect the underground and aboveground parts of the base. To eliminate heat loss, an additional partition is erected next to the wall or a trench is dug, and then the resulting cavity is filled with granules. Thermal insulation of the wall is carried out in parallel with its waterproofing and the construction of a drainage system.
Warming the base with this material is still relevant, despite the appearance innovative technologies. This is due to the low cost of work and the simplicity of the process. Often, other means are used in parallel to increase the effect.
The scope of the product is limited by its high moisture absorption, so it is not recommended to pour it in places where groundwater comes close to the surface. As a rule, they conduct insulation with expanded clay foundations wooden houses, suburban buildings and other buildings for which modern facilities are too expensive.
Advantages and disadvantages of expanded clay foundation insulation
The material has characteristics that allow it to be used outside and inside the house. The main advantages of this bulk substance are the following qualities:
- The ability to keep warm in all weather conditions.
- It is not afraid of various aggressive environments, does not rot, does not burn, does not collapse when frozen.
- Mice and other rodents do not live in expanded clay.
- Bulk material is convenient for work.
- The use of the product to protect the underground part of the foundation prevents the soil from freezing, which eliminates distortions of doors and windows. A barrier is also created between the base and groundwater.
- Thermal insulation of the outer part of the base increases the service life of the structure.
- The composition of the granules does not contain impurities that destroy cement.
- Grains that are laid from the inside of the house do not allow condensation to form in the basement.
- Work can be carried out at any stage of building a house.
- The insulating partition is much thicker than the "pie" of modern means similar purpose.
- You have to be prepared to overspend.
Expanded clay foundation insulation technology
Thermal insulation is carried out in several stages. First, the amount of material is determined and questions are decided on the choice of the product, then the main operations are carried out.
The choice of expanded clay for insulation of the foundation

To effectively insulate the foundation, the product must comply with GOST 9757-90. It is impossible to check its properties without special equipment; it is possible to determine a fake only by indirect signs.
Make sure that the package contains the following characteristics:
- Thermal conductivity - 0.06 W / m * o C or lower.
- Density - up to 250 kg / m 3.
- The size of the granules is medium or large.
- Water absorption - no more than 20%.
- Frost resistance - not less than 25 cycles.
Tips to help you buy a quality product:
- When buying expanded clay in a container, first of all check the packaging. It must be factory-made, without holes. The bag is light, the outside is clean. The presence of brown or red spots indicates that there is a lot of dust in the container and a large number of damaged grains.
- Open a couple of bags and evaluate appearance granules. Quality fragments have correct form, there is no sharp change in geometry. Only such grains provide acceptable density and thermal conductivity. Asymmetric samples indicate a violation of manufacturing technology and low product parameters.
- Do not buy a product if small and large items are mixed. Unsorted items are also not suitable.
- Expanded clay is not very durable, therefore, spoiled grain is allowed - no more than 5% of the bag volume. A large amount of crumbs indicates improper storage or careless transportation of the product.
- Moldy granules or fungus indicate the presence of low-quality additives in the raw material.
- Check material moisture. Fragments must be perfectly dry.
- If you buy the product in bulk, make sure it is stored in a dry area. From the grains that lie underneath open sky, it is better to refuse.
- Buy products well-known manufacturers. If you are interested in a heater from an unknown company, collect as much information about it as possible. Interesting information is on the construction forums.
- Give preference to large construction companies. For information: the cost of imported products is 4 times higher than domestic.
For example, we calculate the thickness of the insulation layer on reinforced concrete strip foundation. Construction is underway in the Moscow region. In the directories we find the values of the coefficients: ?1 = 1.69 W / (m * C) - the coefficient of thermal conductivity of reinforced concrete; ?2 = 0.18 W/(m*S); h1 = 0.5 m - base width; R \u003d 3.28 m 2 * C / W.
We substitute the values in the formula: 3.28 \u003d 0.5 / 1.69 + h2 / 0.18. Where h2 \u003d 0.537 m. We round the value to 0.6 m.
Let us determine the volume of the insulator with a layer thickness of 0.6 m to insulate a 6x8 m structure 1.4 m high. Calculate the area of the trench around the building: ((6 + 1.2) × 0.6 + 0.6 × 8) ? 2 \u003d 18.24 m 2.
The volume of the heat insulator for filling the pit is: 18.24? 1.4 \u003d 25.5 m 3. Round the value up.
Arrangement of the drainage system

Expanded clay is hygroscopic. If the groundwater near the house is at a depth of less than one meter, it is recommended to build a drainage system. Drainage is created regardless of which side of the foundation the material will be poured.
The work is done as follows:
- At a distance of 1.5-3 m from the house, along the perimeter, dig a trench, the depth of which exceeds the depth of the base by 0.5 m. Run the bottom with a slope of 2 cm by 1 m towards the water outlet.
- Lay geotextiles in the trench with an overlap on the walls.
- Spread a layer of medium-sized gravel 10 cm thick and compact it.
- Lay a perforated pipe on the bottom, controlling the slope of the surface towards the drain.
- Equip the drainage system with wells for clearing blockages and a collector into which water will be discharged.
- Wrap the geotextile over the pipe.
- Fill the trench with soil.
Insulation of the foundation with expanded clay over the soil
For thermal insulation of the basement, an additional wall is built. It is made of brick or concrete (filling the formwork) at a distance of 20-30 cm from the house. The partition is erected with a bandage to the first floor. Pour the substance into the resulting cavity and cover it on top with cellophane film, backfill and brickwork.
Another option is to add concrete mortar granules, mix thoroughly, and then pour into the formwork. This design retains heat poorly, because. concrete conducts it well.
Much better to cook clay mortar with expanded clay. Stir the mixture to a state of thick sour cream, and then pour into the gap between the partition and the plinth. Clay slowly heats up and gives off heat, so it is preferable to concrete.
Protection of the foundation with expanded clay from the basement
Insulation of the foundation from the inside with expanded clay is used if it is impossible to use it from the outside. For work, stock up on boards treated with antiseptic agents.
- In the basement, build a wooden wall from the floor to the ceiling of the first floor and fix it parallel to the base at a distance of 30 cm.
- Fix the structure with slopes.
- Lay a waterproofing film on the floor of the enclosed area.
- Fill the cavity from floor to ceiling with expanded clay.

The process of warming the foundation with expanded clay from the outside is complicated by a large volume earthworks, during which the entire space near the wall is freed from the soil.
Operations are performed in the following sequence:
- Dig a trench around the perimeter of the foundation to its full depth. The width of the pit for the convenience of the master should be in the range of 0.8-1.0 m.
- Clean the surface of the base from dirt. Knock off sharp corners and edges.
- Treat the wall with a special primer - primer.
- Spray it on after it dries bituminous mastic cold or hot way. For hot coating, preheat the product to a temperature of 180 degrees for open fire. A substance that is intended for use in a cold state, simply mix and apply to the walls. For reliability, repeat the operation 2-3 times. Work with a roller with a long handle.
- At the bottom of the trenches, pour 15 cm of sand, level and compact it.
- Lay the hole with a thick plastic film overlapping the foundation along its entire height. It will protect the granules from groundwater. Wet grains lose some of their qualities.
- At a distance of 0.6 m from the wall, coinciding with the calculated thickness of the insulation layer, build a partition. It can be made from bricks, boards, slate, etc.
- Fill the space near the wall with expanded clay to the top, on the other hand - with earth.
- Cover the "pie" with roofing felt with an overlap of 5 cm on the base and 15 cm on adjacent sheets. Seal the joints with hot bitumen.
- Pour sand on top, and then soil.
- Pour around the perimeter of the house concrete pavement with thermal jumpers from bars. protective layer should be 10-15 cm thick with reinforced mesh. Penetrating waterproofing compounds can be added to the solution.
Internal insulation of the foundation with expanded clay
This method is used at the initial stage of building a house and is carried out over the entire area occupied by the house.
The work is performed in the following sequence:
- In the pit, level and compact the bottom.
- Lay a thick polyethylene film with an overlap on the walls and on neighboring fragments. Glue the joints with reinforced tape. Instead of a film, roofing material can be used.
- Sprinkle a layer of granules on the floor.
- Cover it with cellophane for waterproofing.
- After construction, other means of a similar purpose, for example, mineral wool, can be laid on the floor, and then the entire “pie” can be filled with a concrete screed.
Expanded clay is not a highly effective means. To achieve good result, be sure to insulate the base comprehensively, not forgetting about waterproofing and moisture removal. Deviation from laying technology can lead to constant heat leakage through the foundation and even to its destruction.
In order for the house to be warm at any time of the year and even in severe frosts, it is important not only quality foundation, warm walls, good windows and doors. It also plays a very important role proper insulation attic space, and, of course, ceiling insulation. expanded clay is used by most developers because of the obvious advantages. This is a good and high-quality insulation, quite affordable for everyone, proven and reliable.
Expanded clay is a light porous material in the form of rounded granules. The composition of expanded clay includes only burnt clay, which makes the material environmentally friendly for human health.
Positive qualities of expanded clay:
- Frost resistance;
- Expanded clay is environmentally friendly and safe for health;
- Soundproofing;
- High thermal insulation;
- Affordable price;
- fire resistance;
- High performance.
Why is it necessary to insulate the attic floor with expanded clay

When using expanded clay, fasteners and fitting of insulation elements are not needed.
Properties warm air are known even to a schoolboy: he rises up to the ceiling and higher, if he has somewhere to climb. Therefore, it is natural that if there is no insulation in your attic, then in the end all your heat will fly away, heating all the surrounding space, but not your house.
High humidity, dampness, cold walls and floors - this is what awaits a negligent owner who decided not to insulate the attic floor. - this is not only the insulation of the ceiling, but also the future floor for the attic.
Of course, it is best to insulate the ceiling with expanded clay even at the construction stage. Insulation equipment, resurfacing does not take as little time and effort as we would like.
The work process is quite simple. Having everything in stock necessary materials and tools and having familiarized yourself with the stages of work in detail, it is quite possible to cope with improving the ceiling on your own.
Back to index
Necessary materials for insulation of the ceiling with expanded clay:
- expanded clay of different fractions;
- vapor-proof material;
- material for the construction of the fence;
- clay;
- masking tape or construction stapler;
- cement-sand mortar;
- flooring material (boards, plywood, laminate, linoleum, etc.).
The principle of insulation attic floors Pretty simple, anyone can do it. First you need to clarify: in order for the insulation to be more reliable and effective, it is worth using expanded clay different sizes, this precaution will eliminate the appearance of voids, which means it will increase the quality of your overlap.
The first step will be the erection of a fence into which you will pour expanded clay.

It is necessary to protect expanded clay from above from rain, and from ingress of atmospheric moisture.
The height of this fence must be determined independently, taking into account the thermal conductivity of expanded clay, which is approximately 0.07-0.16 W / m, naturally, it increases when different fractions are used.
Calculate the amount of heat loss in your home through the ceiling area. The heat loss of a cold attic measuring 3x4 m is approximately 0.20 W / m2 K. For calculations, you can contact a professional or do them yourself according to SNiP -3-79 "Construction Heat Engineering". At the same time, it is also worth considering that load-bearing structure should not damage the weight of expanded clay, which you got after the calculations.
Since for the overlap you need additional protection from moisture, before you start filling expanded clay, you must definitely lay a vapor-proof material that will protect the insulation. Installing a vapor barrier is a mandatory step, since there is a fairly large amount of water vapor in the air that comes from the room.

Vapor barrier "Izospan V" during the cold period prevents the formation of condensate, fungal infection and corrosion of structural elements.
High-quality vapor barrier saves not only insulation, but also significantly extends the life of all roof structures that are at least slightly susceptible to damage from water. If we neglect the vapor barrier material, then water vapor, condensing, will fall on all the elements of the floor.
The material for vapor barrier can be very different. preference in modern construction given to materials of the type "Izospan" series C or B.
But this is not the only option, you can get advice in a specialized store and pick up something similar to Izospan. If you need more economical option, then you can use aluminum foil or a simple polyethylene film, the use of roofing material is also allowed.
Back to index
How to put vapor barrier material

The next stage is the laying of well-kneaded clay before filling the surface with expanded clay. It is laid in a small layer with any suitable tool for this, of course, while it is important not to damage the already laid material.
To fill expanded clay, no special explanation is required, you just have to remember to mix different fractions. If you could not calculate how thick the layer covered with expanded clay should be, then be content with the recommendations of experts who recommend a thickness of 12-16 cm. In terms of level, expanded clay should not exceed the height of the fence.
The next stage should not be ignored, as it will give more strength and durability to the ceiling insulation layer.
After you have laid a layer of expanded clay, a screed is applied to it using a previously prepared solution. Thanks to her, you can safely walk on the floor before laying the floor.
The thickness of the screed is determined by the choice of final coating. If you are planning to lay linoleum or laminate flooring, then the layer should overlap the joists and railing and be leveled using a level. If you are planning a wooden or plywood floor, then the screed should barely reach the height of the beams.
Any person with a civil engineering education is familiar with heat engineering. This is a whole science that studies the protection of buildings from the penetration of cold and is based on the laws of physics. With the help of calculations, experts find out the thickness of the insulation, selected from a huge range modern materials. It is important to protect all structures from the cold: walls, floors, roofs. One option may be to insulate the floor with expanded clay.
How does a heater work and why is it needed
Air is the most efficient heat-insulating material. It can compete only with inert gases, which practically do not react with environment. Such gases are used, for example, when filling the chambers of double-glazed windows, but in the main building structures it is not possible to ensure complete sealing.
All thermal insulation materials have a porous structure. It is in the pores that air is retained and prevents heat loss. The lower the density of the material, the better it will perform its function. Insulation can be used rolled, slab, sprayed or bulk. The most budgetary and easy to do-it-yourself styling is bulk, but it also has the lowest heat-shielding characteristics.
The main heat loss of the house. Through the floor - 10-15%.
It is necessary to insulate floors above the basement, on the ground or in the ceiling of a cold attic for the following reasons:
- security comfortable living in the house;
- reduction of heating costs;
- protection of structures from condensation, which leads to the formation of fungus and mold;
- increased sound insulation.
If you do not perform insulation, during the operation of the house there will be serious problems.
Pros and cons of expanded clay as a heater
During construction apartment buildings thermal calculations building structures, along with strength calculations, are checked by an examination. In this case, floor insulation with expanded clay is not used, since this material cannot be classified as highly effective. It is most advantageous to lay bulk insulation in a private house.
Its advantages include:
- ease of laying with your own hands;
- low cost;
- environmental Safety;
- creating an even base for the floor cake;
- resistance to temperature extremes;
- the possibility of using it for floor insulation, which will be subjected to heavy loads in the future, for example, floors of industrial facilities.
The negative characteristics include the fact that this material has a lower thermal insulation ability compared to mineral wool and polystyrene foam.
Before insulating the floor with expanded clay, it is necessary to determine what thickness layer will be used. bulk material has a thermal conductivity twice that of mineral wool, therefore its thickness should be doubled. In most cases the best option will be 200 mm.
Faction selection

Expanded clay is made from special clay, which swells when heated. It is represented by three factions:
- Expanded clay sand. It is added to dry mixes to improve their thermal insulation characteristics;
- Expanded clay gravel. Represents larger particles with sharp edges;
- Expanded clay gravel. Is the most best material for insulation in a private house. It has the same size as crushed stone, but a rounded shape. The pores are protected from the outside by a layer of sintered clay.
It is important to ensure that there is a minimum number of damaged granules in the total volume, in which case the insulation will be most effective.
Application area
There are a lot of options for using the material when insulating floors in the house:
- insulation of floors on the ground under the screed;
- backfilling the space under the boardwalk when laying the floors along the logs;
- attic floor insulation.
It is important to remember that in all three cases, the floor cake is quite different. Insulation of the attic with expanded clay depends on the design of the floor, it can be performed both along the logs and under the screed.
Warming technology
In order to competently carry out measures to improve the heat-shielding characteristics of the floor with your own hands, it is necessary to follow the order of work. Depending on the type of insulated floor in the house, the layers and their location vary.
Ground floor
 Work is performed in the following order:
- compaction and leveling of the base;
- adding sand and gravel for additional compaction and leveling;
- styling waterproofing material(when high level groundwater);
- laying and leveling a layer of expanded clay;
- installation of footings from lean concrete;
- laying a vapor-waterproofing material, which can be used as an ordinary polyethylene film;
After performing the insulation on the ground with their own hands, they fill in the reinforced cement-sand screed, on top of which a clean floor covering is laid.
Basement or underground floor insulation


Insulation of a wooden floor with expanded clay can be carried out both on logs and without them. It is necessary to lay each layer in the order presented:
- ceiling installation;
- laying a layer of waterproofing;
- if necessary - installation and fixing of the log;
- bulk material is laid;
- leveling expanded clay;
- vapor barrier layer - p / e film;
- installation of a clean floor or screed.
When working with insulation, it is very important to lay the waterproofing and vapor barrier in the correct order.
Attic floor insulation
 For the attic, each layer is in a slightly different order:
- floor structure;
- vapor barrier - p / e film;
- when laying insulation along the logs - installation of wooden bars;
- expanded clay backfill;
- waterproofing;
- clean floor or cement screed.
Features of laying expanded clay
 Leveling expanded clay with a level
 When carrying out measures for the thermal protection of the floor with your own hands, it is necessary to take into account the features of the material used. When insulating the floor with expanded clay, you need to know:
- For getting flat surface beacons are used. The smaller the installation step of the beacons, the more likely it is to ideally lay expanded clay with your own hands.
- When laying on lags, all wooden elements required to be treated with antiseptic compounds.
- The minimum layer of material is 10 cm.
- When using expanded clay, it is best to install a wooden floor covering.
- Floor operation is possible 7 days after completion of construction or repair work.
Technology of laying screed on expanded clay:
Do-it-yourself insulation with the help of expanded clay allows you to work with minimal cost without sacrificing quality.
Thickness calculation
In all these cases, when backfilling, the thickness is selected approximately, the layer is taken to be 15-20 cm. But if necessary, a simple calculation can be made. In this case, specialists use the Teremok program. It is very simple and is freely available. You can calculate the layer online or offline by setting software on computer.
Bulk insulation is available in the database, you just need to find it. For building a house with your own hands, this program will be able to make professional thermotechnical calculations any floor construction: on the ground, on the ground floor, in the attic.