The operational qualities of the laminate and a wide choice of colors, textures and patterns, the relative ease of installation make us think about its possible use for decorating walls. Of course, in the first place - this is a floor covering, popular and in demand, and as a wall is not used very often. However, the laminate can bring interesting and fresh "notes" to the design of the room precisely when it is not used for its intended purpose. Which laminate to choose for laying on the wall and what are the specifics of such installation?

Arguments for"
At first glance, the idea of decorating a wall or a niche with a laminate looks unexpected. However, if you look, there are weighty arguments in favor of such a decision:
- Great look. Some models of this coating are difficult to distinguish from natural wood of valuable species.
- Wear resistance, strength and long service life. The top protective layer perfectly protects the laminate from external influences.
- Antistatic.
- Simple installation that literally anyone can do.
- Easy care of the laminate during operation.
- Affordable price for a material with such characteristics and appearance.
This coating has all the qualities to become part of the original and stylish design of the room, even if not in a very familiar “role”. Laminate on the floor and on the wall, matched in the same color scheme, will help to visually expand the room.

The choice of laminate for wall decoration
Important! For decorating walls, you should choose a low-class coating (21-23) - it will practically not experience loads. So you can save a decent amount. After all, it is important for you to choose a material that matches the color and pattern of your design ideas. However, it is quite difficult to buy a low-class laminate, stores try not to keep it in stock.
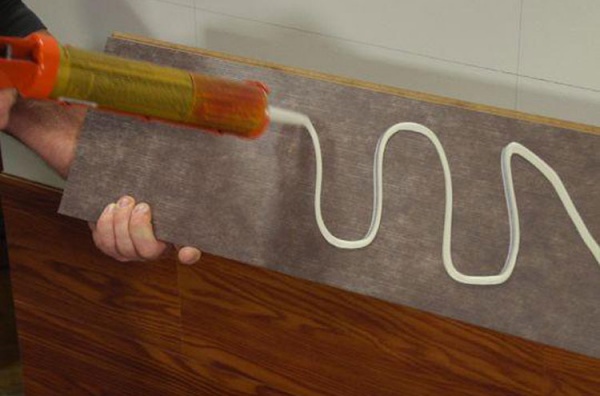
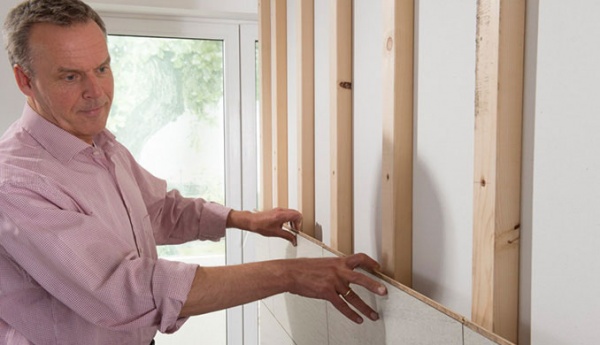
The choice of panel connection option (glue or lock) depends on the laminate class. The coating of 21-23 classes is not available with a Click-lock, the laminate of this class has only an adhesive connection. Adhesive-bonded laminate is mounted on a leveled surface, with the adhesive applied in a zigzag pattern to the back of the panel. Then glue is applied to the end of the panel and the next one is laid. Excess glue is immediately removed with a damp cloth, which is moistened in a weak solution of vinegar. A bar is placed under the bottom panel as a stop so that the structure does not start to slide down.
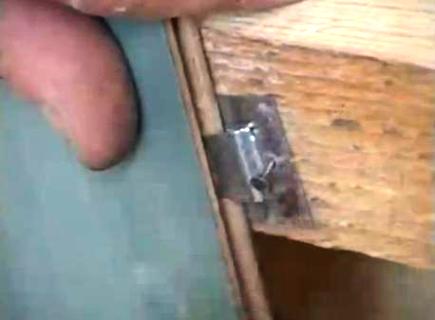
Laminate with Lock and Click locks is attached to the wall using liquid nails and clamps. Kleimers are galvanized brackets, they differ in size and shape. One type of kleimers has teeth that are driven into the end of the panel and fixed with screws or nails to the crate or wall, the other has a flat protrusion that enters the groove of the panel. Kleimers are specially designed for fastening lining, laminate and other similar coverings to walls, providing a very secure fastening.


Advice from experts. It is not necessary to glue the lock connection of panels with Lock and Click locks. But experts strongly advise to go through the gel for the laminate - the gel will allow you to maintain the elasticity of the connection.
Where and how will we use it?
Let's start with the rooms where you should not lay laminate on the walls. This is a kitchen, a bathroom, an uninsulated balcony, a basement in a country house. Changes in humidity and temperature will adversely affect the material, and it will quickly lose its appearance.
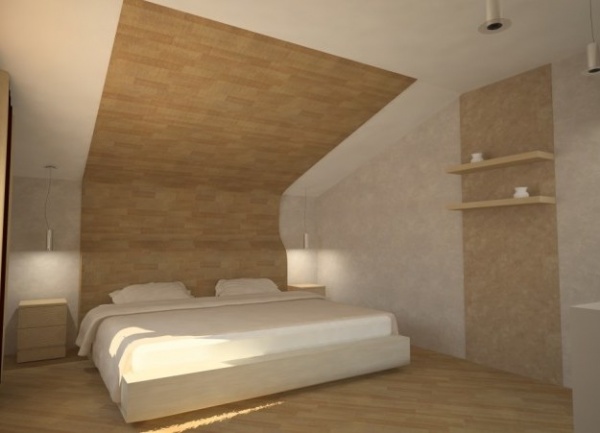
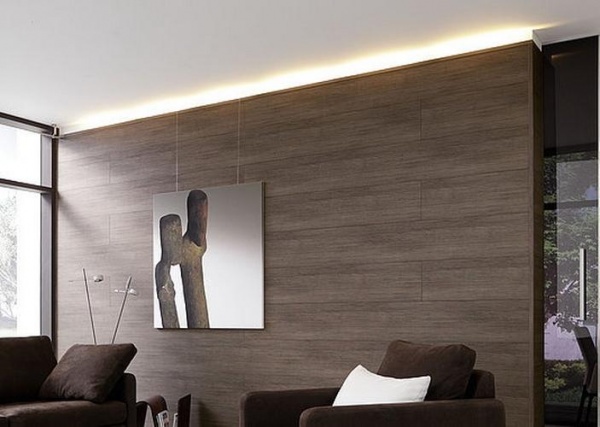
Traditionally, laminate is used to decorate the walls in the hallway to the height of the panel. They decorate with this coating part of the wall above the head of the bed in the bedroom, decorative panels are made of laminate behind the TV in the living room, and niches are trimmed. The difference in shades of the material in the same color scheme on the floor and on the wall creates an interesting effect.


Features of the installation process
The laminate is intended for laying on the floor, and the technology for mounting it on the walls, taking into account all the features of this material, has not yet been fully developed. Only recently, some manufacturers began to produce special frames for attaching this coating to the wall.
One group of experts cites a lot of practical experience and videos posted on the Internet demonstrate fastening with liquid nails, clamps and even self-tapping screws and nails. Some manufacturers (for example, Egger) show in video instructions that the first panel from the bottom is fastened with self-tapping screws at the bottom, and studs are hammered in the upper part (this is how the lining is attached).
Another group of specialists argues, and argues not unreasonably, that the coating cannot be fixed rigidly, which is why it is called a “floating floor”. And a twisted self-tapping screw or a hammered nail is not very compatible with the concept of a “floating floor”.
The truth, as usual, lies somewhere in the middle. It is not worth refusing to use laminate as a material for decorating walls on the basis of theoretically correct judgments of the second group of specialists. But these judgments cannot be completely ignored either.
Important! Try to avoid rigid fixation of the panels during installation. How to do it? For example, on a metal crate with the help of clamps, the upper panel is rigidly fixed in the structure. Further, the panels are fastened with clamps with a flat ledge, but the clamps themselves are not screwed to the vertical rail. Fixation is made only on panels of rows 6-7, which gives some mobility to this part of the structure.
With the adhesive method of fastening, the surface of the wall must be dry and very even. You can not attach the material to drywall, which is simply glued to the wall - under the weight of the entire structure will collapse. It should be remembered that the laminate is quite a heavy material.
For fastening to the crate, the step of the bars should not exceed 600 mm. For vertical installation of the laminate, the lathing bars are arranged horizontally, and for horizontal installation, the bars are mounted vertically.
It is required to leave a distance of about 10 mm between the laminate structure on the wall and the walls in the room. The same distance should be between the structure and the floor. To maintain this distance, plastic wedges are used.
When laying a laminate on a wall horizontally, it is required to follow a checkerboard pattern or shift the next row by one third of the panel. Everything, as when laying on the floor. With one long vertical seam, the load on the fastener increases. Installation is more convenient to start from the left corner of the wall and move to the right. However, it is more convenient to work “right-handed” this way, it is more convenient for “left-handers” to start from the right corner.
Conclusion
Avoid using laminate for wall decoration in rooms with large changes in humidity and temperature.
The practice of interior design in unusual ways has long included the original use of facing materials. One of the many design solutions is the interior finish with laminate flooring. Against the background of the traditional use of lining, plastic sheets or MDF, laminate panels certainly win due to their strength and attractive appearance. Products are not hygroscopic enough, it is undesirable to use them for facing rooms with high humidity. Therefore, before gluing the laminate to the wall, the mounting methods should be studied in more detail. Strange as it may seem, but attaching laminate flooring to other planes is not much more difficult than doing it at its intended destination - on the floor. A properly fixed laminated element will diversify and make the interior of the hallway, hall, bedroom or living room unusual.
In favor of the use of newfangled finishes, the best qualities of the product speak: high wear resistance, reasonable cost, strength, ease of maintenance. The material is produced in a wide range. Although it resembles natural wood, manufacturing technologies allow the production of boards with different textures, textures, various wood shades. Installation of laminate on the wall can be carried out:
- on a wooden crate, this method is called frame. For its manufacture, well-dried bars treated with antiseptic agents are used;
- on a frame made of aluminum profiles using silicone sealants;
- on special glue or liquid nails;
- using kleimers, which are usually used for MDF panels.
 On kleimers
  On a wooden crate
  For aluminum profile
 If the fastening of the laminate on the frames does not require an absolutely flat surface, then gluing it or fixing it with clamps without first preparing the wall will not work.
Laminate flooring material is quite heavy. It is undesirable for them to veneer plasterboard partitions. There is a risk of collapse.
In order to choose the right method for attaching the laminate to the wall, factors such as the condition of the surface, the geometric dimensions of the room should be taken into account. Because the frame, no matter how thin it is, still steals space. You may have to level the surface, since it will be more convenient to attach the laminate to the wall with an adhesive method than to build a crate.
Styling options
It is absolutely pointless to laminate all the surfaces in the room. Not everyone likes the floor, which goes to the inner planes up to the ceiling, and even on it, from the same material. Even in different shades, textures. But individual accents and inserts can bring some zest and uniqueness to the interior. Moreover, laminated lamellas perfectly coexist next to any finishing materials. Therefore, they are applicable both in classic interiors and in modern decorations, such as industrial style or high-tech. How to put the laminate on the wall, the decorator decides in each case individually.
There may be many options. But they depend not so much on the installation methods, but on the colors, technical characteristics, texture of the material. The slats can be placed horizontally, vertically, with offset boards, in a checkerboard pattern. Laminated products are used in the same color and of the same quality, or they try to attach boards using various combinations and transitions. That is, the imagination of designers and customers is not limited by anything.  vertical
  Horizontal
  Diagonal
To veneer a vertical surface with a newfangled finish, it is not at all necessary to invite an expensive company or construction team. You can save a lot on labor costs, since fixing a laminate on a wall with your own hands is quite affordable even for a novice master. It is enough to watch a video on this topic, get acquainted with the technologies, choose your option, buy everything you need and stock up on tools. To work, you will need the following tools:
- a puncher or a powerful drill, preferably with a drill bit if the building is built of stone, brick or concrete;
- screwdriver, jigsaw, hammer, pliers;
- construction level and plumb line, measuring tape;
- pencil or marker;
- as a rule, trowel or trowel;
- spatulas of different sizes, including notched;
- a container for mixing glue and a suitable nozzle for a puncher or construction mixer.
 Tools
Tools This is a general list of tools that may come in handy on the job. A more specific list is determined after making an exact decision on how to attach the laminate to the wall. Will it be necessary to install a frame, or glue the material directly onto the finishing plane.
Installation rules
Since the methods of facing wall surfaces are strikingly different from each other, the technology for their production should be considered separately. But there is one general rule - materials are not used directly from the store. They must be kept for a certain time in the conditions of future operation.
Sheathing on a wooden frame is convenient in that a free gap forms between the base structure and the finishing layer. The gap between the wall and the laminate can be used to hide communications, to create a sound barrier, or for other purposes. Measures for laying wires and insulation should be carried out at the stage of mounting the frame; after installing the finishing panels, this will not work. The process looks like this:
- if necessary, the wall is leveled with a plaster mortar or large shells, chips, cracks are sealed;
 Surface leveling
 - markup is made for the placement of the frame. The vertical beam is mounted in such a step that it is convenient to mount laminated boards on it. Usually this size is equal to half the length of the board;
- according to the established dimensions, a beam is cut and fixed vertically to the base, using a level. Extreme bars require special attention, they determine the future plane. They must be mounted in an ideal level;
- if the laminated boards are arranged vertically, then the bars are mounted in the same order, only horizontally;
- a horizontal beam must be fixed slightly above the floor plane, since they start laying the laminate on the wall from below. The quality of further work will depend on the correct installation of the first row;
 Installation on a wooden crate
 - special holders must be installed on a horizontal bar, with the help of which it is convenient to install the first row of lamellas, with the groove up;
- the following panels are connected to the lower connection of the spike into the groove and fixation with brackets to the vertical bar;
- for greater strength, the joints are treated with silicone sealant, it should be applied to the spike of the inserted lamella.
Facing is not made close to the surfaces of the floor and ceiling. Laying a laminate on a wall without creating an expansion joint or gap means creating additional stresses in the finished plane. This can lead to unnecessary deformations. The resulting gap is closed with decorative strips made of a material suitable for the general style of the room.
Wall&Water or the so-called “dry” method consists in mounting a frame made of aluminum profiles. The panels are connected to each other and to the frame elements using silicone sealant and click elements. The distance from the wall to the cladding can also be used rationally.  Metal crate
In some cases, laying is carried out with kleimers directly to the base, without crates. This installation method is simple, but requires a flat surface, otherwise the strips of material will not be able to fit snugly against the base, and gaps between the wall and the laminate, in this case, are not allowed. Such a defect will distort the surface and spoil the overall impression.
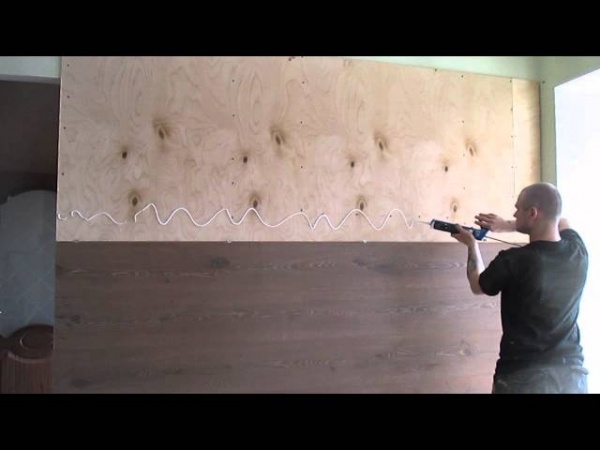
Adhesive method - for this case, the thinnest material is usually chosen so as not to create an extra load on the surface to be trimmed. You can fix the laminate on the walls with both ready-to-use glue and dry mixes. This method requires thorough surface preparation. The finished plane is marked out according to a previously developed layout scheme. Horizontal and vertical lines are needed in order to accurately and evenly glue the boards.  Fixing laminate flooring with liquid nails
It is convenient to collect small shields on the floor and lay them entirely on the glue. To do this, the adhesive is applied in an even layer on the plane of the wall, using a notched trowel, and the prepared shields or planks are pressed tightly. Between themselves, the lamellas are connected with locks, which are additionally lubricated with silicone.
What to do if the wall is uneven
Laying laminate on the wall with gluing, in case of irregularities, is simply impossible. First you need to either level the surface, or choose another mounting method. You can level the walls in different ways: with plaster, starting putty, sheathing with sheets of plywood, drywall or OSB, observing the appropriate technologies.
There is one caveat - since laminated boards are usually lined with only some part of the plane, then in order to comply with geometry and symmetry, the entire base will have to be prepared. Otherwise, she will “dance” and look, to put it mildly, ugly.
Therefore, before deciding how to lay a laminate, it is necessary to correctly assess the quality and condition of the surface to be veneered. Illiterately laid material cannot decorate the room.
 Leveling walls with plaster
 For which rooms this method of decoration is not suitable
In fact, there are no strict restrictions on the use of laminate flooring. But the solution to the issue of finishing still should be approached wisely. Why waste money and energy on something that may not last long. Moreover, the choice of finishing materials and means is quite wide.
The material should not be used in rooms without heating and with high humidity. It is not suitable for lining light partitions and surfaces made of soft materials. Of course, you can veneer a balcony or a loggia. But, it is extremely undesirable to use glue there, and a crate or an aluminum frame will steal part of an already small area. There is only one way left - to plant the lamellas with kleimers directly on the base. In any case, it is worthwhile to think carefully and calculate the options for how to fix the laminate on the walls. And then decide which finish to apply in a particular room. Now you know how to lay the laminate on the wall surface or, if necessary, glue the laminate so that the coating lasts as long as possible.
Video
The video explains in detail how to lay the laminate on the wall.
Sometimes when creating an interior, unexpected decisions are made regarding the use of a particular finishing material. An example is the use of floor laminate for finishing a section of a wall, a niche, and even a ceiling. Laminated plates imitating valuable wood bring a certain charm to the interior, adding sophistication and comfort. If you decide to add a twist to the decoration of the room, it remains to find out which mounting method to prefer and how to lay the laminate on the wall surface.
Material for wall mounting - rational selection without overpayment
The idea of finishing the walls with laminate arose due to the similarity of this flooring with natural wood, the texture of which this material is designed to imitate. You can also use natural wood in the form of a lining for interior wall cladding - special boards equipped with locking joints, but many are stopped by the difficulty of installing this material, the need to treat it with various impregnations, paint and varnish it. Laminate, on the other hand, does not require any additional measures: after installation, the surface is ready for use, while the floor board is practically not inferior to natural wood in terms of external qualities.
Another common option for wall cladding with wood texture imitation is the installation of decorative plastic panels. The formation of a PVC finishing surface does not present any particular difficulties; it comes out much cheaper in terms of money. But the strength of plastic panels is low (it is easily damaged by mechanical stress), the appearance and the choice of various decorative patterns are so-so. In addition, plastic is combustible, so that its manufacturers do not declare this, and there are also questions about its toxicity. That is why the preference is given to the laminate on the wall, especially when it comes to living rooms.
We found out that the material in question is quite appropriate for decorating walls. It remains to choose the desired floor board from the variety that is offered in a specialized distribution network. Immediately it is worth focusing on the fact that there is no such thing as a wall laminate - all varieties of material models were originally designed to form a floor surface. Can all laminated boards be fixed to a wall surface? In fact, any. But still there are purely practical nuances that should be taken into account when choosing a material.
First, it is a class of wear resistance. The higher this indicator, the stronger the decorative surface and less prone to abrasion, scratches, chips and other mechanical damage. With the wall mounting method, the importance of this criterion for the quality of a laminated board is leveled, because for obvious reasons, hardly anyone will walk or move furniture along the wall. For a laminate on a wall, a wear resistance class of 21-23 is quite sufficient; it is not advisable to purchase plates with a stronger surface, since with an increase in the indicator in question, the cost of the material increases sharply, although this does not affect its decorative properties.
Secondly, it is the quality and type of interlocks. When installing a laminated board on the floor, which is carried out in a floating way, the reliability of the locks plays an important role, since only due to these devices the entire structure is fastened together. When attaching the laminate to the wall, in any case, additional fasteners are used, which carry the main load. At the same time, the lock only helps to tightly fit the individual structural elements one to one, making the joints between the boards inconspicuous. The quality of the locks also affects the cost of the laminate, so you should not overpay, trying to choose a material with strong and functional locks.
When choosing a laminated board for wall mounting, the main criterion is the decorative component. The main thing is to choose a material with the texture that best fits into the intended interior design.
The use of laminated boards - where is this option appropriate?
Creative imagination when developing interior design options is not limited by any framework, so there are no specific recommendations where you can make a wall, panel or niche from a laminate, and where it is better to refuse this idea. But this is in terms of design creativity. A practical approach to the issue of the advisability of facing the wall surface with laminated boards indicates some limitations of this method of wall decoration. It is not recommended to use laminate for any cladding in rooms where there is or may be high humidity or direct contact with water, therefore this cladding method is not used in bathrooms, toilets, kitchens, open or uninsulated balconies and loggias.
In rooms with a normal microclimate, the use of the floor covering in question for wall cladding is not limited, but fixing the laminate on the wall solid is not quite right. First, it's expensive. Secondly, this material looks much more interesting when a certain zone is allocated to it. For example, often in this way a panel is formed in the bedroom behind the head of the bed. Another option is a niche or a kind of shield that highlights the area on the wall where the TV is installed. Such a solution is interesting - the same material with the same decorative texture that is laid on the floor. This design option visually enlarges the space by continuing the floor into the wall without visual transition.
The traditional way to finish the hallway is to form panels at the bottom of the wall. For these purposes, various materials are used - MDF, wooden lining, plastic facing products. In this case, we can also use laminate - the material is quite durable, easy to clean and maintain, and this is just what you need for panels in the hallway. In addition, laminated boards, which have high decorative qualities, are good for highlighting individual interior elements in bedrooms, living rooms and even children's rooms. In fact, in rooms with a normal residential microclimate, laying laminate on the wall can diversify the interior in various ways, as long as it is appropriate in terms of visual perception and combination with other finishing materials used in this room.
How to create a base for wall mounting floor plates
When lining walls with laminate, the requirements for surface quality are the same as for the base of the floor when using this material for its intended purpose. The base on which it is planned to lay the decorative cladding should be as even as possible. The laminated board is devoid of elasticity, the smoother the surface, the greater the contact area of the facing plates with the base. The permissible curvature of the wall on which the installation will be carried out should not exceed 2-3 mm per linear meter, while the base surface should be vertical and lie in the same plane.

How is the desired result of preparing the base surface for the wall installation of a laminated board achieved? There are several options:
- plastering on guide beacons;
- installation of drywall on a pre-created crate;
- assembly of a load-bearing or wooden beam for subsequent sheathing with a laminate.
The first option for preparing the base is the most economical in terms of material costs. Plaster can be made with various compositions - gypsum mixture, lime and cement-sand mortar, polymer cement plaster materials. Given that we are talking about interior decoration, it is preferable to use gypsum-based plaster mixtures to level the wall surface inside the building, although the other listed options for working solutions are also relevant and applicable. If the adhesive method of mounting the laminate on the wall is supposed, after the plaster has dried, it must be impregnated with a primer - the treated surface will hold the glued facing material much better.
As for the drywall base. Why is it preferable to sheathe gypsum boards along profiles, but not to glue drywall sheets with glue? A plasterboard false wall based on the created crate is much stronger, while the weight of the laminated plates is considerable. If, nevertheless, the base is formed from drywall glued to the base surface, the sheets must be additionally fixed with dowels or self-tapping screws (depending on the structure of the mounting base). Laminate is much heavier than gypsum plasterboard, if we take an identical area of \u200b\u200bthe one and the other material, so only the glue on which the drywall is fixed may not withstand the proposed operational load. The plasterboard surface also needs to be prepared. First, all seams are reinforced and filled with mortar, then the GKL is primed, and only after that (when the primer dries) is the laminated cladding laid.

You can mount the laminate directly on the wall if it meets the requirements. If the base surface has a significant curvature, there is an option to do without its alignment. To do this, a crate is created, as the supporting elements of which metal profiles or wooden beams can be used. With the intended horizontal installation of laminated boards, the racks are installed vertically. If there is a desire to lay the facing plates vertically, the supporting elements of the frame are mounted horizontally. The step of the racks or horizontal crossbars is made within 40-60 cm. It is not rational to make a step less due to the overspending of material, more than the indicated limits are impossible for reasons of strength of the base.
If wooden beams are chosen as load-bearing elements, do not forget to treat them with antiseptic and water-repellent impregnations - this will greatly extend the life of the created crate.
Laminate fixing methods - glue, clamps or nails?
There is no single technology for fixing the floor board to the wall surface, because no one has developed it. Laminate is a floor material, and its installation on other surfaces is not provided, therefore, all methods of attaching such a cladding to a wall or crate are the fruit of the practical conclusions of the masters who had to do this. True, relatively recently, manufacturers, having learned about the growing popularity of wall-mounted use of laminate, began to produce special fasteners for these purposes - kleimers. Fixing the floor board to a vertical surface with clamps is one way to fix the laminate to the prepared wall.
The second method of fastening the cladding in question is the use of special nails with a very small head (so as not to interfere with the snapping of the lock joints), which are driven into the base using a special pneumatic gun. Such nails are more intended for fixing wooden lining, but the craftsmen adapted this method of fastening for a laminated board. Fixation with nails is reliable, but is criticized by many experts. The fact is that the nails fix the plates too rigidly, and the laminate is created by manufacturers taking into account its floating laying, which provides for the possibility of free mutual displacement of the boards relative to each other under mechanical load or temperature deformations. Whatever it was, but there is such a way. To use nails for fixing or choose another method is a master's business, especially since there is a choice of how to attach the laminate to the wall.

One of the laying methods is on "liquid nails"
If the laminated board is fixed to the crate, you will have to choose from the methods described above (kleimers or nails). When it is a flat plastered wall or sheathed with drywall, it is better to use the adhesive installation method. As an adhesive (again, guided by practical experience), it is convenient to use some varieties of "liquid nails" - universal polymer-based adhesives that are packaged in tubes designed for special guns. The polymers, which are the structural basis of such adhesives, have sufficient elasticity even after complete hardening, which corresponds to the principle of floating laying the laminate on the wall.
Some craftsmen share their successful experience in gluing the facing board to the mounting foam. So it turns out much more economically when compared with liquid nails, and much faster. However, polyurethane foam can lose its properties over time, gradually breaking down, so there are not many guarantees about the durability of this method of fastening. Unless it makes sense to combine the use of foam as an adhesive with additional fasteners, clamps, for example.
Decorative trim - 3 main principles
There is also such a way to put a laminate on the wall - first, a solid shield of the required size is assembled on the floor, after which it is lifted and glued to the wall surface. The method is original, but has drawbacks. Firstly, this can only be done when the area of the cladding is small. Secondly, this method does not work if you need to attach the laminate to the crate. Another disadvantage of this technology is that you need an assistant, and preferably two, so methods from a floor board directly on a wall or crate are much more often used.
When installing laminated plates, work starts from the bottom of one of the corners. It will be more convenient for right-handed masters to start from the left corner, for left-handers - vice versa. Before gluing the laminate, or rather its first board, you need to make a stand for the entire length of the wall to be lined. The thickness of the stand is about 10 mm. After the end of work, the stand is removed, and a deformation gap is formed, which prevents contact of the created cladding with the floor surface. The same gaps are made with adjacent walls and ceilings.
To hang on the wall, you need to follow the same basic principles as when installing the material on the floor.
- 1. First of all, this is the spacing of the seams in adjacent rows (the seams cannot be the same or too close). Usually they make it so that the seam of the adjacent row falls in the middle of the board or with a slight offset from the center.
- 2. Given the possible deformation displacement of the plates relative to each other, so that there is no tension between the fixed material, we recommend treating the locks with a special gel that significantly reduces friction and additionally protects the seams from moisture ingress.
- 3. With the simultaneous use of the adhesive mounting method and mechanical fixation (some craftsmen consider the combination of glue and metal fasteners to be the only correct technology for attaching a laminate to a vertical surface), it is advisable to use clamps that allow the facing plates to move. First, we put the board into locks, glue it, then put on the clamps and fix them to the base.
Wall cladding with laminated board is not a big deal. The main thing is to approach the work responsibly, not to rush anywhere, to choose the right basic material and means of fixing the laminate. Subject to the simple rules described above, finishing activities will not take much time, and the wall surface sheathed with a board will add sophistication to the interior for many years, delighting the household.
This question will undoubtedly arise in a person who, for the first time, learned about this finishing option. Laminate has long established itself as an excellent decorative finishing material for the floor, durable and practical to use.
Laminate can be used to finish floors and walls in almost any room in an apartment or private house.
Laminated panels are increasingly being used for wall decoration, thereby replacing traditional finishing materials such as, or conventional wall panels.
Benefits of using laminate flooring
- European, as well as domestic manufacturers, put on the market ecologicaly clean a product that meets all modern safety requirements, so it is quite possible to sheathe walls with laminate.
- If you decide to use laminate for walls, then be sure that this material durable, and if the operating rules are observed, it will last for more than a dozen years.
- Using laminated panels of low class 21-31, you can save a lot. After all, such panels are inexpensive, but they are designed for use as a floor covering, and there will be no demolition on the wall.
- Variety of textures and color solutions of this material provide a wide field of activity for designers when decorating rooms.
- Installation of laminate flooring on the wall do it yourself- a simple task, if you carefully read all the tips indicated in the article and follow them. Even a beginner will be able to independently carry out repairs.
Disadvantages of laminate when decorating walls
- First disadvantage laminate as a finishing material for walls - this is his susceptibility to moisture, which can cause swelling of the material and lead to cracking of the external decorative surface of the laminated panels.
- Another disadvantage is sensitivity to temperature fluctuations, especially to high temperatures, which can spoil the attractive appearance of laminated panels.
Therefore, you should not install laminate on the wall of the kitchen or bathroom, as these rooms have high humidity and frequent temperature changes. Laminate on the wall of a balcony, basement or loggia is also not the best solution.
The microclimate of these rooms will be harmful to the laminated panels and destroy even the most high-quality and durable laminate. To finish these rooms, it is better to use traditional materials, or MDF panels.
lock system
 Adhesive laminate. This system does not have locks for attaching panels to each other, so the fixation takes place with the help of glue. How to glue laminate on the wall you ask? On the end and back of the laminated board is applied construction adhesive, for example, silicone-based or the so-called "" and pressed against the wall.
Next, the next panel is laid and all the others in the same order. Glue that comes through the joints should be immediately removed with a cloth dipped in a solution of water and vinegar. Adhesive laminate has a small area of contact with the surface on which to lay, so it is rarely used when laying on the crate.
 This type of laminate flooring has a fastening in the form tongue and groove lock, which can not be glued with glue, which allows you to get neat and dry joints.
When installing this type of coating, the strips of panels are fixed in the groove of the tongue with small nails or staples. It should be noted that the fastening takes place on a wooden or special metal crate. The sheet piling option is suitable for facing walls, floors and ceilings.
 This option has an improved tongue-and-groove system, which is a convenient lock for connecting panels together. When laying laminated boards with click lock, the material is tilted perpendicular to the other panel by 20 degrees, then the panel is inserted into the grooves of the lock and easily snaps into place.
Click decorative laminate can be attached to the wall to the wooden crate with glue. This laminate has increased strength and resistance to deformation.
Price and strength class
 To mount the laminate on the wall, first of all follow the color and texture that will be used in the interior of the room. In most cases, one of the most important factors is price finishing material. True, you should not always save on this, since the quality of laminated panels directly depends on their price.
When cladding walls with laminate, you can use a material of low 21-31 grades, and not 33-34 (high strength), which are used where high abrasion resistance of the coating is required. After all, the walls made of laminate in the interior will not be subjected to high loads, since they will mainly perform only a decorative function.
 Therefore, choosing an inexpensive finishing material for walls made of laminated boards, you can significantly reduce the repair budget and at the same time get Beautiful design premises.
Buying a laminate for walls can be inexpensive, but you should still take into account factors that may affect the performance of the facing material, for example, it can be animals or children.
Let's summarize the criteria for choosing a laminate for walls:
- Consider Intensity loads, which will be carried out during operation on the laminated coating, so it is very important. If you have a pet that can damage the surface of a laminate wall with its claws, then you should not choose an inexpensive option that has low physical resistance.
- Another important parameter is appearance, that is, the design with a laminate on the wall, first of all, should please the eyes and bring aesthetic pleasure to the owner. The modern construction market is replete with finishing laminated materials of various colors and textures. You can choose from a variety of options that imitate different types of wood or even stone without any problems.
- The next setting applies to installation method laminate on the wall. One of which is to fasten laminated panels to a crate of wooden or metal slats. It is also possible to glue laminated boards directly onto the wall. But at the same time, the surface should be as flat as possible.
How to lay laminate on the wall with your own hands?
Laminate installation methods: glue or crate?
 In case of adhesive method fixing the laminate on the wall, a thorough surface preparation should be carried out, since irregularities will have unpleasant consequences during operation. Firstly, this is not an aesthetic wall appearance, where the gaps of some laminated panels will protrude due to irregularities. Secondly, the cost of preparing the walls can cost a round sum, which is not very good for thrifty people who are used to counting their money.
The glue method is quite simple to implement and does not require special knowledge, which will make it possible. How to stick it on the wall, and what nuances may arise during the work, we will tell further? Any type of laminated boards can be glued, and panels with and without a lock at all.
 Creating a crate for laying laminated panels it will be more profitable in the sense that you do not need to level the wall, that is, plastering or installing drywall to create a flat surface is not required. The crate will allow you to insulate the wall with appropriate materials and carry out additional sound insulation. Some manufacturers, aware of the growing popularity of wall cladding with laminated panels, offer special fastening systems to quickly create a convenient crate.
What tools are required for self-installation of laminate on the wall?
- In addition to beveling, you will need simple tools such as a square, ruler, tape measure, pencil.
- You will also need hacksaw on wood, metal, or better an electric jigsaw, which will greatly speed up and facilitate the work.
- You will need a special wooden block (boss) for tamping laminated boards and expansion wedges designed to set the gaps between the laminate and the ceiling-floor of the room.
 To visually familiarize yourself with the laying process laminate on the wall, video (at the end of the article) with the stages of work will help to better understand the entire course of the repair. For a person who decides to carry out the lining with laminated panels on their own, viewing the training information is simply necessary, as it will prevent many mistakes and incorrect actions.
We mount the laminate on the wall with our own hands
Stages of work:
- We calculate the amount of laminate. Everything is quite simple here, because the amount of material required is calculated by a simple formula - the height is multiplied by the width and the total area is obtained. At the same time, about 10% should be added additionally for fitting and cutting the material.
- We prepare the surface of the wall for laying the laminate. With the adhesive method, a dry, clean and even wall is required, so you need to clean it well and.
When creating a frame for a laminate you will need to create a crate made of wood or metal. To create a wooden frame, you need slats 20-40 mm wide, which are attached to the wall at a distance of 30-40 cm from each other. The slats are installed perpendicular to the direction of the panels of laminated boards. The metal frame is made of slats designed to create plasterboard ceilings. Or you can use special systems that manufacturers offer for attaching laminate to the wall. - Choose a starting point. When sheathing the entire surface or only the upper part of the wall, you should start installing the laminate on the wall from above. You will need to mark a distance of one board from the ceiling and start facing from this border. It does not matter which position of the panels will be used - horizontal, vertical or diagonal. If you want to sheathe only the lower part of the wall, you should respectively start from the floor and follow the same steps.
- We mount the laminate on the wall. When sticking a laminate on a wall, the material is treated with an adhesive. These can be silicone-based "liquid nails", as well as special glue for laminated panels. Next, the board is pressed against the wall and fixed. This is repeated for all panels. In this case, you can coat the lock of the laminate boards with glue for better strength.
When creating a crate, panels are fastened with special brackets (kleimers) or nails. This method of fastening is also used when working with lining or MDF panels. Kleimers can prevent the grooves of the laminate lock from entering into place. Just cut the attachment points so that the grooves fit into place. - We install skirting boards. Corner places, as well as the joints of the floor or wall after installing the laminate on the wall, require fastening and corners. This will create a finished look for the interior. Many options for various corners and skirting boards, presented in building supermarkets at the present time, will allow you to choose what you need.
Laminate can be used for more than just flooring. Wall decoration with this material is also possible - this will create a beautiful, even surface “under the tree”. How to glue the laminate on the wall, what other installation methods are used, it is worth considering in more detail.
Advantages and disadvantages of laminate on the wall
The laminate board is a fairly strong, durable material - the panels on the floor and walls are highly wear-resistant and do not wear out. This is achieved by applying a special coating to the surface of the board. Depending on the need, you can purchase a laminated panel of the desired class, manufacturers give a guarantee of at least 20 years.
Other advantages of laying laminate on walls are:
- concealment of wall defects - the material will hide chips, spots, irregularities (when using crates);
- lack of pollution - dust does not sit on the laminated material;
- absence of fungus, mold - due to biological inertness, fungi do not multiply on the laminate, some brands of laminate are even treated with silver and other antiseptics;
- profitability - when buying a laminate of class 21–23 with a small thickness, the cost of repairs will be inexpensive;
- good soundproofing (a number of manufacturers even make a special membrane substrate for panels);
- a variety of colors, textures - the range of laminate in stores is large;
- the ability to wash with different detergents.
Unfortunately, its disadvantages lie in the cheapness of the laminate board. Thin material reacts to temperature changes, it cannot be glued on the balcony, next to the batteries. Such a laminate does not tolerate high humidity, even the rays of the sun will be unfavorable for its appearance and performance properties. For high-quality products, you will have to pay more, which will increase the cost of repairs.
The disadvantage is the need for perfect alignment of the horizontal or vertical base. If the base is a curve, it should be aligned as much as possible. Only in this way the glued laminate will last a long time, it will lie beautifully. This will significantly increase the cost and time to create the coating. If a frame (crate) is made for laying, this will reduce the area of \u200b\u200bthe room. It is undesirable to use panels in the bathroom or in the kitchen - the material will deteriorate from constant moisture.
Laminate for walls - what is suitable
Since the wall will not be subjected to daily stress, you can buy a thin laminate for its cladding. The lower the strength class, the thinner and cheaper the coating. Usually, laminate is purchased on walls no higher than 21-30 classes. If you plan to finish the balcony, it is better to choose a class closer to the upper limit; the thinnest material is suitable for creating a coating in an apartment.
Depending on the lock system, the laminated material can be:
- Glue. The panels do not have locks at all, the fastening is done by gluing. Due to the small area of contact with the surface, the adhesive laminate is not used on the crate.
- sheet piling. The material must be secured with a tongue and groove lock. Even if you do not glue the lock, it will hold securely, firmly. This type of laminate is well suited for walls.
- clicky. The locks are a more advanced tongue and groove system, so the panels are perfectly and quickly connected to each other. Such material is considered the most suitable for the adhesive method of attaching the laminate; it can even be glued to the crate.
- Kleimerny. It is fastened with the help of special devices - kleimers, it is advisable to attach it to a wooden frame.
Adhesive bonding of laminate
There are two main ways to attach the board to the walls vertically - glue and frame. Attaching the material with glue to the wall is considered the simplest method; you can create such a coating with your own hands. It is important that the wall is even, discrepancies and defects of more than 3 mm should be eliminated.
Tools and materials
To mount a laminate, you should prepare the necessary fixtures and materials in advance. To attach the battens to concrete, brick walls, you will need a puncher or a drill with a high-quality drill. Also in the process, you may need a screwdriver and a jigsaw. To cut the board, you can use a regular hand saw for metal instead of a jigsaw. Other repair tools:
- a hammer;
- pliers;
- roulette;
- marker (pencil);
- level;
- container for glue mixing;
- glue stick or construction mixer;
- trowel (rule);
- plumb;
- spatulas - small and large;
- rag for glue.
To tamp the panels, you need a bar, and a boss is also useful - the panels are knocked through it with a hammer. If you have to level the surface, you should buy a putty (dry or ready-made), a primer. It is also important to buy glue that will fasten the laminated panels with high quality.
Glue selection
What glue to choose? There are ready-made adhesives or mixtures that need to be diluted. Adhesive for laminate must meet all the necessary characteristics. With temperature changes, the laminate tends to change geometry, so a not too movable joint may not hold a vertical coating. It is recommended to buy non-toxic compounds that are resistant to deformation and easily removed from the surface of the board.
It is best to use glues such as "liquid nails", but their price is quite high. The product must contain polymers or polyurethane. The best adhesives for laminate flooring have proven themselves:
- Tomzit;
- Kisel;
- Cleo Laminat.
From "liquid nails" you can stick a laminate on a Henkel brand product with a green bottom of the can. All of the listed adhesives have excellent water-repellent properties, good viscosity with minimal fluidity, long service life, and are environmentally friendly. Material consumption - 20–30 g / sq. m.
Wall alignment
If small irregularities in the floor are perfectly compensated by the substrate, then there is no such possibility on the wall. Due to the high cost, glue must be applied in a thin layer, and it will not hide wall defects. The remaining defects and irregularities will reduce the adhesion area and make the coating unreliable. To level the walls, you need to apply the starting putty. Get compositions of good quality, having high adhesion to the surface.
After puttying, it is necessary to wait a sufficient time (1-2 days) for complete drying. Then the surface of the wall is primed 1-2 times, which will improve adhesion to the adhesive. It is impossible to neglect priming - the laminate is quite heavy, without a primer it will be worse to stay on a vertical base. After the primer dries, you can start gluing the laminate. Glue should be diluted according to the instructions if the finished composition is not used. Before laying, it is necessary to draw a wall so that the laying of the laminate is perfectly even.
Laying process
Start gluing the material from the lower left corner. They take the first panel, cut it in half, grease it with glue, then apply it to the wall, press it. It is necessary to hold the bar for several seconds, after which it is torn off so that the glue is slightly weathered. Then the board is pressed again for the final setting. Then they continue the row up, leaving a gap between the board and the floor of 2 cm. To do this, you need to put a gasket from the scraps of the laminate. After this gap will be closed with a plinth. To create a flat surface, use a level, gently tap on the top of the boards with a hammer. The last board in the row is also cut to the desired length.
The second row starts with a whole panel so that the laying is done in a checkerboard pattern. This will make the cover more beautiful. When the weathering of the glue is not performed, a technological break is made after 2–3 rows. This is necessary so that the glue grabs well, otherwise the panels may “float”.
Frame mounting method
Wood is used to create the frame, since the metal profile is not suitable for laminate. Self-tapping screws for metal will gradually become loose, the lining will deteriorate sooner or later. A vertical or horizontal frame is mounted before starting work. To create a horizontal frame, the crate is typed vertically, for a vertical one - horizontally.
Features of the frame are as follows:
- the step of the bearing bars is calculated as ½ of the board length;
- it is better to buy bars 30 * 30 mm three meters long;
- first put the extreme bars, fixing strictly according to the level;
- threads are pulled between the bars, the middle bars are fastened along the threads;
- for insulation, you can place a heater between the cells (for example, mineral wool);
- after creating the frame, panels are attached to it with the help of clamps (staples), using a construction stapler, by gluing - in any way.
When laminate is not suitable for wall mounting
Laminated board is a rather heavy material, so it is not recommended to mount it on plasterboard walls. This may cause the collapse of the structure. It is also impossible to make laminate cladding for light partitions, too cold rooms, those where humidity is high. Cellars are not trimmed with material, basements - due to dampness and cold temperatures.
In the kitchen, the material, if it is located next to the stove, will quickly become unusable. Laminate is also not suitable for children's rooms - if a child paints it, it will be almost impossible to wash the stains. It is also not recommended to use laminated panels for the walls of apartments where there are animals - scratched and “marked” boards will have to be replaced regularly.