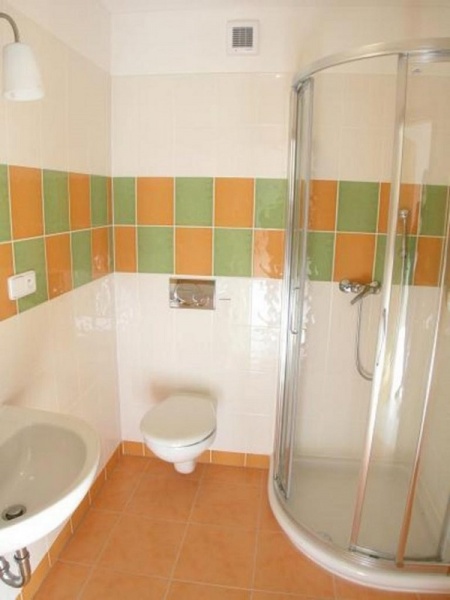
A bathroom can be elegantly refurbished, even with the simplest building materials. It is not necessary to purchase elite porcelain stoneware and lay out walls with it up to the ceiling, order stretch ceilings, spend money on arranging underfloor heating with marble, it is enough to have a desire to do repairs, the ability to handle tools and a small fraction of good taste.
Under the word "budget" in the article, the options for finishing with the most affordable materials will be considered:
- paint and varnish;
- PVC panels;
- wallpaper.
In addition, the secret of creating an interior in style will be revealed and it will be proved that brick is finishing material in the bathroom is not inferior to other materials. After all, "budget repairs" can also be stylish.
DIY wall painting
Wall painting is considered one of the easiest and least expensive ways to finish. It is important to choose the right paint and prepare the surface of the walls.
Advice! Design your bathroom. It is not recommended to cover absolutely all surfaces with paint, it is advisable to close the areas near the bathtub and sink with moisture-resistant panels or finish with an apron made of inexpensive ceramic tiles.
Step 1. Choosing a paint for the bathroom
Bathroom paint should have antibacterial properties and be moisture resistant. Otherwise, the appearance of fungus and peeling of the coating cannot be avoided.
Traditional oil paints deprived of such dignity, and also quickly covered with cracks, so it is better to immediately refuse this option.
When choosing shades, remember that it is inappropriate to paint dark colors in small bathrooms, as this will visually reduce the space even more. Do not overdo it with the number of bright spots or complex patterns and their number so that the interior does not look vulgar. Soft pastel colors will visually expand the room and fill it with light.
Please note that paints can be matte, glossy and semi-gloss. Of this variety, it is matte enamels that hide small defects on the walls best of all, while drops and streaks are clearly visible on glossy surfaces. However, if you can't make a choice, consider combining glossy and matte finishes. This technique will make the bathroom modern and stylish without significant costs.
bathroom paint
Step 2. Preparing the walls for painting
Do not forget to take out all the furniture from the bathroom, remove the mirrors, seal the faucets with masking tape, and cover the plumbing with film or newspapers, because preparing the walls for painting is the dirtiest and most time-consuming step.
You should not apply new layers of paint over the old peeling, nothing good will come of it. If you have a drill in your arsenal, get a pair for it sanding attachments and scrape the old paint off the walls. Remember safety precautions.
You can remove the paint by thermal methods, for example, using a burner or a building hair dryer. Heat the wall section and scrape off the peeled coating with a narrow spatula.
When all the old paint is removed from the walls, it is necessary to repair cracks and potholes, knock down the ledges.
Step 3. Prepare materials and tools
Prepare paint and tools, following manufacturer's instructions. To apply paint, you will need a roller, brushes, if you have an airbrush - great. Before purchasing, measure the area of the surfaces to be coated, adjust the amount of material, taking into account the volume. For quality painting it is better to apply two coats, keep this in mind at the time of purchase.
Step 4. Preparing the workplace
Get rid of unnecessary items workplace near the walls, if you are not going to redo the floor coverings, then cover them with film or paper. Carefully protect the tub and sink from dirt.
Start work from the most inconspicuous corner, in this place you can learn in practice the properties of the paint and, if necessary, dilute it to the optimum consistency. We recommend that you paint the walls with a roller, and use a brush to treat only hard-to-reach areas, corners and borders of joints. various colors. Panels in the bathroom are still in vogue, if you plan to make them, then mark the height on the wall, draw a horizontal line.
Step 5. Start staining
Apply a deep penetration primer to the wall. It will not only improve appearance, but also increase the strength of the coating, reduce the likelihood of paint peeling.
Apply a second coat of primer on top of the first and wait 24 hours
Pour a portion of paint into a special plastic tray for rollers. Dip a roller into it, rotate it several times, remove excess paint on a horizontal platform.
Practical advice. To minimize the chance of paint spilling onto the floor, rotate the roller before blowing it out of the tray.
Step 6. Painting technology
Start painting from top to bottom, this method reduces the likelihood of streaks, they are immediately smeared, the roller “rolls” on them. Paint carefully, do not allow gaps. Don't be upset if the first layer looks ugly, this is expected. The fact is that on the wall there are sections with the old and new plaster, remnants of an unremoved coating, etc. All of them absorb paint in different ways, which is displayed on the outside. The second layer will fix all problems, the finish will be monophonic.
Paint in small areas, fix difficult places immediately with a brush. The paint should smooth out the lint marks on its own. If this does not happen, add a solvent to it. Pay attention so that he is conscientious, read the instructions for use. If in doubt - test the solvent for compatibility with a small amount of material, if the paint has curled - change the solvent.
It is desirable to apply the second layer, not completely dried up first, so the coefficient of adhesion between them increases. Checking the readiness of the surface is simple - run your fingertips over it, they should not get dirty, but only “creak” a little.
If you are making a multi-colored panel, then you need to paint the surface in the second color only after applying two layers of the first. In this case, start working from the top of the wall, the panel is finished last. So you insure against paint getting on already finished areas. Glue along the border line masking tape. Make sure that the paint does not flow under it, paint only with a brush, the direction of movement is in the direction opposite to the adhesive tape. Never stick adhesive tape on paint that is not completely dry, this is very important. If you stick it on a freshly painted surface, then during removal, with a high probability, part of the paint will also be removed with it, you will have to redo everything.
Wall decoration with PVC panels
The cost is somewhat more expensive than the first method, but in terms of design indicators it is much better. Yes, and the preparatory work is greatly facilitated, there is no need to remove old coatings, level the walls and close up gaps on them. The crate under the panels can be made of wooden slats or special plastic profiles with clips. We recommend using the second option. The cost of plastic additional elements has almost no effect on the price of repairs, and the work is greatly simplified. In addition, the plastic profile is not afraid of moisture, which is very important for bathrooms. Wooden slats need to be impregnated with antiseptics - an additional loss of time.
Count the number necessary panels, make a margin of 5-10%. If there is little experience, but the bathroom has a lot engineering communications, to close which you need to trim the panels, then take a margin of 10%. At the same time, estimate the number starting profiles, external and inner corners. They are sold in a standard dyne, they cost a penny, there is no need to save.
Step 1. Mounting the crate
The panels are arranged vertically, the crate must be done horizontally. The distance between the planks is 50–60 cm. Make markings on the wall, make sure that the lines are parallel. The crate is fixed with dowels, drill holes with a drill with a perforator, use drills with victorious soldering. To prevent the floor from getting dirty with building dust, cover the place near the wall with film or paper. As soon as all the holes are made - immediately remove it. Do not leave cleaning for later, practice shows that no matter how carefully you work, the garbage will surely spread throughout the bathroom.
Make holes a few centimeters deeper than the length of the plastic part of the dowels, otherwise you will not be able to insert them all the way, dust will interfere. First, drill two extreme holes, attach the profile, then fix it in several more places. The horizontal distance between the dowels is 60–70 cm.
How to fix elements in the same plane?
- Check the condition of the wall with a plumb line, Special attention pay attention to the places of fastening of plastic profiles or rails.
- Fix the two extreme elements under the level, re-check their position. If there are large recesses at the place where the profiles are attached, then use linings made of various materials. The dowels must attract the profile over the entire plane; there cannot be a gap between it and the wall at the attachment point.
- Pull the ropes between them, two are enough at the ends of the profiles or rails.
- Install all other profiles under the rope, with its help control the position of the rails.
Step 2. Installing plastic panels
Measure the wall in at least three places. If they have a spread of no more than a centimeter, then the work is noticeably simplified - all panels can be cut to size at the same time. To do this, you need to find out the shortest, cut all the rest along it. Stack the panels in a stack of 5-10 pieces. cut off on a flat plane and grinder with a disk for metal. A discrepancy of up to one centimeter will be hidden by the ceiling and floor profile. It is installed at the top between the wall and the flow and at the bottom at the junction of the wall and the floor. Put plastic corners on the sides.
Take the exact dimensions of the last panel, cut it along. You can cut mounting knife or Bulgarian. If you use a knife, then the operation must be done in two stages. First - cut upper part and transverse stiffeners. Second - bend the panel, at the bend on the second side, completely cut off the desired part with a mounting knife.
Finish the rest of the walls in the same way. Practice shows that it is better to make a place near the bathtub from ceramic tiles. It is possible not in the entire wall, but only an apron. The main thing is to close the area, which constantly comes across water during the adoption of water procedures.
Video - Installation of PVC plastic panels in the bathroom
Video - Finishing the walls in the bathroom in 1 day with plastic panels. Inexpensive do-it-yourself bathroom renovation
Wall papering
For wallpapering, you can use only waterproof types. This method of finishing has a number of undeniable advantages.
- Low cost makes it possible to have an exclusive and reliable coverage with small material losses.
- High technology. Among all the possible ways to finish the walls in the bathroom, wallpapering is the easiest. The work is carried out within a few hours, the room can be used for its intended purpose the very next day.
- It is possible to frequently change the design of the premises. In some cases, re-pasting can be performed without removing the old one - the repair time is significantly reduced, and the amount of construction debris is minimized.
Disadvantage - in terms of physical strength, wallpaper is inferior traditional materials. But, if you behave carefully and avoid mechanical damage, then the period is calculated for many years. In addition, defects on the wallpaper are easily eliminated, after pasting there will always be a small amount of materials left. Don't throw it away, keep it "just in case" for repairs.
What wallpaper to choose for pasting the bathroom
It goes without saying that only waterproof. During the purchase, pay attention to physical strength, and it depends on the material of manufacture.
| wallpaper type | Brief performance indicators |
|---|---|
| The most modern, high performance mechanical strength may have prolonged direct contact with water. Available in a wide range of colors, they can be plain or with various patterns and ornaments, with a structured or smooth front surface. Disadvantages - relatively high price, the need to use special glue. | |
| The cheaper segment is inferior to vinyl in terms of performance. It is recommended to use on wall areas that are not exposed to water splashes. | |
| They are made from a special polymer film, have a huge amount of design solutions. Disadvantages - relatively high price and complexity of finishing. In addition, they can only be used on perfectly flat surfaces. |
How to glue the wallpaper correctly so that later you do not have to constantly re-glue the peeled off areas?
Step 1. Surface preparation
The most important moment of the production of works, of course, not counting right choice wallpaper. Wall linearity parameters affect not only the appearance of the wall, which is very important, of course. On the uneven wall even theoretically impossible to stick waterproof wallpaper. And this means that there will definitely be air pockets and other places where the wallpaper is not glued. During the use of the bathroom, these areas constantly increase in size, this continues until the peeling becomes noticeable. Repair will be required, it is quite difficult to perfectly align the wallpaper after repair, and in some cases it is impossible. What are the requirements for the wall surface?

Surfaces must be primed in two layers, this increases the adhesion reliability and serves as additional protection against moisture penetration.
Calculate the surface area, make a small margin. Each roll of wallpaper indicates the length, width and total area. Use this information when purchasing materials. Do the same when choosing glue.
Step 2. Algorithm for sticking vinyl wallpaper
Measure the height and width of the wall, cut off the desired number of strips. Stripes, depending on the pattern, can be applied end-to-end or overlap. Cut off with a small margin in length, it will then be removed with a knife, an uneven cut will be buried by ceiling and floor plinths.
Practical advice. The most difficult thing to glue wallpaper in the corners of the room. The fact is that they can have slopes, and this has a negative impact on quality. To prevent such consequences, never make junctions of strips at the corners, try to have their middle in these places.
- Glue the strip smeared with glue to one wall of the corner, align it strictly vertically.
- Carefully bend the wallpaper, but not all the way into the corner, lightly glue the strip to the second wall.
- Slowly begin to bend the wallpaper towards the corner, while constantly monitoring the displacement of the second edge, it should always be in a vertical position. The corner of the wall is uneven - not a problem, let there be air pockets in some places, the main thing is that the edge of the wallpaper on the second wall is vertical.
If you do not follow this nuance, then on the entire adjacent wall the wallpaper strips will be slanted, and this is a big marriage.
For spreading with glue, you will need a large room, the bathroom, as a rule, does not have such dimensions. Decide where exactly you will prepare the wallpaper. Take measures to prevent contamination of floor coverings, do not allow glue to get on the front surface. When pasting walls with wallpaper, accuracy is one of important conditions quality work performance.
Carefully squeeze the air out from under the wallpaper. You can use rubber spatulas or rollers. But it is best to do the work with clean, dry hands. So you will feel the bumps and be able to eliminate them in a timely manner. It happens that the air pocket is discovered late, several strips of wallpaper have already been pasted. It's not a problem. Pierce the air bubble in 2-3 places with a needle, after that you can press the wallpaper again, they will take the desired position.
Without pressing, cover the switch with wallpaper and make a diagonal cut through it. Carefully cut the edges and press the wallpaper to the wall
After the glue is completely dry, cut off the excess length and attach the skirting boards. Skirting boards are fixed with liquid nails or in other ways, taking into account the material of their manufacture.
How to renovate a loft-style bathroom
Quite a fashionable style among young people, it is difficult for older people to get used to it. Loft style - repair method various premises, including production, with minimal financial losses. All structures remain in the same place, construction work on surface finishing is carried out without the use of additional materials. Leave old water and sewer pipes in the same place, you can remove the old paint from them and apply a new one. No need to try to make them match the wall, on the contrary, use contrasting colors that emphasize the placement of pipelines. If problem areas are identified, correct them immediately.
As for the walls, you can remove the old plaster to the brick, throw in large recesses cement-sand mortar, but do not align and do not overwrite. Scrub the brickwork with a wire brush, trying to highlight the position of each brick. The older the seam and brick, the better, the more modern the loft will be considered. Everything should be simple and natural, no plastic skins, drywall boards and other finishing materials.
Professional builders recommend that the section of the wall directly near the bathtub be finished with ceramic tiles, and the rest of the surfaces should be made under the loft. This approach will combine modern fashion design premises while maintaining the usual level of amenities.
Video - Industrial style loft bathroom
Video - How to save on bathroom renovations
Bathroom renovation has long been part of our plans, since the last time it was done 15 years ago. During this time, the bath turned yellow, the sewer pipes clogged, the tiles began to fall off, the plumbing was covered with an indelible coating. Therefore, we saved up money, counted the amount of material, gathered our strength and began to repair.
However, first things first. First, we turned to repair specialists. Our bathroom is located in an apartment in a house built in the Khrushchev era, when the party and the government were faced with the task of quickly resettling Soviet citizens. Therefore, no one cared about comfort, the main thing was to give people a lot of housing, more modest and smaller. For example, our bathroom, together with the toilet, has a size of 1.5 by 1.8 m. And for the repair of this small area, local craftsmen asked for an amount that could hardly fit in our heads.
Of course, they can also be understood. There is no work in the provinces (namely, where the house of the Khrushchev era is located), so people who did not leave to protect the capital and know how to do at least something, took up the repair of apartments and private houses. And since there are few such people, the demand for their services is high. Prices have skyrocketed, so even for the repair of a small bathroom they ask for big money, by the standards of the same province. As if the Kremlin Palace is going to be restored. And the quality of work leaves much to be desired. Even our Uzbek friends no longer want to receive a reward, for which a couple of years ago they were ready to work hard from morning to night.
For comparison, you can view the work of the capital's masters at the builders' exchange VotMastera.ru. Prices are an order of magnitude lower than those offered by local repairmen, and the quality of the work performed can be judged both by photos and customer reviews.
In general, having assessed the volume and specifics of the upcoming work, we decided to do the repairs ourselves. And the money that could go to the wages of the workers, we will spend on the boards and make it in the country, and even there won’t be any left. In this article we will tell you in detail how we did the repair, attaching a lot of photos.

DIY BATHROOM REPAIR
First of all, let's define the scope of work. We decided to make a complete renovation with our own hands, replacing everything that is there: a bath, a toilet bowl, a sink, a radiator, floor and wall coverings. Everything except, which we recently mounted.

First, remove the cabinets and shelves, unscrew the screws on which they were held, remove the sink. As a battery, we hung a heated towel rail, curved like a coil. We will change it too.
If you plan to replace the radiators, then you need to carry out repairs at the time of the year when there is no water in the radiators. Carefully cut off the heated towel rail grinder.

Now let's break the tile. To do this, we use a perforator with a nozzle in the form of a spatula.


Water was supplied to the bathroom through polypropylene pipes. Let's turn off the tap and dismantle the entire pipeline together with the mixer. In order to have water supply, we will attach a flexible hose to the tap and we will use it during the repair with our own hands.

There is a ventilation window under the ceiling, in which a fan was mounted and connected to electricity. Under it there is another entrance to the ventilation shaft, where the tin box coming from the kitchen is inserted.


Next in line is the bath. We disconnect it from the sewer and take it out of the room.


The sewerage laid in the bathroom has been in operation since the construction of the house. It's made from cast iron. Carefully, using a small sledgehammer, knock out the pipes from the entrance to the sewer riser.


The last to dismantle the toilet. It was connected to a cast-iron elbow, which is inserted into the sewer riser. To take out this knee - I had to suffer. They've done it right before. But there is still no reception against a sledgehammer and scrap. Just tap on the knee carefully, cast iron is a fragile material. Knocked, twisted - pulled out.

The floor was covered with ceramic tiles. During the repair, we also dismantled it using a perforator, having cleaned the floor to a cement screed.

INSTALLATION OF THE WATER PIPE IN THE BATHROOM WITH YOUR HANDS
The plumbing, which we dismantled during the renovation, ran over the wall. From the condensate that collected on it, it turned black. To prevent this from happening again, we will hide it, where possible, in the walls. To do this, we will make strobes in the places where we plan to install the pipe with a perforator with a nozzle with a spatula. The depth of the strobe should be slightly greater than its diameter so that it can be completely plastered. This work is quite dusty, so we recommend closing cracks under the door with some material. In several places, the strobe needs to be enlarged so that the pipe fastening to the wall can be inserted.

For the installation of water supply, we chose pipes made of polypropylene. It is modern, reliable and durable material, with a long service life. To connect them, a special soldering machine with metal nozzles is used. different diameters. It works like this: we heat the device, at the same time insert the pipe and the coupling into the nozzles, wait until they melt and connect them together. After a few seconds, when the material has cooled down, the connection is ready for use.

Before installing the plumbing in the bathroom with our own hands, we carefully measure all dimensions, calculate the number of required couplings, corners, stopcocks and fittings. If the connection needs to be made detachable, we use special “American” fittings. With their help, part of the system can be separated without destroying it. We plan to install a water meter. Just before the counter and after it, we use “Americans” so that we can replace it if necessary. We will provide for the installation of a main filter for water purification. We solder the shut-off ball valve so that you can turn off the water before replacing the cartridge.

After the renovation in the bathroom, we will have 3 water points - one near the sink, the other - at the bathroom, the third - at the toilet. To two points we will bring cold and hot, to the toilet - only cold. After we fix the polypropylene in the strobes, we screw the valves to the fittings and supply water. It is necessary to check the system for leaks before we start plastering and tile work. In our case, everything turned out to be normal, you can start. But before that, we will make more small strobes to hide electrical wires in them. The bathroom had an outlet that was too high off the floor. During the repair, we will lengthen the wiring and lower it lower.


WALL PLASTER
First, we will plaster the window between the bathroom and the kitchen. From the side of the kitchen, it is already patched up, we will do the same in the bathroom. To do this, cut off aluminum profiles along the height of the opening, fix them on the frame with self-tapping screws.


Prepare the solution according to the instructions written on the packaging with the dry mix. Put it on a wide spatula and plaster the window.


To make it easier to lay on the walls ceramic tiles they need to be aligned. If the unevenness is large, you can use plaster beacons by setting them vertically in level. After that, we cover all the strobes with a mixture, then we completely plaster everything.


INSTALLATION OF TILE ON WALLS
To decorate the walls in the bathroom, we chose ceramic tiles rectangular shape. After waiting three days for the plaster to dry, we proceed to laying.
We will not tile under the bathroom. Let's start with the second row. So that it does not move out, we fix the rail along the entire length. Prepare the glue by mixing the dry mixture with water of the desired proportion with a mixer. We put it on the wall with a spatula, level it with a comb over an area equal to the size of one or two pieces and apply the tile, slightly pressing on it.


After laying the tile, wipe it off the adhesive residue. Then we take the grout of the desired color, stir it with water and rubber spatula carefully stitch the seams.


Next, we will fasten the “American” detachable fitting to it, we will attach the heating pipe to it.


To lay the pipe to the place of its installation,


INSTALLATION OF HEATED WATER FLOOR
On the bathroom floor, we decided to make a heating system. To do this, during the repair, we laid a welded mesh on a cement screed, attaching it to the floor with dowels and screws.

We connect the metal-plastic to the heating system using special corners and fittings. At the entrance to the water heated floor, we will install a valve to regulate the water pressure and a Mayevsky tap. At the exit we will put a shut-off valve. This is done so that you can completely turn off the warm water floor during a possible accident.

After we connect everything into one system, we fill the base of the bathroom with self-leveling properties. Pour the contents of the bag with the dry mixture into a container with water and mix thoroughly with a mixer. Be sure to maintain the proportions indicated on the packaging, otherwise the manufacturer of the mixture does not guarantee the declared strength of the self-leveling floor. After pouring the mixture onto the screed, roll it with a spiked roller to expel air bubbles.


After the rest, we proceed to the final stage of repair. In ventilation holes set decorative elements and an electric fan by connecting wires to it.


The self-leveling floor is dry, so ceramic tiles can be laid on it. Here the technology is the same as when laying it on the walls. We stir the glue, apply it to the base, level it with a comb spatula, lay the tiles.


Wait a day for the glue to dry.


Connect the water supply to the entry point. Immediately after the tap, we will install a water meter, after it - the main water purification filter.

The renovation is slowly coming to an end. Already n the time has come . It is installed on the frame that comes with it. Acrylic bathtubs are a modern industrial product. They are lighter than steel and cast iron, retain heat longer, are silent and practically do not fade.
First we assemble the frame, then we fasten the legs to it.


Next, we will put a floor cabinet with a sink, connecting the tap to the water supply system, and the drain to the sewer pipe.


To install the toilet, you need to make marks in the places of its attachment to the floor,, insert plastic dowels into the holes and fix it with bolts, putting decorative plugs on top of them.


We hang a wardrobe and a shelf for toiletries on the wall. We connect the shelf to the electrical network.


Bottom acrylic bath close the screen, hang the curtain.


We glue skirting boards on the ceiling, hiding the bumps.


Video
Many home masters do not know where to start repairing the bathroom and in what sequence to carry out such work. We have prepared detailed and understandable instructions.
The room in which we take water procedures is considered very specific. Serious humidity and temperature fluctuations are constantly present here, water flows in large volumes in it. It is clear that in order to repair such a room, it is necessary to select special materials that can withstand all negative impacts. To finish the premises of interest to us, they usually choose:
- plastic panels;
- porcelain stoneware;
- tiles (for walls and floors).
These materials have the required qualities that allow them to be used in a room where there is steam and high temperature.
Finishing the bathroom with plastic panels
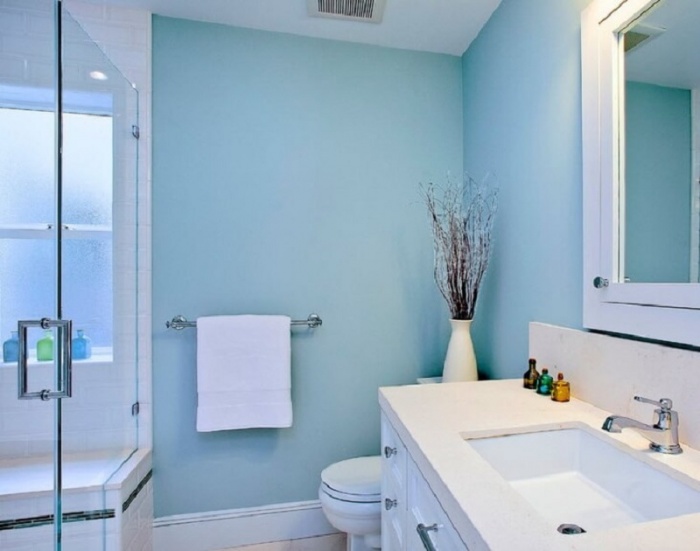
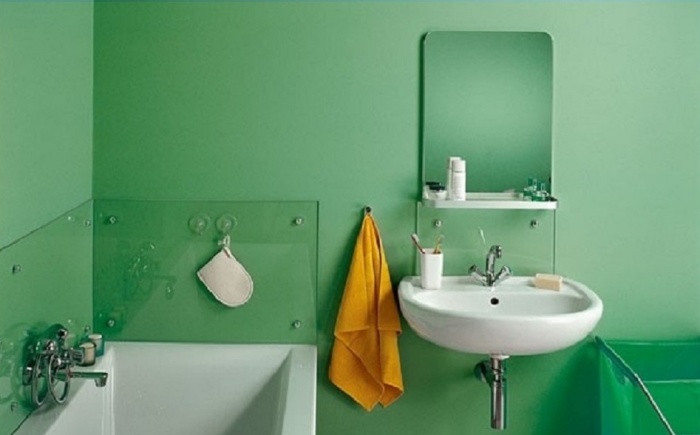
In addition, the bathroom should have a special atmosphere that promotes relaxation of a person. So, you need to correctly think over the design of this room and choose the right color scheme for it. Most often, bathrooms are performed in pastel colors that do not irritate a person, but, on the contrary, calm his nervous system after a busy day. Professional designers recommend finishing bathrooms with products in beige, blue, peach, and blue shades.
Thus, bathroom renovation should begin with the preparation of a design project, the selection and purchase of the required materials. At this stage, you will need to foresee a lot of little things and purchase a lot of different products, ranging from sewer pipes and tile adhesive to shutoff valves and towel warmer.
Now you need to decide on the scope of work and make a plan for their implementation. The sequence of self-renovation of the bathroom, as a rule, is as follows:
- Preparing the room for renovations.
- Analysis of the state of the existing floor covering and the choice of technology for its restoration or complete replacement.
- Floor repair, insulation and waterproofing.
- Installation of sewer and water pipes.
- pad electrical wiring.
- Plastering of ceiling and wall surfaces, their sheathing with the selected material and insulation.
- Installation of an efficient ventilation system.
- Installation of sanitary equipment.
The above sequence will allow you to spend a minimum of time on giving the room for water procedures perfect look.
Where to start preparing the described premises for its complete transformation with your own hands? Of course, from the dismantling of all plumbing fixtures installed in it, as well as furniture (if any), lighting fixtures, mirrors and hinged structures. If you do overhaul bathroom, be sure to remove the faucets and faucets.

Removing old bathroom tiles
After that, proceed to remove the old finishing materials. Remove the lining from the walls and ceiling, knock down the ceramic tiles (along with the layer of glue that held them), wash off the paint. With a perforator, preparing the bathroom for good repair goes much faster - feel free to knock down everything that leaves from the ceiling and walls. Your task is to get to the brick or panel masonry and floor slabs.
After such actions, it will be necessary that you "exposed" and carefully treat them with primers. They should be chosen wisely. Do not forget that now there are a variety of primers - bioprotective, hydrophobic, contact, increasing adhesion, strengthening. If you do not know what kind of composition you need to purchase, be sure to consult a specialist. Real help in this matter, consultants of good hardware stores often provide.
The next step in preparing the bathroom is the revision of the flooring. When the old screed showed its best during operation (for example, you forgot to turn off the water, it flowed for a couple of hours, while not even a drop of moisture leaked to the neighbors below), leave it. If the screed has clearly served its purpose, it must be removed.
This operation is performed by a puncher with a chisel. With these tools, you can also remove the old cement substrate under the tile. Important point! If you do not touch the old screed, it is better to clean the substrate with a grinder equipped with a cleaning bowl-shaped circle (it is usually called a diamond cup). The cost of such a device is quite high. But it will always come in handy for a master who does all the housework with his own hands.
Now you can sweep away all the dirt and debris and proceed directly to the repair work.
- screened quartz sand;
- cement M500 (you can also take M400);
- PVA emulsion;
- water.
The ratio of cement to sand is 1 to 4. Water needs to be mixed as much as cement. It is most convenient to form a screed with your own hands using marker beacons. The mixture is applied with a layer of the order of 4–5 cm, rubbed with a building rule, after which it must be carefully smoothed out with a polyurethane foam or stainless steel floor to an ideal state (no cracks, swell and other defects). Very important! A screed made on the basis of sand and cement must not be touched for 40 days. During this time, no work can be done in the bathroom.

Creating a new concrete floor screed
Waterproofing a room with high humidity is best done with materials made of polyester or aquaizol. Do not use ordinary waterproof film for this purpose. Hydro insulating material lay as carefully as possible, the joints between its individual parts are connected in two ways:
- Building hair dryer.
- Adhesive mastic, which has a special composition.
On the walls, waterproofing is brought in by 25–30 centimeters. Note that cuts in the moisture-proof film are not allowed in the corners of the room. It is better to bend the insulating material, make folds. But in no case do not cut the film.
It is almost impossible to see open sewer pipelines in apartments these days. Such communications spoil the whole look of the bathroom, nullify all the tricks of designers. Chasing the walls in order to hide the pipes is also not an option. This procedure is very tedious, dusty and really long.

Installation of pipelines in the bathroom
For this reason, sewer pipes are now most often mounted according to a special technique - they are launched along the bottom in a bundle, and then masked with galvanized slopes. The latter can then be easily glued with silicone tiles (facing). The silicone composition is also used for fixing the slope from the floor surface and to the wall.
Unfortunately, bathroom renovations cannot be done without shaving. In any case, you will need to make two strobes for cases when a separate faucet is installed on the washbasin, or one if a common faucet is used. One thing reassures - the length of the strob will be minimal. In addition, they are located vertically. It is relatively easy to punch them with your own hands, which cannot be said about horizontal strobes.
For a heated towel rail, it is desirable to install metal-plastic pipes. It is not worth looking for other options these days. Such tubular products are ideal in operation. They can be easily bent downhill using transition fittings.
But for the cold water system in the bathroom are more suitable polypropylene pipes(PPN). They are easily welded into a solid and reliable monolithic structure, and then hidden in the walls. It should be said right away that it is advisable to purchase fittings for such pipes from solid plastic. It is not advisable to use metal reinforcing elements. They can leak at any moment. But sealed plastic will never let water through.
Installation of the pipeline should begin with the installation of sewer pipes. Using sealant and seals, you will spend no more than one day on their assembly. After that, feel free to install polypropylene products for cold water and solder them. Be sure to blow out mounting foam pipes in grooves. So you will be sure that the pipeline does not fog up. Yes, and heat loss in this case will be significantly reduced. Follow the recommended piping sequence and your bathroom renovation will go faster.
Electrical wiring is carried out with a cable protected by double insulating layer. It is desirable to place the wire in a metal or plastic corrugation. It is better to use a metal sheath, as it shields the wiring perfectly.
Having dealt with communications, proceed to the processing of wall surfaces. performed by two compositions - starting (it has increased tenacity) and finishing. The latter perfectly levels the treated surface. It is necessary to plaster from the ceiling to the floor.

Plastering the walls in the bathroom
The following stages of repair work:
- Insulation and ceiling lining. Thermal insulation is recommended to be made in the form of a pie, consisting of two glass-magnesium sheets and a heater placed between them. Sheathing can be made with clapboard (plastic) or laminated boards, which are fixed to the ceiling with building silicone or strong mounting glue.
- Laying tiles on the floor. The sequence of the operation is as follows - mount the products on the glue, starting from the door, tap each tile with a hammer (rubber). All cut rows should be laid last and after the adhesive under the remaining rows has completely cured.
- Wall covering. It is produced with plastic panels, porcelain stoneware, ordinary tiles.
Last steps works - cleaning the ventilation duct (or installing a new one), installing a sink, bathtub (shower booth), faucets, water meters. If you were able to do all the previous operations, the placement of plumbing will pass without difficulty. There are no special tricks here.
Here, in principle, is the entire step-by-step plan for self-repairing the bathroom. You just need to start implementing it and after a while enjoy the new look of your water treatment room.
Organizing a budget bathroom renovation with your own hands is a doable task. The right strategy when choosing finishing materials and a clear idea of the progress of work will allow even with a modest budget to transform the bathroom without sacrificing quality.
Organization of the process
Good planning is the first step towards a successful completion. Most of the work in the bathroom with a budget repair can be done by hand. Removing old coatings, dismantling plumbing or painting can be done even by a novice master.

But if experience in tiling walls is not enough, you should think about inviting specialists to individual areas of bathroom renovation. Do not overestimate your strengths and capabilities. Sometimes reworking your own mistakes will cost more than inviting the master initially.

When the bathroom renovation work is distributed, they move on to the choice of finishing materials. It is better to refuse well-known imported brands. A significant part of the cost is the payment for the brand, which, when budget option repair looks inappropriate. The cheapness of Chinese goods is also not the best option.
Advice! Stop at a domestic manufacturer or an assortment from Poland, Slovenia and Bulgaria.
This applies to both finishing materials for the bathroom and plumbing. The combination of reasonable cost and good quality – distinguishing feature offered products.
An important condition for a quality result when doing it yourself budget repair is to comply with the technological process. If any stage of the work is in doubt, listen to the recommendations of experts, improvisation is inappropriate.
Redevelopment of the bathroom automatically increases the repair estimate at times, so there is no need to talk about the budget option. Leave your ideas for moving walls or plumbing to another place until better times, when there will be no financial constraints.
The amount of preparatory work to remove the old lining depends on the choice of new materials. Sometimes this step can be avoided. Mandatory dismantling of plumbing is required if it is planned to replace it.

Wall decoration
An economical bathroom renovation includes several options for wall decoration:
- staining;
- installation of PVC panels;
- wallpapering, including self-adhesive film;
- facing with tiles from the budget segment.
Each method has undoubted advantages and some negative points.
Coloring
Wall covering with paint is the leader among economical finishing options due to its ease of execution and low cost. Competent approach when choosing paint and quality training walls - the beginning of the path to success.
Advice! It is not recommended to completely cover the walls of the room with paint.
A project where the areas near the sink and bathtub are lined with inexpensive tiles or moisture-resistant PVC panels is characterized by greater efficiency.

Moisture resistance and antibacterial properties are prerequisites when buying paint, otherwise it will not be possible to avoid the development of fungus and peeling of the coating in the bathroom. High performance characteristics against the background of the budget cost inherent in paints:
- latex;
- acrylic;
- silicone.
The absence of a pungent odor is a definite plus of water-based formulations, and silicone paints performs well as a water barrier. It is better to refuse the use of oil mixtures. After a short time after the repair, the walls of the bathroom will be covered with cracks.
 4
4
When conducting economical repair In the bathroom, it should be remembered that paints with an attractive glossy effect emphasize any irregularities in the walls and make all defects more visible. Therefore, careful alignment of the walls is necessary. The advantage of gloss is the ability to visually enlarge the space of a small bathroom.
Often, during renovations, it is necessary to remove the old paint coating from the walls of the bathroom. You can do this in several ways:
- use a drill with a special grinding nozzle;
- purchase a liquid for removing paint; in the process, you will also need a spatula and a scraper;
- use thermal methods when the old coating is heated building hair dryer or a burner, and the swollen paint is scraped off with a spatula.

Naturally, at the end of the removal process and before the start of staining, the whole range of measures is carried out: sealing cracks, eliminating protrusions, priming.
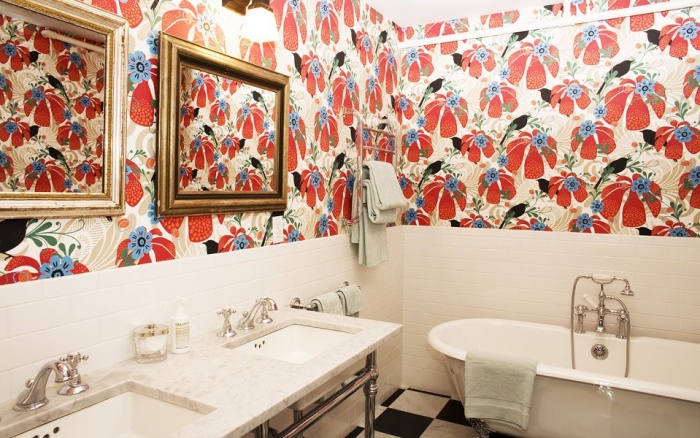
In the photo, a bathroom with a budget renovation with your own hands:
PVC panels
You can repair the walls of the bathroom with PVC panels. At a cost, this will cost a little more than buying paint, but the method has two distinct advantages:
- The appearance of the bathroom after a budget renovation using PVC panels, in terms of design, is incomparably better.
- No extensive preparation of the wall surface is required.
The process of mounting panels does not contain complex steps and is available for do-it-yourself. After calculating the need for the material, the formation of the crate is carried out. For these purposes are used plastic profiles with clips. Suitable for economy bathroom renovation wooden slats. Pre-impregnation of the material with antiseptics will protect the slats from high moisture.
Wallpapering
It has the right to exist and the option of repairing a bathroom using wallpaper, the main thing is to choose moisture-resistant products. The work is being carried out at a fast pace, the removal of the old coating is not required in all cases. There are 3 main types of wallpaper designed for use in the bathroom:
- Vinyl with non-woven base. The price is quite high, the repair will require the purchase of special glue, which is not always advisable in an economy project. But high performance is the basis of popularity among consumers.
- Washable. Compared to vinyl copies, they are less practical, the cost of the product is correspondingly lower.
Remark! When repairing with your own hands, it is advisable to avoid pasting areas of the bathroom that may be exposed to water.
- Self-adhesive film. Incredible practical material, which is initially provided with an adhesive layer. A wide range of design solutions is able to create a wonderful transformation with a bathroom after renovation.
High quality and attractive appearance of self-adhesives are accompanied by 3 negative points:
- The rather high cost of the product, which may not fit into the budget repair estimate.
- Bathroom walls require careful preparation, as any flaw under self-adhesive wallpaper will be extremely noticeable.
- Pretty complicated application process. The painstaking process takes much longer than standard pasting.

tiling
Budget repair also implies the use in wall cladding tiles. The main thing is to choose an inexpensive product with decent quality. Solution advantages:
- the material is resistant to temperature extremes;
- not afraid high humidity withstands prolonged contact with water;
- washes well;
- resistant to mechanical damage.
The following negative points can become an obstacle to using the bathroom during budget repairs:
- additionally, you need to purchase a mixture for fixing to the wall and a grout;
- walls with old paint need preparation, the coating must be removed;
- the process requires a certain amount of experience and not everyone can do it on their own, inviting a master will increase the repair estimate;
- It takes more time for lining than when pasting wallpaper or painting.
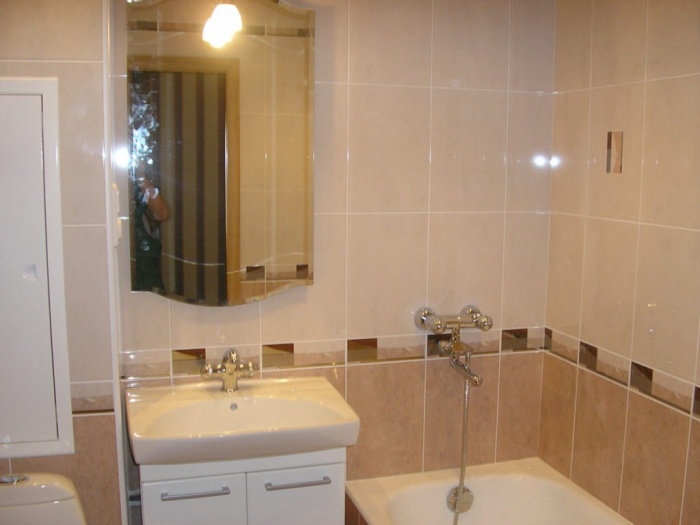
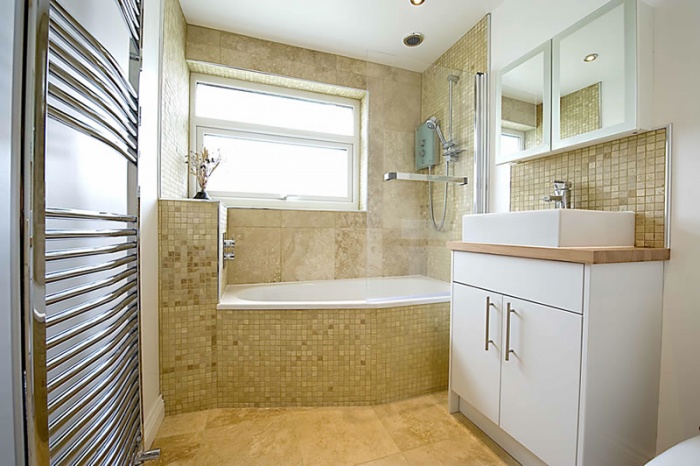
Best option for bathroom remodeling budget project- combination of lining. The area near the bathtub and sink is tiled, and for those less exposed to water, a simpler and more economical method of coating is chosen.

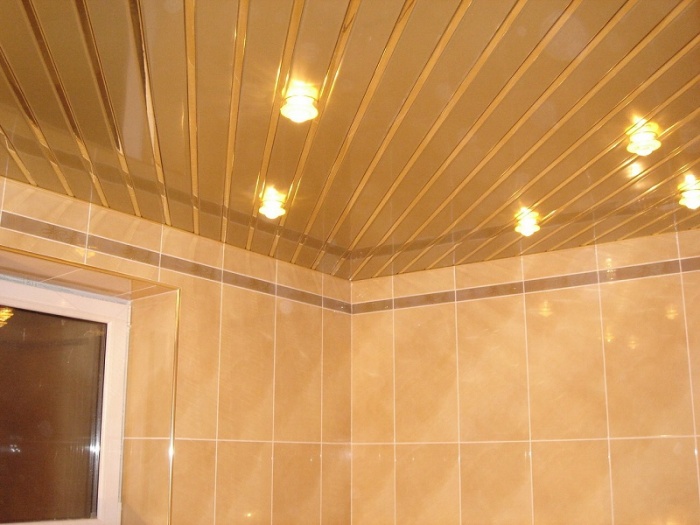
Ceiling finish
Scope of work budget finishing ceiling depends on its original state. flat surface enough to cover water-based paint or whiten. A simple and quick process can be done by hand. It is recommended to remove significant curvature or mask bathroom communications suspended structure. Rack elements or PVC panels are suitable as a material.

The main advantages of the choice:
- affordable price segment;
- simple lining procedure;
- does not require perfect surface preparation of the bathroom ceiling;
- successfully mask wires and pipes;
- Possibility of installation of built-in lamps.
The result of the budget repair is shown in the photo:
floor covering
The finishing option depends on the renovation estimate and the condition of the old bathroom flooring. Sometimes just refreshing the look of a tile is enough. To do this, you will need to remove the grout and pick up a new one that matches the color of the tile.
It is quite simple and cheap to lay linoleum, but this measure will be temporary. The increased level of humidity in the bathroom provokes the development of mold on the linoleum.
Comment! To avoid negative consequences with budget repairs, the purchase of PVC-based linoleum or without a base at all will allow.
Greater practicality in the repair of the bathroom has a tile, even if it is a budget cost. Facing is carried out without dismantling the old tiles. The cost of labor and time will require a screed. To repair the bathroom floor, choose a tile with a rough texture to avoid slipping and not cause injury.
With an extremely limited budget, the most economical option is to purchase a large rubber mat that will cover the free space of the bathroom floor as much as possible. It can be changed much more often than any stationary coating, and a fresh look of the interior with minimum expenses will be provided.

The nuances of choosing plumbing
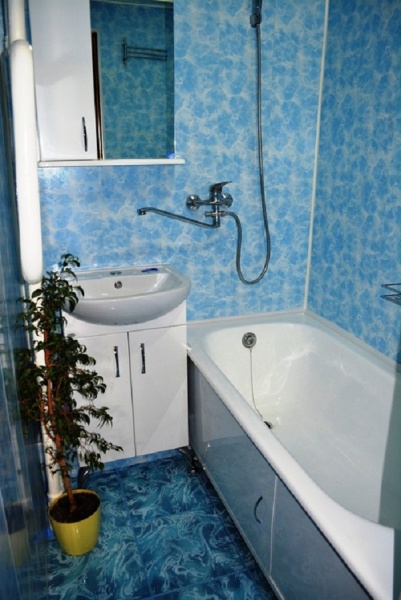
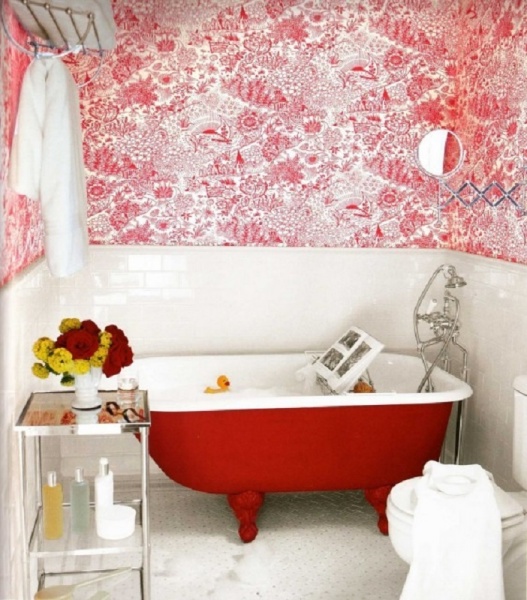
Replacement of plumbing in the case of budget repairs is not always carried out. Sometimes they stop at the option of restoring the bath. There are several ways to update:
- The inner surface is treated with a two-component polyester enamel. Most budget friendly.
- Restoration with liquid acrylic is characterized by greater durability and cost.
- Sometimes both methods are unacceptable due to the deplorable state of the bath. An acrylic tab will save the situation, the fixation of which is carried out with a sealant.

Each of the methods still implies financial costs, although they will be incomparably lower than the purchase of a new bowl.
If a budget repair involves the purchase of new plumbing in the bathroom, consider the following options:
- acrylic container. Located at the bottom of the price segment. Easy installation and easy care are the key advantages of a bathroom product. A short service life and instability before mechanical damage are the main negative features.
- Cast iron is characterized by greater practicality. The cost is higher than acrylic counterparts.
- Steel bathtubs in their characteristics are between acrylic and cast iron products.
- If the presence in the bathroom of the bath itself is not important, you can think about installing a shower cabin. But the repair will already go beyond the budget.
When replacing sinks in the bathroom, choose between hook-on or stem-mounted equipment. The first option is more budgetary, the second has more aesthetics, as it successfully masks communications. About the nuances of choosing plumbing and preference domestic manufacturer was mentioned in the first section.
Conclusion
To embellish the interior of the bathroom after a budget repair, small trifles can. original curtain, decorative stickers and new accessories will enliven the design of the room. Communications are not left open, they will spoil the result of even the most expensive bathroom renovation. A budget way to quickly hide the functional elements of the decor is to form a plastic box. It will take a little time and costs, but the result will be obvious.
Hello dear readers! Continuing the topic of repair, I will tell you how to start repairing the bathroom and toilet with your own hands. Surely many renovating these premises are faced with this issue.
If you are the owner of an apartment in which the bathroom is located separately from the toilet, I advise you to start do-it-yourself repairs at home by working out the same colors and style. Even if the rooms are separated, it is one whole. The design is chosen the same or similar in type of finishing materials used and color.
Toilet and bathroom are kind of twins. I advise you to tile the premises with tiles of the same type, but of a different shade. If you use the same finishing technique, you will get dissimilar rooms that will create a different mood. If the walls and floor are made in the same color, but with different finishing materials, discomfort will appear due to the contrast between the rooms.
Video tips
I think now you understand why it is better to use the same tiles and decor for finishing the bathroom and toilet. This approach will save you money. After finishing, trimmings will remain, which are likely to find a place in the second room.
How to start a bathroom renovation
A bathroom is a room in which a person is left alone with thoughts and emotions. Here he takes a shower, relaxes, rests after a hard day, gets rid of irritation and fatigue, gets a boost of energy.
The described effect will bring only a convenient and comfortable bathroom.
Bathroom renovation step by step
- Measure the room . Take a piece of paper, a pencil, a tape measure and measure the length and height of the walls, the area of the room. Based on the figures obtained, calculate the amount of materials that will be required to repair the bathroom.
- Mentally imagine a new bathroom . Decide on the color and type of finishing materials, the location of the bath, furniture and accessories.
- Prepare the room . Clean the walls and ceiling of the bathroom old finish. The work is dusty and dirty, so wear a respirator. You will need a puncher, spatula, metal brush and other tools.
- Treat the walls with a primer . Lay the wiring and level the ceiling with putty. At this stage, mark the vertical and horizontal lines with a level or plumb line.
- Plumbing replacement . A responsible step, I do not advise saving on it. We are talking about replacing the plumbing, risers and sewerage in the bathroom.
- Floor waterproofing . Making a cement screed, water will not seep to the neighbors. Treat the joints between the walls and the floor, the entire area of \u200b\u200bthe bathroom with a special waterproofing solution.
- For wall and floor decoration . Try tiling your bathroom yourself. If there are no skills, ask a tiler for help. Some, for the sake of economy, do not veneer the place behind and under the bathroom. It is better to veneer the planes, and put the bath on the tile. The screen will help to hide the side and communications.
- Door installation . If you are going to replace your bathroom door, do it before tiling.
- Plinth and ceiling . At the end, install a decorative plinth along the perimeter of the ceiling, and paint the ceiling with water-based paint. If this option for finishing the ceiling in the bathroom is not suitable, pay attention to stretch ceilings or structures made of plastic panels. It remains to seal the seams.
Video instructions
Following the instructions, you will reach the final stage. At the end, install the sink, hang a mirror and lamp, install furniture. The end result is a beautiful room.
Where to start repairing the toilet

People face difficulties in repairing toilet room. The toilet is an important part of housing, which I advise you to repair thoroughly and correctly, taking into account all the little things. Where to start the painstaking process, I will tell below.
- As with the bathroom, I advise you to start repairing the toilet with the preparation of the room. Remove first old toilet, remove old finishing materials from walls, floors and ceilings.
- Supply water and sewer to the installation site of the new toilet. If the sewerage system in the apartment is made of cast iron pipes, replace plastic products. If pipe replacement is not planned, limit yourself to a plastic supply. It is better to connect pipes using special inserts. Don't forget the slope required for normal functioning sewerage.
- Pay attention to communications. If they run along the wall, close them in a box. Be sure to make sure that the box is removed or disassembled. This makes it easier to troubleshoot problems caused by leakage.
- Before the beginning plastering works put beacons on the walls of the toilet. Using as a guide, line up the walls. After the plaster has dried, lay the tile.
- Switch to floor. First, make a concrete screed, and after drying, lay the tile. Do not immediately install the toilet, it will interfere with work in the upper part of the room.
- There are many options for finishing the walls of the toilet. What finishing material to choose is up to you, but I advise tiles. If such a lining is not to your liking, the market offers photo wallpapers, mosaic tiles, a natural stone or wood trim.
- Take care of the ceiling. Plasterboard ceiling is suitable for the toilet room. It will hide the wiring and ventilation system. If you add a decorative plinth, you get beauty.
- Lastly, install a lamp in the toilet, secure the toilet bowl and attach a paper holder to the wall. I advise you to immediately understaff the toilet with shelves for storing air freshener and stocks of toilet paper.
After going through a difficult path, in the end you will get a result that will delight you with freshness and originality. But more pleasure will bring the thought that the author of the masterpiece is yourself.
How to start repairs in a combined bathroom

The combined bathroom has advantages and disadvantages. The main disadvantage is that the room is available only to one household. Plus - the ability to expand the area of \u200b\u200bthe bathroom. A washing machine or a closet for accessories can be easily placed in the combined bathroom.
AT modern apartments the toilet is separate from the bathroom. At the same time, the premises are characterized small area and there are cases when a few centimeters are not enough to install furniture or another object. To fully consider the issue, consider how to combine a bathroom and a toilet.
How to combine bathroom and toilet
This kind of repair, in addition to construction works, provides for "paperwork". According to the rules, redevelopment in the apartment is coordinated with the relevant authorities. At the same time, changes are made to the housing plan.
When creating a preliminary plan, note the relocation of plumbing, changes in electrical wiring and plumbing systems. This is an incomplete list of factors that should not be ignored. Work on combining a bathroom is a small technical part of a huge job.
After approving the plan, switch to repairs. It is better if the household members go on a summer vacation for a while. As a result, they will protect themselves from discomfort, and no one will interfere with you.
- Demolish the partition between the bathroom and the toilet, level the walls, which are usually extremely crooked.
- Redo the pipes. If necessary, change their location so that they do not interfere. The same goes for the heated towel rail.
- The next step involves laying electrical wiring. Route cables, locate switches and outlets, and install.
- Prime the walls and level the floor with concrete screed. Before laying the floor covering, whether it is a tile or other finishing material, fill the floor with bitumen. This will reduce the likelihood of flooding neighbors during a leak.
- Stretch ceiling – a good option for a shared node. Just entrust their installation to professionals, as the arrangement of the ceiling involves the use of special equipment and skills.
- Finish the walls and lay flooring. To visually expand the space of the room, build in each wall big mirror. The combined bathroom will turn out beautiful and original.
- The final stage of the repair involves the installation of plumbing, furniture placement, connection household appliances, installation of bath accessories - hanging soap dishes, hooks.
If you want to achieve results, listen to the recommendations. They will help to speed up and successfully complete the repair. When the family returns home, the beauty of the combined bathroom will surprise.
The choice of furniture and the layout of the bathroom

I devote the final part of the article to the layout of the bathroom and the intricacies of choosing furniture. If you have finances, organize in the house separate bathroom especially if the family is large. As a result, several people will be able to relieve their needs at the same time. If you like a combined bathroom, make sure that it has sliding partition. With its help, divide the room into zones.
Room size. To make the toilet convenient and comfortable, select several square meters. Excess space is not required. Design a bathroom according to tastes and preferences, but you should not overdo it with space - 6-10 squares are enough.
Furniture . Before buying furniture, decide what you want to see in the room. Usually this is a set of a sink, a mirror, a pencil case and a floor cabinet. Sometimes a hanging cabinet is provided. Before buying a bath set, make sure the quality. On the surface of the furniture, the paint should lie in an even layer.