Beautiful, but capricious. In order for the plant to be healthy and bloom profusely, its owner will have to be patient, have a lot of theoretical and practical skills, and also create comfortable conditions for the living window sill decoration.
Attention to the azalea flower is required from the first days of being in the house. Often, a bush brought from a store, covered with a lush hat of flowers, literally in a few days or weeks begins to wither, sheds flowers and foliage, and then dies. Some azaleas cannot recover from flowering and also dry out.
Faced with a similar situation, a novice florist blames himself or affirms that the azalea is a disposable flower and cannot be kept at home. This opinion is wrong! With proper preparation and diligence, beautiful azaleas actively bloom, grow and even multiply.
Azalea after purchase: risks and necessary measures
To ensure a long and happy indoor life for the flower, immediately after purchase, the azalea is carefully examined.
Nurseries-producers of domestic plants care little about the development of the root system and the further growth of the azalea. Shrubs artificially brought to the flowering stage and planted in shipping pots with a small amount of peat mixture are additionally treated with retardants, synthetic substances that introduce the culture into a kind of sleep. Long-acting fertilizers are added to the soil mixture, a supply of which maintains the freshness and flowering of the plant for 2-3 months. The roots, often damaged during transplantation, do not develop at this time. The plant is at risk of pest and fungal infections.
It is not surprising that moving from the store to the windowsill, the new pet weakens after a while and may die. The initial examination of the azalea after purchase is aimed at identifying existing and developing problems and deciding on further actions:
- The peculiarity of the azalea is that a specific microflora is formed around the root system of the plant, the violation or removal of which threatens to grow the crop.
- Equally dangerous is excessive moisture in the soil, leading to decay of small roots and the root collar of the azalea.
If, after the purchase, the azalea has problems with the root system, the condition of the soil is suspicious, there are traces of mold or salinity, it is better to transfer the plant to another container, removing damaged tissues and poor-quality soil.
Do not transplant an azalea covered with flowers or buds. Transferring to another substrate will be for a culture that spends all its strength on many flowers, the strongest or irreparable stress.
If we are talking about saving the shrub, before transplanting it is better to carefully remove most of the blossoming corollas and colored buds.
It is dangerous to transplant azalea and in winter time When the plant is at rest, life processes, including regenerative ones, are inhibited. It is better to try to wait for the resumption of vegetation and transfer the revived shrub to fresh soil.
Azalea transplant
 Regular transplantation of azaleas is carried out when mass flowering is completed. Such a measure will not only not harm the culture, but will also help to renew it, give it strength and lay the foundations for future growth.
In this case, the procedure carried out in relation to indoor rhododendrons has its own characteristics. First of all, you should be very careful about the root system of the shrub.
When the azalea is carefully removed from the pot, the grower most often finds a dense, earthy lump that looks like a black-brown sponge. It is completely penetrated by many large and small roots, and traces of salts and dead tissues are visible on the remaining fragments of the soil. Therefore, the transplantation of azaleas is always preceded by processing, including:
- removal of the remnants of the old substrate;
- renewing pruning of the roots;
- processing of the root system and zircon.
All tools, whether it be a knife, secateurs or scissors, which are used to trim a lump, are pre-treated with an alcohol-containing liquid or calcined over a burner.
Due to the excessive density of the root system inside the pot, the azalea loses part nutrients, the access of moisture and oxygen is deteriorating. To remedy the situation, a lump with azalea roots is cut about a centimeter from the bottom, at the root neck and along the side surface. At the same time, the remaining soil is removed.
In this form, the azalea flower is placed in a container with clean warm water, in which, according to the instructions, a root system growth stimulator and zircon are added, which have an immunomodulatory and fungicidal effect. During the time that the grower is preparing a nutrient soil mixture, the roots of the azalea will be saturated with moisture, and stimulating preparations will show their effect.
 Unlike many indoor plants Azaleas prefer to grow in acidic soil. Therefore, the mixture is specially prepared for them. To do this, take:
- specialized soil for azaleas;
- crushed steamed bark;
- sand;
- dried sphagnum moss;
- charcoal;
- perlite and vermiculite.
 The resulting mixture should be loose and airy. A pot for transplanting azaleas does not need a deep one, the main thing is that there is enough space for a powerful layer of drainage from fine expanded clay and comfortable placement of the root system:
- A small layer of substrate is poured onto expanded clay.
- An azalea flower is installed in the center of the container, around which fresh soil is gradually poured so that the root neck of the bush is not affected.
- The substrate is compacted and, after transplantation, the azalea is lightly watered with the solution in which it was soaked. root system.
The best place for a shrub after the procedure is a well-lit window, but not in direct sunlight, where the plant is not threatened by drafts, and there are no heating devices nearby.
 In the next 3-4 days after transplanting the azalea, the soil is not moistened, and then watering is gradually resumed using filtered or settled water. room temperature. In 1–2 months, the plant must undergo acclimatization and compensate for the loss of the root system.
Since the state of the azalea flower is still unstable, it is better not to feed it, and sometimes add zircon to irrigation water.
Propagation of azalea shrubs by layering
 For propagation of azaleas at home, you can use layering rooted in the spring. For this:
- shoots in the lower tiers of the bush are bent to the ground;
- sharp knife a transverse incision is made on the wood, into which a match or a toothpick is inserted so that the cut does not connect;
- the incision site is fixed with a wire pin to a loose substrate;
- the apical part of the shoot is lifted so that it assumes a vertical position, and fixed with a peg.
Layers in the place of its attachment to the ground are sprinkled with a substrate and watered. Several months pass before the formation of the root system and the separation of the young azalea flower from the mother plant. This usually happens by autumn, and by the following spring, the seedling will be ready to be transplanted into a separate pot.
Reproduction of azaleas by dividing the bush
In this way, you can propagate the azalea, which has many young shoots, the root system is developed and healthy. The procedure is carried out in spring time when a culture activates not only growth, but also protective forces.
Reproduction of azalea by dividing the bush is risky by damaging small, but extremely important roots for the plant. Therefore, the procedure should be carried out very carefully using a sharp disinfected knife.
The separated parts of the azalea, after being transplanted into their own pots, regain their strength for at least a year and require special attention and care.
Reproduction of an azalea flower by cuttings
 As cuttings, take the apical parts of the last year's shoots, 7–9 cm long and with several fully formed leaves. The cut is made obliquely with a sharp knife or blade. The bottom three leaves are removed, leaving a small part of the cutting. Other sheet plates shortened by half.
To make the propagation of azalea at home easier, before planting in the ground, the cuttings are immersed for a couple of centimeters in a solution of a root system growth stimulator. This treatment lasts 4-6 hours.
rooting planting material carried out in a loose substrate with an acidic reaction. Cuttings are deepened by no more than 2 cm at a distance of 3-4 cm from each other. In a greenhouse and subdued light, future plants will have to spend 1.5–2 months. The entire cutting period is necessary:
- keep at a temperature not lower than 25 ° C;
- water moderately;
- spray with warm settled water;
- ventilate to prevent the formation of condensation and mold.
 For the formation of a uniform crown landing capacity turn from time to time. Azalea flower cuttings are taken out of the greenhouse when their own shoots begin to form on them. Then the young azaleas are transplanted into their own small pots and pinched, which will lay the foundation for the future crown of the plant.
After rooting and before getting an adult flowering plant takes 2 to 3 years. Since the azalea noticeably weakens after flowering, it is better to remove the first buds from young specimens.
 Get blooming azaleas from seeds is extremely difficult and troublesome, but possible. To do this, small seeds are mixed with dry sand and sown on the surface of the substrate. Best time for the procedure - spring.
Under the film at a temperature of 18–22 ° C and constant humidity in the range of 90–100%, future plants spend three weeks. They are regularly sprayed and ventilated, preventing drying out or mold. When true leaves form on the seedlings, it's time for the azaleas to swoop down. And seedlings that have reached a size of 10–12 cm are transplanted into their own pots.
We transplant the azalea correctly - video
Azaleas come to stores from grower nurseries, where they care little about the development of the plant's root system. Bushes artificially prepared for flowering and planted in shipping pots with a small amount of peat mixture are treated with synthetic compounds. These substances put the azalea into a sleep-like state. Fertilizers are added to the ground, the supply of which is enough to maintain the freshness and flowering of the plant for two to three months.
The transport soil, which contains the plant in the store, tends to be compressed and firmly adhere to the roots. Besides, given land contains no nutrients.
Chemical flowering stimulants used in nurseries activate the formation of buds, inhibiting the development of the root and green mass. Such a plant is at risk of contracting fungal infections.
Reference. In order for the root system to develop normally, after acquiring an azalea, it is necessary to transplant. This procedure is recommended to be carried out 10-15 days after purchase, giving the plant time to adapt to new conditions.
After the purchase, you need to carefully examine the plant. In case of detection of mold, fungus, problems with roots, as well as in poor condition of the soil, the azalea must be transplanted into high-quality soil, removing the damaged areas.
It is recommended to transplant young plants annually, adults - every two years. The procedure must be carried out when the flowering period is over. If the azalea has been flooded or the pot has become small, an unscheduled transplant is required.
If the plant is flowering
Azaleas should not be transplanted during the flowering period. At this time, the plant spends all its energy on the formation of buds and the maintenance of flowers. The procedure will lead to severe stress, as a result of which the azalea can drop leaves, flowers and buds. It is very difficult to get a plant out of this state. In the case when it is urgent to save the azalea, most of the blooming flowers and colored buds must be carefully removed before transplanting.
You can find out more about when it is better to transplant an azalea and how to do it.
Step-by-step instruction
Inventory preparation
- Prepare a large container of water. An ordinary basin will do. Take boiled or filtered water.
- Treat a knife, secateurs or scissors with an alcohol-containing liquid or ignite.
Pot selection
You should choose a pot five centimeters higher than the old one, wide and deep enough. Suitable for both clay and plastic pots. You can choose a planter or any other pot.

- Mix azaleas soil with vermiculite.
- Crumble sphagnum there.
- Add some river sand.
- Mix well.
It is quite difficult to independently form the soil for an azalea at home. The following options are possible:
With peat and needles
- Peat - 1 part.
- Overripe needles - 2 parts.
With the addition of sand, humus and earth
- Peat - 1 part.
- Humus - 1 part.
- Sand - 1 part.
- Sod land - 1 part.
- Leaf land - 1 part.
- Coniferous land - 5 parts.
with moss
- Sand - 1 part.
- Dried crushed sphagnum moss - 1 part.
- Overripe needles - 2 parts.
Important! By the time of transplant above-ground part azaleas should be pruned, cut off dead branches, remove dry leaves, faded buds.

Placement in a new pot
- At the bottom of the pot, pour drainage three centimeters thick, consisting of small stones.
- Place some wood chips, river sand, steamed pine bark or moss on top. The layer thickness should not exceed two centimeters.
- Then sprinkle "Trichodermin" for the prevention of fungi and rot.
- Put a little on top soil mixture, distribute evenly over the flowerpot.
- Remove the azalea from the container with water, slightly squeeze the earthen ball, let the liquid drain.
- Place the plant in the prepared soil in the center of the pot.
- Gradually pour fresh soil around the azalea so that the root neck of the bush is not affected. Add soil on the sides of the earthen clod. root collar no need to go deep into the ground.
- Compact the soil a little around the roots.
- After transplantation, slightly moisten the substrate with a solution in which the root system was soaked.
Note! It is impossible to water the plant abundantly after the procedure. Roots dry out more slowly than soil and can rot.
From the video you will learn how to properly transplant a purchased azalea:
For more information on how to transplant an azalea at home, see.
First watering
The first time after moistening the soil is not required. Three to four days after the procedure, it is necessary to gradually resume watering. To do this, use settled boiled water at room temperature. For a speedy recovery, it is sometimes recommended to add Zircon to the water for irrigation.
 During the procedure, it is necessary to pay great attention to the roots of the azalea. important when transplanting special care, namely, it is necessary to preserve the microflora of the root system, which the plant maintains throughout its life. Violation of the microflora can lead to disease and death of the azalea.
The roots of the plant are thin, fibrous. An earth lump looks like a sponge, the transport soil adheres tightly to the roots. It is very difficult to clean the root system from the old substrate. It also makes the division process difficult when it is necessary to plant a bush that is too large.
How to properly care?
A flower weakened after the procedure can be treated with growth stimulants. After transplanting at home, you need to provide the plant with proper care and favorable conditions for successful recovery.
Location selection
After the procedure, it is necessary to put the azalea in a warm, bright place, protected from direct sunlight, away from drafts and heaters. A window on the west or north side will do.
Lighting
Azalea loves the light, but does not tolerate the direct rays of the sun. The lack of light can be compensated by artificial lighting. At first, you should shade the plant a little, after a couple of weeks put it on the window without protection. If the weather is dry, warm, you can take the azalea to the balcony or loggia, providing a little shade.
Humidity
It is important to create conditions of high humidity. If the air in the room is dry, pour expanded clay into the pan and pour water regularly. Make sure that the expanded clay does not dry out.
On a note. To prevent the leaves from drying out, it is recommended to spray the plant every other day.
Temperature
From October to December, the optimum temperature for azaleas should be from +6 to +10ºС. It is in such conditions that the process of bud formation for further flowering takes place.
When the buds begin to bloom, the temperature should be raised to + 17ºС. In summer, the indicators should not exceed + 18ºС, in winter they should not fall below + 5ºС.
Watering
Potted azalea should be watered every two to three days in the morning. Water should be poured through the pan. Drain excess water after 15 minutes. It is important that the earthen ball is completely saturated with moisture.
Soil moisture needs to be monitored regularly. It is impossible to allow the drying up of an earthen coma.
For irrigation, clean boiled water at room temperature is required, which must be defended for at least two days. To increase the acidity of the soil, you can add a drop of lemon juice to the water.
top dressing
Azaleas do not need to be fertilized within one to two months after transplantation. After the procedure, the plant will be weakened, as a result of feeding the roots may burn out.
After recovery, it is necessary to fertilize every seven days in the spring summer period. In September, feeding becomes less frequent and is carried out once every two weeks. In winter they stop completely. Plants need to be fertilized special formulations for azaleas. When forming buds, top dressing with superphosphate is used.
Azalea transplantation after purchase is a complex undertaking that requires certain knowledge and strength. If everything is done correctly, one or two months after the procedure, the acclimatization process is successfully completed and the losses of the root system are compensated. With proper care, the bush develops safely, blooms luxuriantly and grows.
If you find an error, please highlight a piece of text and click Ctrl+Enter.
For a long time my house was filled with plants from all over the world. I get along well indoor "exotics", hybrids familiar to us garden plants and shrubs. There are among them simple and unpretentious, capricious and demanding.
One of these flowers "with character" is the azalea, which has been decorating my home for several years. indoor garden. In this article, I will share tips on how to transplant an azalea correctly so that it delights you with its beautiful flowers.
As soon as you have purchased a plant, immediately pick up another pot for it! As a rule, flowers are sold in shipping containers with poor soil.
Hoping that the bush was in the hands of professionals, received proper care and has healthy roots, not worth it. Therefore, it is necessary to transplant the azalea immediately after its acquisition.
If you bought it at the time of flowering, then it is better to wait with a transplant, as the plant may drop inflorescences. But only if the land does not cause you concern.
Azalea transplantation is mandatory if the plant is waterlogged, there are traces of mold and salt. In this case, before the procedure, it is necessary to remove the main part of the opened flowers.
Home-grown azalea should be repotted regularly in the future. Young bushes - every year, adults - once every 3 years.
Remember, a special microflora is created around the roots of the azalea, the violation of which can lead to its death. Therefore, do not disturb the plant during flowering and in winter. The ideal time to renew the soil is spring.
Soil selection
As I mentioned earlier, the azalea is a very vulnerable and demanding plant. Unlike many others, she prefers acidic soil. It is best to take a ready-made soil mixture designed for this species.
If you can cook it yourself, then take two parts pine needles and three parts of high-moor peat, as well as in equal parts of river sand and leafy earth. For looseness of the soil, as well as to increase its moisture permeability, charcoal or perlite must be added to the mixture.
Choosing a pot
We choose a capacity for a flower wider and larger than the previous one. It is also necessary to take into account the drainage layer, which will take up to 5 cm. For an azalea, the width of the pot has great importance, since the roots of the plant develop exactly in width.
Transfer
And so, the planned transplantation of azaleas is carried out after mass flowering. This perfectly stimulates the azalea, refreshes and provides a basis for further growth. This procedure for azalea has its own nuances. First of all, it is necessary to give Special attention plant root system.

When we take the shrub out of the pot, we see a dense clod of earth, all shrouded in small and large roots, and in the unfilled areas, the remains of dead roots and salts are visible. At this stage, the azalea always undergoes processing, which includes:
- removal of remnants of old soil;
- rejuvenating root pruning;
- processing with "root" and "zircon".
All equipment that is necessary to work with the plant is treated with alcohol or ignited by fire.
Due to the density of the roots, the plant lacks nutrients, the access of moisture and oxygen becomes difficult. To fix this, the root ball is cut to a centimeter from all sides, from below and at the root collar.
After that, the azalea must be placed in a warm clean water, in which we added a growth stimulator and zircon. So we leave the azalea while we prepare the new soil ourselves. This will allow the roots to be well saturated with moisture.
Shrub division
If your shrub has grown strongly and it is no longer alone in a pot, then they must be divided. Division should be carried out after pruning the roots. The bushes are planted in separate pots. If there is a need, then they make a crown pruning, pinching young shoots, leaving several pairs of leaves.

Transplant stages
As already mentioned, the azalea pot should be spacious enough for the plant's root system to be comfortable:
- Pour a little substrate on the drainage layer.
- We install a shrub in the center, gradually falling asleep in a circle with fresh soil so as not to affect the root collar.
- We compact the soil and water it with water in which our plant was located.
After all the manipulations, it is best to install the plant in a well-lit place, without sunlight. The first three to four days after transplanting, the shrub is not watered, later watering is resumed.
Water must be defended or filtered. The period of acclimatization and recovery lasts from one to two months.
Azalea breeding
Azalea is propagated by cuttings. It is best to carry out the procedure in the summer. For this purpose, semi-lignified cuttings with buds are placed in the ground and covered with jars or bags. Watering, like spraying, should be plentiful and daily.
Formed flower buds should be removed immediately. Rooting cuttings, as a rule, takes two months, after which they are planted in a pot. For the formation beautiful crown, stretched shoots on cuttings pinch.

Summarize
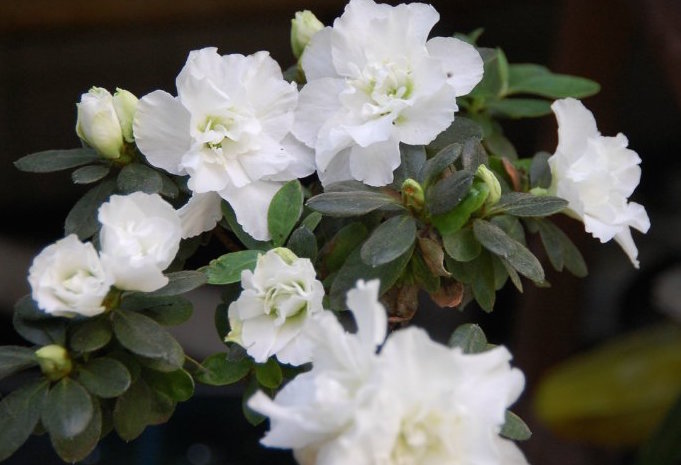
- Azalea is a dwarf flowering shrub from the genus of rhododendrons.
- Capricious and very sensitive plant.
- Regular transplant required.
- The nuances of transplantation include root treatment, pruning and preventive measures against rot and mold.
Azalea - garden plant. Belongs to the genus Rhododendron. In winter, the flower blooms profusely, so it is in great demand among flower growers.
Discovered culture in con. XVIII–beginning 19th century England. Then the Dutch botanist Jacob Brainius discovered the plant. He brought it home, but the flower died without taking root. After a while, the scientist Conners repeated his attempt to grow azalea, but failed. In the beginning. XIX century, Captain Welbank brought a flower from India, and he took root. With the help of breeders today, many varieties and species of plants that amaze with their beauty have been collected on the flower industry market.
In the natural environment, culture grows in China, North America, Japan, Southeast Asia. Only two types of flower are grown in pots: Japanese ( frost-resistant variety, can be planted after flowering in the ground) and Indian (characterized by small leaves and more often grown in room conditions).
Azalea adaptation period after the store
In order for the plant to grow well, it needs to get used to the new conditions. To do this, the gardener inspects the soil for the presence of mold. If there is a disease, the flower is treated with drugs against the fungus. Next, the azalea is accustomed to a different habitat.
Quarantine condition
Having brought home a culture, which, by the way, is finicky in growing, you cannot put it with the existing pets in the house. Even if the azalea looks beautiful, this does not mean that the plant is healthy and is not in danger. To do this, the flower is placed in a separate room, creating a quarantine for at least two weeks. If after the time there are no problems, the plant is put to the rest of the green mass.
Do I need to repot Azalea?
A change of soil and a flowerpot for a flower is needed if necessary. A three-year-old culture is transplanted once a year. If the plant is older, the procedure is done 2 times a year. A flower is transplanted with abundant growth of roots or decay of the soil. Immediately after the purchase, it is better not to disturb the flower for as long as possible. First, there must be an adaptation period.When to transplant an azalea
Usually the flower is transplanted in the spring. Pre-cleaning the aerial part - remove dry branches, leaves. During transplantation, it is necessary not to damage the roots, if possible, replace the completely old substrate with a new one.

Choosing a pot and substrate

For a flower, give preference to deep and wide flowerpots. Speaking about the material of pots, clay and plastic containers are suitable for azaleas.
Care for room azalea after purchase
Growing a plant at home requires certain skills. It is not always possible to "win" a flower. The culture is capricious and fastidious. Quite often, after the acquisition, the plant sheds flowers. To achieve re-flowering, the gardener needs to try.Temperature, humidity and lighting
Comfortable temperature for azalea is 10-15C. In other words, chill. IN winter period on which the plant blooms right conditions easy to provide. Great choice will become a window sill isolated from the batteries.

For rhododendron, the most crucial period is the formation of buds. At this time, the temperature should be at the level of 6-8C. To achieve the required temperature, azalea sometimes manage to be put even in the refrigerator. I would like to highlight that this method helps to restore a weakened plant. During flowering, the temperature rises to 12-15C.
Like most indoor plants, rhododendron loves rich, diffused light.
The next important factor for a flower is high humidity air. At home, this rule is difficult to follow, so the plant is constantly sprayed with a spray bottle. Do not allow large drops of water to fall on the flower. Otherwise, it will get stained.
How to water an azalea
When growing a plant, watering plays an important role. The main thing is to maintain the correct balance of substrate moisture. The potting soil should always be moist. It is unacceptable to overdry the earth, otherwise the flower will throw off leaves and flowers.

Watering the culture, use soft water. You can take snow or rain. Azaleas respond well to water mixed with lemon or apple cider vinegar (just add a few drops to the water).
Top dressing and fertilizer
If you want to fertilize the crop, which is done only during the flowering period, it is best to buy prepared mixtures in specialized stores. Fertilizers are applied according to the instructions. The most famous drugs are: Epin, Zircon, Ecogel-antistress, Ferovit, HB-101, Fitosporin-M.
Rules for caring for azalea after flowering
Plants usually rest after flowering. Many flower growers believe that you can relax at this time, but this is a delusion.

After flowering, the azalea needs to be cut, replanted, formed a crown, pinched. First of all, all dried leaves, buds, flowers are removed from the plant. The culture is transplanted after flowering, from the moment of building up young branches. If there is little experience, it is recommended to do transshipment first, so as not to disturb the root system of the flower. The peculiarity of the procedure is the washing out of the earth from the roots. It is impossible to wash the roots strongly, so as not to remove all useful microorganisms from them.
Formation "Bonsai" from azalea
In home floriculture, it is popular to plant bonsai trees without side shoots. Creating a crown for a flower in the form small tree with a thick trunk and a fluffy top will require a lot of effort. This form is not inherent in nature for a plant. Recall that bonsai is also made from fat women. In other words, from varieties with miniature flowers and leaves.To get a bonsai from a rhododendron, you need to form a crown from the first year of a flower's life. The plant must be young. This will take more than one year. The number of cuts will require at least five.

The first pruning is to select the main massive shoot, from which the trunk of the future bonsai will turn out. Lateral branches are cut off completely. The first 12 months do not cut the top. Thus, the azalea grows rapidly upwards. Important point Stage 1 - the formation of the stem, growing its length. In order for the main shoot to be straight, it is attached to a support, constantly turning in different directions towards the light. When the rhododendron reaches the required height, the top is cut off. Further, all forces are directed to the creation of the top. It can be pyramidal, rounded, elongated.
How to propagate azalea at home
Having learned all the rules and nuances for caring for an azalea, you need to practice your skills in plant propagation. The culture is propagated by cuttings, seeds, grafting, dividing the bush. The seed method is commonly used by professional gardeners to propagate new varieties. All other methods are available for inexperienced flower growers.
The most common method of propagating azalea indoors is cuttings. In the spring, a stalk of 5-8 cm is cut from the flower. The cut is treated with a drug that stimulates root growth. For rooting use a peat mixture, a coniferous substrate. Pagon is planted vertically to a depth of 2 cm. From above it is covered with a transparent container, cellophane to create a greenhouse effect. The sprout is grown at a temperature of 25C, constantly moistening the soil.
Grafting a flower is done by choosing a side shoot with a bud and a pair of leaves on it. An incision is made under the kidney. The layer is pressed down to the ground and fastened with a bracket. Soil is poured on top. After the shoot takes root, it is carefully separated from the bush and transplanted.

Choosing a method of reproduction of rhododendron by dividing the bush, it is taken big flower and carefully, without damaging the root system, it is divided into small parts. Each part is planted in a separate pot. For a newly-made azalea, care is the same as for an adult flower.
The Difficulties of Growing Azaleas
As with many other indoor plants, flower breeding can be accompanied by a number of difficulties. They all appear from insufficient lighting, incorrect temperature and watering, improperly selected substrate or top dressing. The main diseases of azalea are monitored by the following signs:
Read again about the rules for growing crops and care at home, and your beautiful azalea will delight you with its flowering for more than one year.
Indoor flower pests
Azalea is a frequent unexpected guest. It appears with a lack of moist air, watering. A cobweb forms on the stems of the plant, the buds wither, fall off. They fight the "enemy" with a soapy solution and washing the flower under a warm shower.
Azalea care at home requires special skills and abilities. In order for a flower to grow well after purchase, you need to own complete information for cultivation of culture. This will require constant attention and observation of the flower grower.
Azalea is a rather special flower for home floriculture. Ever since you chose it in a flower shop, it will urgently require close and almost constant attention to itself, as well as especially careful care.

But there is no reason to be worried. Thoughtful care for azalea at home will not allow this beautiful plant perish. On the contrary, it will actively grow, and delight its owner with a beautiful and lush bloom. The main thing is to know what to do and not make fatal mistakes.
One of the features of the azalea is a rather unusual microflora near the roots. If its integrity is violated, the flower may die. We can say that a delicate root system is weakness azaleas. Therefore, in this regard, you should be very careful with the plant. Especially when moving from one pot to another.
But there is no doubt - this article will describe in detail how to care for azalea at home after purchase.
How azalea is kept in stores

In large and small shops that sell flowers, any plants are always brought from the so-called nurseries. Most of flower growers - both amateurs and professionals - know that this flower itself is quite capricious in terms of care. Manufacturers artificially prepare the azalea for flowering and subsequent sale.
In these nurseries, flowers are processed with special synthetic means, which introduce the plant into a kind of sleep. The flower looks quite presentable for sale, and can bloom for several months, due to the fact that he received special fertilizers in the nursery. Often the soil is even overfed with them.
However, the root system of the azalea, which we have already mentioned, does not develop in any way, because, in fact, it is sleeping. Because the plant, in the end, often gets sick - the roots of the flower die from the fungus. This is considered one of the main reasons why new owners do not even have time to really start caring for an azalea at home after purchase.

The most popular variety for indoor floriculture is the variety of evergreen Indian azalea. Buds boast a variety of shapes and colors.
There are some details that can affect the cost of a flower:
- Its variety is a garden or indoor azalea;
- The size of the plant itself and the roots - respectively, the larger, the more expensive;
- How many buds does a flower have.
Most of the stores on the Internet have consultants who will not only help you choose the right flower or decide on a variety, but will also be able to tell you everything that interests you about caring for an azalea at home.
How not to let a flower die

When you have made a long-awaited purchase and brought an azalea to her new house, do not rush to get it out of the store packaging. It is better to leave the plant alone for about half an hour, so that the flower gets used to the microclimate of the apartment.
It is important to determine the permanent location of the plant. Here are some recommendations:
- A space with good illumination, but without direct sunlight;
- Coolness - about + 16-18;
- Humidified air.
It is very important to examine the soil of the azalea - to do this, you need to pull it out of the flowerpot. In stores, it is not uncommon to fill a flower with water to make it look fresher.
What to do if the soil is too wet:
- Remove the flower from its pot and wrap the roots with the ground with paper that absorbs moisture well;
- Repeat this action until the ground is dry enough, but this must be done with extreme care due to the fragility of the roots.
If the plant is too dry:
- It must be placed in a container of water right in the pot for about sixty minutes. Water should reach the edges of the pot;
- Then you need to take out the flower and let the excess moisture go away - for this, the pot must be placed in a saucer or a special tray lined with expanded clay so that the soil and liquid no longer combine;
- The flower should not be transplanted immediately, especially if the flowering period has begun.
Adapting to a new location
You can be sure that the azalea has fully adapted only when, after moving from flower shop on the home window sill, the plant will fade and sprout the next sprouts. In such a rather exciting period, you should take care of the flower with all care. And watch how he behaves.
Azalea does not like heat very much, therefore it is better to remove the pot away from heating systems. In addition, they are very badly affected by low levels of humidity. The more coolness he gets in the course of getting used to, the more chances there are that the flower will remain alive.
There is also no need to rush with fertilizers. During their stay in the nursery, the azalea is placed in already overfed soil so that the flower lives quietly until it hits the store counter.
If you follow all these rules, you just have to wait.
Special spraying, which is called "Epin", is capable of assisting in addiction. This substance is a special biostimulant for indoor plants.

Its action helps the plant to reveal its own protective functions, raises the level of immunity and resistance to stress. Instructions for use can be read on the package, and sprayed about once every ten days.
What care to provide the purchased plant

First of all, the azaleas need to get used to the new environment where they found themselves after the store. Azalea care at home after purchase is actually quite troublesome. Due to its very capricious nature, a flowering and fragrant plant that was just yesterday may lose buds and leaves in two or three days.
If the leaves began to fall off and the plant is rapidly losing its luxurious appearance, this can be called a herald of the death of the flower. That is why, before buying an azalea, you need to be prepared for something like this and remember exactly how to act in such a case.
So that the newly acquired azalea long time pleased your eyes with its beauty and lush flowering, it is extremely important to strictly follow the basic rules for care.
Please note that after purchase, the azalea is advised to transship. But you don't have to move it right away.
Transshipment is quite easy to do:
- You need to carefully remove the plant from the store pot along with a clod of earth;
- Move it along with the soil to a new spacious flowerpot;
- Close the empty space with a special mixture;
- Try not to over-moisten the soil.
How to save a newly acquired flower? Under what conditions can the azalea more easily adapt to a new environment?
The roots also need special inspection. Symbiont mushrooms live on its roots, which provide the azalea with food. In soil with a high alkalinity, these symbionts die. And, as it is easy to understand, the plant too. That is why the roots of the flower must not be washed.
The substrate mixture should be acidic, let water and air in. It is better to buy the soil already prepared for this flower. And replanting young flowers is advised every year. And when the plant has matured, then once every two or three years. The upper layers of the soil are replaced, trying not to affect the fragile roots.
Temperature regime

The most favorable temperature for the growth and development of azalea flowers will be from +10 to +15. Don't worry if the temperature is a little higher. The main thing is that it does not exceed the mark of +20. But during the period summer heat it is quite difficult to provide the plant with such a regime. At the same time, in summer season azaleas hibernate.
To support vitality plants, a street shade is also perfect. If there is such a possibility, great solution will bury the flower in the ground right along with the pot. But first it will be useful to pull on the pot nylon tights or stocking. This is necessary so that pests do not attack the plant. Experienced flower growers say that pests really like the earthy mixture for this color.
With the approach of the autumn season, buds begin to be laid. it will be useful to lower the temperature level for the flower to +6 degrees. And when the flowers appear and begin to bloom, you can raise the degrees to +15. Remember - the cooler the azaleas are, the longer the flowering will last.
Azalea does not tolerate hot weather. But never water it. cold water! This risks becoming a cause for the occurrence of fungus. In the summer, the pot can be overlaid with ice cubes. This will not only protect the plant from the heat, but also add humidity to the air.
Humidity level
This is one of the most important factors. Dry air can simply kill a flower.

Here's what you can do to keep the humidity at the right level:
- Choose a deep tray for the pot;
- Cover the pallet with pebbles and moss;
- Observe that there is moisture in the pan;
- Spray the leaves during flowering;
When spraying with a spray bottle, try to keep the droplets small.
Lighting
Azalea really just loves bright light. At the same time, she should not be exposed to direct sunlight - this can cause her to fade. For an azalea, a room located in the northern or western part of the apartment is perfect.
You can also place a flower in the southern room, but then it is better not to put it on the windowsill. good way out will buy a special stand and place it near the window.
How to water properly

As with any plant, water is a very important detail that saves them from withering.
For home flowers great value have:
- Water quality;
- temperature level;
- Frequency and abundance of watering.
Never water an azalea cold or even ice water! An unexpected change in temperature regime can be a real stress for the flower.
Up to the point that this can serve as a kind of signal for the plant that autumn has already come. And then the azalea will shed both flowers and leaves. Ideal for an azalea would be water of the same temperature, which contains the flower itself.
Only soft water is needed. It would be better to boil the water first, then let it cool. It is also important to water only upper layers water in a container, trying to prevent sediment from falling into the ground.
If you water the soil with ordinary water, from acidic soil will become alkaline, because it contains a lot of mineral salts. After boiling, they become the very aforementioned precipitate. To acidify the soil a little more, you can add three drops of juice to a liter of water.
If you bury the azalea in outdoor soil for the summer period, the rain will only benefit it.
This plant cannot tolerate drought. If you notice that the leaves or flowers have begun to droop, this is the first signal that the flower must be watered immediately. Nothing like this should be allowed. Better keep moist earth mixture fine. Excess fluid can also harm fragile roots, and they can begin to rot.
This plant loves water, so it's good if watering is plentiful. Usually it should be watered every other day. But if the air in the room where you put it is dry (especially often in winter), then it will be better to water every day.
You need to water the plant from above, and it is better to drain excess water from the pan. As you probably already understood, soil moisture must be monitored so that the leaves do not begin to fall off.
Azalea First Aid

What should never be allowed:
- Droughts;
- heat;
- An excess of moisture;
- Direct exposure to sunlight.
- A sharp change in temperature;
What to do if the plant begins to wither:
- Examine the soil in the flowerpot;
- Moisturize, if necessary;
- Monitor air humidity;
- Perhaps the location is not the most suitable - move the plant to a cooler place, away from the sun.

If the azalea began to throw off the leaves, this is most likely the first signal that the plant is starting to die. What to do:
Azalea is a very demanding and capricious plant. It requires not only care in accordance with all the rules, but also a lot of attention. It often happens that even as a result of all rescue operations, the azalea cannot be brought back to life. Therefore, it is better to follow the flower every day than to bring it to a similar state, and then frantically try to save it.
If you properly and carefully care for your flower, it will delight you with its luxurious flowering for many years.
To an inexperienced grower, it will certainly seem that the azalea is very time-consuming and brings a lot of trouble. But in practice, all these rules gradually become a habit that will bring only pleasant emotions.