Ceramic and tile surface finishing is one of the most visually appealing options today. finishing in residential, administrative, commercial or other premises. And in addition to external beauty, this finish has a number of advantages:
- moisture resistance;
- strength;
- and durability.
At the tiled or ceramic tiles there is only one drawback that makes it inaccessible to many finishing options. This is a high cost, or rather, the high cost of installation, coupled with expensive prices for the material itself. The master tiler will have to pay a tidy sum. And no wonder - the work is painstaking, requiring concentration, certain knowledge and skills, and accuracy. The tiler not only selects tiles according to the pattern and colors during installation (plus, he calculates the required volume), he also observes the planes, laying them out at the required level.
However, you can save money if you have the right amount of time for self-assembly and strictly follow the laying technology. And also pay attention to all the useful tips that professionals in this area of finishing give.
How to lay tiles with your own hands?
Even if you have never had to do anything like this, the amateur has a good chance of putting tiles on the floor or wall with quality. It is only important to be patient, be careful and consistently follow all the necessary technological steps.
But first you need to get the right tool:
- hydro- or laser level, plumb;
- square;
- perforator with mixer nozzle;
- polystyrene foam float for "stretching" the plaster over the surface;
- trowel;
- aluminum rule;
- notched trowel;
- tile cutter;
- rubber spatula or jointing sponge.

Technology self-laying ceramic and/or tile:

Alignment is a mandatory procedure, because without this, the corner of the cladding can simply be “filled up”. This means that there will be a large gap in the width of the seams, which looks ugly and is bad for the quality of the installation as a whole. The evenness of the corners is checked with a special tool - a square, which is installed exactly in the corner, and its edges should lie tightly along the walls.
Laying tiles on the wall with your own hands
So, the prepared walls, from which the previous finishing layer / layers were removed, must be plastered in order to level them as much as possible.
To do this, the store must purchase the appropriate dry plaster mixture on cement base. And knead the composition with water in the proportions indicated on the package. And in order for the solution to turn out to be of high quality, it is worth using a special construction mixer or a special nozzle for a perforator.


Plastering process vertical surfaces simple, but requires certain skills:
- first, the solution is thrown with a trowel in small portions onto the wall;
- then, in a circular motion with a polystyrene foam grater, the solution is stretched over the surface;
- it is necessary to constantly monitor the evenness of the wall using a laser, hydro or conventional level.
If the wall is large in area and / or has significant irregularities, then it will be necessary to plaster on aluminum beacons with a T-shaped section, 5 and / or 10 mm in diameter, planted strictly vertically on the mortar layer. In this case, the size of the rib is determined depending on the size of the irregularities. The step will be 1 or 1.5 m.
As soon as the layer with beacons sets, it will be possible to throw a solution between the slats. And remove the excess with a rule thrown between rows of beacons.
How to plaster walls according to the rules? You will learn about all the secrets by looking this species eo overview:
Now you can start tiling the walls:
- knead dry glue to the consistency of thick sour cream. Important: you don’t need to do a lot at once, otherwise the glue will cool down, losing its qualities;
- apply adhesive mixture on each tile along the entire back surface with a special notched trowel;
- masonry is carried out from the bottom up and its evenness is constantly monitored (in each of the rows);
- and it is necessary to observe the same width of the seams using special plastic crosses (they are sold in various sizes).
Of course, in the process of laying you can not do without cutting the tiles. This operation is performed on special equipment - a tile cutter. 
Detailed instructions for tiling walls are presented in the video review:
Laying tiles on the floor with your own hands

The floor, before laying ceramic tiles on it, will also need to be leveled. Almost by analogy with the walls, but only by the screed method.
With minor unevenness of the floor surface, you only need a self-leveler - ready-made dry mortar. It will need to be closed with water and laid out on the floor. And this screed itself will level the surface.
If the irregularities on the floor are serious, there are noticeable level differences, it will be necessary to level the surface with a screed along the beacons. A solution of cement-sand mixture.
With a concrete floor, everything is simple and clear, but with a wooden one it is more difficult. The fact is that laying tiles on old boards is by no means recommended. It is necessary to lay new ones and at least 2.5 cm thick. In this case, the wooden surface must be cleaned and treated with special impregnations against fungus, water and rot. A waterproofing layer must be laid on top of the tree. Can be taken roll material, and you can use compositions for spreading on the surface. Then a reinforcing mesh is laid, and concrete is poured after it. And you will have to wait until the screed hardens.
In general, it takes at least 4 weeks for concrete to harden (rather than dry). Only special plasticizer additives for solutions can speed up the process.
As soon as preparatory stages completed, you can start laying tiles. How to lay tiles on the floor? Step by step, of course:
- Prepare the tile adhesive by kneading the selected dry mix as written on its package. And you need to do exactly as much as you plan to spend, which is called "at a time."
- Apply the required amount of adhesive to the back of the tile and spread over the entire surface with a special notched trowel.
- Glue the tiles on the floor, starting laying from the far corner of the room and moving towards the exit.
The evenness of the installation is checked in each row. The width of the seams is also controlled.

Regardless of where you had to lay the tiles yourself - on the floor or on the walls, once the process is completed, you need to perform one more obligatory finishing operation - jointing. That is, fill special composition a certain shade of the resulting seams.
This is done for both practical and decorative purposes. And experts do not recommend saving on the fugue, otherwise the seams will crack.

Seams are fugued with a special spatula or a special sponge. The mixture is prepared according to the recipe printed on each package. And after the composition dries, its excess is gently washed off the tile with plain water.
A short video instruction for tiling the floor:
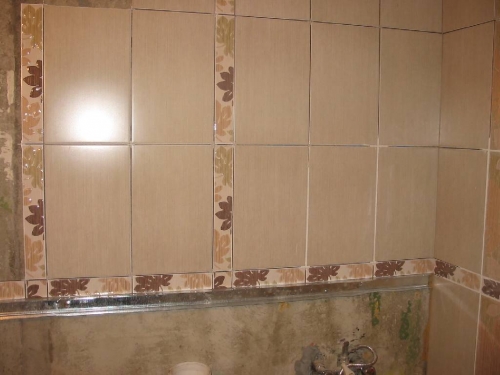
How to lay tiles in the bathroom with your own hands
Most often, tiles are laid, of course, in bathrooms and bathrooms. The cladding process is not much different from those described above. The main thing is to choose the right plaster and adhesives. And also correctly calculate the required number of actual tiles. So as not to buy later.
There are a few tips for laying the material in this particular room:
- edged elements are best placed at the bottom and in the corners;
- it is worth using a horizontal starting rail;
- the lower edge of the tiles in the initial (lower) row must be installed along this wooden rail;
- check the evenness of the "sides" in the rows with a laser level.
It should be remembered that ceramic or tile, even when laid on a properly prepared surface, dries for several days.
The specialist tells about the secrets of laying tiles:
Updated: 08/24/2019
The tile is very strong, durable and wearproof material. That is why this type finish coat so popular. In apartments, tile is most often used to finish the floor of bathrooms, kitchens, halls and hallways. In addition, tiles very often finish the floor in public organizations: banks, shops, offices, beauty salons; Tiled tiles often cover the floor of socially significant objects: hospitals, hospitals and children's institutions. And this is not surprising, because this material is so easy to clean, suitable for rooms where many people pass every day, and can withstand heavy loads. In addition, the floor, covered with tiles, looks very aesthetically pleasing.
Floor tiles should not only please your appearance, have a thickness characteristic of floor tiles. It is also important to take into account the specifics of the room, the floor of which it will cover. Taking into account this specificity, it is necessary to determine what class of abrasion the floor covering should have.
bathroom tiles
The bathroom usually does not have high traffic. Therefore, you can buy any floor tiles, which you like, you can ignore the abrasion class. Tiles must be elementary resistant to aggressive detergents and water. We also recommend that you opt for tiles with a non-slip surface that is devoid of gloss. This is necessary for your safety.
The floor in the kitchen gets dirty quite often. And not only dust and pet hair can act as pollution, but also fatty sauces, milk and broth. Therefore, to make cleaning easier, we recommend avoiding tiles with a textured or porous surface for finishing the kitchen floor.
In addition, in the kitchen there is a risk of falling knives, plates and any other items. Therefore, kitchen floor tiles must be durable. It should be selected from samples marked with at least the third class of abrasion.
Due to the high traffic of the hall or hallway, choose tiles with the fourth class of wear resistance for flooring.
| PEI classification | Description |
|---|---|
| PEI I | the tiles of this group assume a light degree of exploitation without exposure to abrasive particles (used for walls in bathrooms) |
| PEI II | tiles of this group are intended for operation with a small presence of abrasive particles (used for walls / floors in bedrooms, offices, bathrooms) |
| PEI III | tiles of the third group fit in any residential premises and in small offices that do not have a direct entrance from the street. Tiles are not suitable for stairs, corridors and other areas with high traffic |
| PEI IV | the tiles of this group have higher strength characteristics than the tiles of the previous group, and therefore are suitable for any living rooms, as well as for covering stairs, halls, corridors |
| PEI V | Tiles of the fifth group are the most durable and abrasion resistant glazed tiles. Therefore, only it is used both in private and public interiors with traffic above average (offices, shops, cafes, restaurants) |
There are three main methods for laying tiles on the floor.
"Seam to Seam"
Laying floor tiles "seam to seam"
This method is preferred for the first independent experience do-it-yourself tiling. It is the simplest and even beginners will be able to perform such a layout. You can even simulate a checkerboard pattern using square tiles in two colors.
"Scattered"
This method resembles brickwork and looks very interesting. Allows you to create a laminate effect when laying rectangular tiles with a wood texture. Recommended to be done by craftsmen with some experience. In addition, this method allows you to mount different-sized tiles on the floor. With a well-thought-out scheme, you can get an unusual and beautiful floor.
Diagonally
This is perhaps the most beautiful, but also the most difficult to perform tiling method. It is worth doing such work with your own hands, only for those craftsmen who have considerable experience behind them. This technique allows you to hide the defects of the room, for example, it will not be noticeable that the walls in your kitchen are far from perpendicular to each other. Laying tiles diagonally can even optically expand a room. When performing this pattern, the laying of tiles starts from the corner, and not from the center, as in other cases.
Possible installation errors and their consequences
In the case of floor tiles, annoying flaws can be made even before installation begins. When buying tiles, you should not save too much. The cheapest tile has poor geometry, which means that it will be impossible to lay it neatly. Approach the choice of tiles wisely, remember that the miser pays twice!
When buying glue or a mixture for its preparation, follow the expiration date and compliance with storage conditions. The mixture must be fresh and not frozen. Usually the shelf life is 1 year, but some tile installers prefer to use mixtures produced no earlier than 6 months before the date of installation. Perhaps the opinion of professionals should be heeded. But the price when choosing glue does not matter.
If you forget about the necessary supply of tiles, then you may have a floor covering made of different shades. The same article in different batches may have subtle differences. To avoid colorful tiles on your floor, purchase 10% more tiles when laying seam-in-seam and 15% more when laying diagonally.
If you haven’t leveled the base carefully enough, the coating will be sloppy and uneven. Subsequently, some tiles may even move away from the base. To avoid wasting time and money on the dismantling of poor-quality coating and laying new tiles approach the preparation of the base as carefully as possible.
If you neglected waterproofing when preparing the base, it could cost you big money in case of a breakthrough water pipes. If the neighbors below are flooded, you will have to voluntarily or legally compensate for the damage.
If the preliminary layout is not done correctly, then cut tiles may be visible. You can try to hide this aesthetic defect, for example, with cabinets or floor planters. A more radical method is the dismantling of floor tiles and the laying of new tiles, according to a carefully thought-out scheme.
The advantages of a tiled floor include the following qualities:
- attractive appearance;
- abrasion resistance;
- ease of cleaning;
- environmental friendliness;
- strength;
- durability;
- moisture resistance.
The tiled floor has the following disadvantages:
- injury risk;
- when falling on a tiled floor, ceramic dishes are guaranteed to break;
- a frying pan or other similar object that has fallen to the floor is likely to crack the tile;
- the complexity of laying;
- the need for heating.
Step-by-step instruction
All work on laying the tiled floor can be divided into two blocks.
Substrate preparation and waterproofing
Tiles should only be laid on a perfectly flat floor. It should never be thought that minor floor irregularities can be leveled out using a thick layer of mortar to fix the tiles to the floor. The tile must be fixed on a small layer of mortar, which must be applied in an even layer over the entire area.
Before proceeding with the installation of tiles, you need to make a special leveling layer -. It is preferable to lay tiles on concrete screed, but in the hallway and in the kitchen, you can install a tiled floor on a wooden subfloor.
In this case, each floorboard will need to be processed using a manual or electric scraper, then sand the remaining irregularities, and then putty and cover the cracks. Alternatively, you can level the wooden draft floor with a moisture resistant one. Use sheets with a thickness of 12 mm or more.
In the kitchen, bathroom and toilet, that is, in those rooms where there is a high risk of breaking water pipes, it is also necessary to make a waterproofing layer. This is a very important part of preparing the base for the tiled floor. Properly executed waterproofing will help you subsequently avoid unnecessary expenses. In the event of any accident, the water will remain in your apartment and you will not have to spend money on repairing the neighbors below.
Step 1
Step 2
The old screed must be tapped with a hammer in order to detect possible cracks and voids in time.
When the primer is completely dry, apply a new one. cement screed. You can familiarize yourself with the intricacies of this process in the relevant. If the old layer has only cracks and minor irregularities, then it can be brought to the ideal with a small amount of self-leveling compound.
Step 3
The dried screed must be carefully dedusted and coated with two layers of Glims primer.
Step 4
Let's start drawing coating waterproofing. To do this, we process the joints of the walls and the floor around the perimeter of the entire room with a special mixture and, after the putty has completely dried, we glue all the joints with a rubber waterproofing tape with special care.
Step 5
We process the entire floor with a coating of waterproofing mixture, going onto the walls to about 20 cm. The application should be continuous and three-layer. Dry each layer for a day. For work, use a wide brush or roller.
Step 6
Then, when the last layer of waterproofing has dried, cover the floor and walls to a level of 20 cm with Stenotek KR Betonokontakt primer. It has excellent adhesion, as it contains coarse quartz sand.
Step 7
After 24 hours, you need to set the beacons to a height of at least 15 mm and pour with a mixture of Vetonit 5000. Level the solution as a rule, based on the profile of the beacons.
Step 8
After 48 hours, when the self-leveling floor dries out, we again treat the entire area with Glims primer.
After 3 hours, you can already start laying tiles on a perfectly flat and completely waterproofed floor. In addition, when following this instruction, the tile will lie on enough solid foundation from self-leveling floor and tile adhesive.
Direct installation of tiles
Calculation of the required number of tiles when laying "seam-to-seam"
You need to measure the floor of the room with a tape measure, and calculate the floor area. We divide the result by the area of one tile and add 10% to have some stock of material. So, if the floor area is 6 square meters, and a square floor tile with a side of 30 cm has an area of \u200b\u200b0.09 square meters, then we need: 6 / 0.09 \u003d 66.66 tiles. We round up to 67 and add 6 pieces in reserve. We buy 73 tiles.
Calculation of the required number of tiles when laying diagonally
The calculation will be similar, but with some features. Tiles that will lie around the perimeter of the room will need to be trimmed, so the reserve amount should be increased to 15%. For the same area of 6 square meters, with an area of one tile of 0.09 square meters, we need to buy 77 tiles, since 66.66 * 15 = 10.
The amount of adhesive needed depends on the size of the tile. The larger the area of the tile, the thicker the adhesive layer will be needed. Most often, when repairing apartments, cement tile adhesive is used. Consider examples of glue consumption.
A spatula of the correct size will help reduce consumption.
This information, as well as the calculation of the amount of glue you need, is best specified on the packaging. This is due to the fact that cement glue different manufacturers has different density. You can also purchase both ready-to-use glue and dry mix. The first option is more convenient, but the second is cheaper. If you are laying tiles on top of a warm floor, then you should choose a specialized adhesive for this purpose.
We mark the base and calculate the location of the tiles
To make your floor look perfect, you need to apply the markup. Mark the center points of the opposite walls and draw the center lines of the room through them. If you are laying tiles diagonally, then connect the corners of the room with straight lines. When laying tiles, be guided by this markup.
Lay the tiles on the floor, following the selected layout plan. If not all tiles fit entirely, then they will need to be cut. Try to arrange the tiles so that the cut elements are hidden. If the room has a central object, then surround it with only whole tiles. At the entrance to the room, only solid elements should also be located.
For cutting floor tiles use a special tile cutter.
In a container specially designated for this purpose, pour clean water and pour the dry mixture in the proportions indicated on the package. Stir the solution thoroughly, let it brew for a few minutes and mix again. This approach will achieve maximum uniformity. We advise you not to mix the entire amount of glue at once, as many solutions dry out rather quickly and become unsuitable for further use. Dilute the glue in parts - this will allow you to avoid unnecessary costs.
Ready mixtures need only be mixed before use.
Let's start laying tiles
Using a double-ended spatula, apply tile adhesive to the floor. Apply it smooth side spatula, and spread with a notched. The larger and heavier the floor tiles, the larger the trowel teeth should be.
Apply adhesive to no more than 1 square meter of floor at a time. Start laying tiles from the center of the room, focusing on transverse or diagonal lines. To maintain equal gaps between the tiles, use special crosses.
Having aligned the tiles along the line, you need to insert crosses between them, and insert wedges from the side of the wall to fix it from accidental shift
For better adhesion tiles with a surface, tap each tile with a rubber mallet after laying, you should act from the center of the tile to the edges. Glue cut tiles only after all solid elements have been laid.
Constant checking of the quality of laying with the help of a water level will allow you to achieve a perfectly even coating.
Grouting tiles
When adhesive solution dry, you can remove the crosses and proceed to grouting. Grout mixes are silicone, epoxy and cement based. Despite the different composition of the grout, they are almost identical in their properties, differing only in the way they are prepared and used.
Before starting this stage of work, vacuum the tiles and joints.
Choose a grout based on the color of the tile. It can match in tone, harmonize with the tile, or have a contrasting shade. It all depends on your imagination. Silicone and epoxy grouts are sold ready-to-use, and cement will need to be diluted according to the instructions on the package.
Glitters - colored sequins for adding to epoxy and some cement grouts
With a rubber spatula, apply a little grout to the seam and press inward. Position the spatula over the seam and apply pressure over it to remove any excess.
After the grout has dried (the exact time is indicated on the package), remove masking tape, wash the tiles warm water with a soft sponge and wipe the surface dry with a flannel cloth.
Video - Laying tiles on the floor with your own hands
Most often, laying tiles on the floor is trusted by professional tilers and they do it for a reason. After all, the durability and beauty of the coating greatly depends on the quality of laying, and the process of work itself is very complicated. However, even a beginner can lay an even tile on a fairly even base with his own hands and according to the standard “seam-to-seam” pattern. The main thing is to choose the right mounting solutions and strictly follow the technology. Our step-by-step instruction with photos and a selection of useful videos. This tile laying theory will also be useful to those who need to control and accept the work of tilers.
Materials, tools and equipment
Here is a list of the materials and tools you will need in the process of laying, cutting and grouting floor tiles.
Tools and equipment:
- Roulette, metal ruler and corner;
- Construction pencil for marking;
- Building level and rule;
- Construction mixer or drill with a stirrer attachment;
- Tile cutter or electric tile cutter;
- Core or glass cutter (needed for curvilinear cutting of tiles);
- Tile cutters (for cutting curved);
- File (for grinding cut edges);
- Putty knife;
- Notched trowel (6-8 mm);
- Master OK;
- Rubber spatula for grouting;
- Rubber mallet;
- A bucket with a sponge and a rag;
- Knee pads and household gloves.
materials
In addition to the tile itself with a 10% margin, you will need:
- Tile adhesive corresponding to the base material (for concrete, wood, old tiles, etc.), as well as the characteristics of the tile itself;
- Crosses of the desired size;
- Grout of the desired color;
- Primer.
Step 1. Preparing the base
First you need to prepare the base so that it is even, clean and dry. It is preferable to lay tiles on a concrete screed, but if desired, you can also put them on old tiles or wood, chipboard (or other similar material). However, keep in mind that when installing tiles on old cladding the height of the final floor will increase.
To lay tiles on a concrete screed you need: remove possible roughness with a scraper, vacuum the floor, wash with an alkaline cleaner, then cover with a coat of primer (preferably) and wait 2-4 hours until the floor is completely dry. Next, if concrete base uneven (deviations of more than 5 mm per 2 linear meters), then it must be filled with some kind of leveling compound and wait for it to dry.
To put a tile on an old tile you need:
- To improve the adhesion of the old tile with glue, it is passed along with sandpaper or a grinder;
- Then the coating is vacuumed and washed, if necessary treated with a primer (drying in 2-4 hours is required) and covered with a self-leveling mixture.
Attention! When laying tiles on the underfloor heating system, turn off the heating 1-2 days before starting work. Turn on heating or floor heating it is possible only 2-3 days after grouting. For laying ceramic tiles on a “warm floor”, you need to use an adhesive with a high content of elastic polymers, which will prevent thermal deformation of the base.
Step 2. Drawing the Markup
Once the floor is dry, you can start drawing markings. There are many ways to draw markup, but they all have the same goal:
- The floor must be marked so that, firstly, the cut tiles are placed out of sight; and secondly, cuttings were required as little as possible. Ideally, tiles should be cut by a third or a maximum of half.
So, for example, the markup can be built in such a way that whole tiles are placed at the entrance, along the axes of the window opening, or, say, at the threshold balcony door. In our article, we will consider one of the most popular ways of laying tiles on the floor - along two perpendicular axes from the center of the doorway.
So, draw a line from the center of the threshold to the center of the opposite wall with a cord or laser level. Next, along this line, begin laying a row of dry cross tiles. After laying the last whole tile, draw a line along its outer edge so that you get two strictly perpendicular vertical lines as in the diagram below. It is advisable to use a square to make sure that the corners are straight at 90 degrees.

In the corner of the perpendicular, we will glue the first tile, and from it we will lay the first row (along the horizontal line).

Step 3. Laying the first tile and the first row
Dilute the adhesive in a bucket according to the manufacturer's instructions, apply it with a spatula to one of the corners of the intersection and at the same time to the area of several tiles of the future first row, slightly going beyond it. Then smooth the adhesive with a notched trowel, keeping it at a 60 degree angle. Try to always keep the "comb" at the same angle so that the glue is the same thickness.
Attention! If the tile has a size of more than 30x30 cm or 20x30 cm, then the adhesive must also be applied to the tile itself in a thin layer (apply the adhesive to the tile and immediately remove it almost completely with the same spatula). For very large sizes, the layer of adhesive on the tile can be thicker and thinned out with a notched trowel as shown in the photo below.


Then, in the same way, you should glue the second tile and level it with the first one using a mallet and a rule. Make sure the tiles are level by placing a spirit level directly on two tiles at once as shown in the photo below.

Check the height of each laid tile with the previous one. If necessary, remove excess or, conversely, add glue
Only when both tiles are aligned, insert crosses into the corners of the tiles and into the seam.

Now continue gluing the tiles in the same way until the entire first row is complete. Walk along it again with the rule and check the evenness with a level.

A few rules and useful tips for laying
- The subfloor and tiles must always be dry.
- Try to apply glue to no more than 1 running meter facing area at a time.
- Glue that has stood for more than 30-40 minutes becomes unsuitable for work (with the exception of adhesives from some manufacturers). Therefore, try to knead the glue a little at a time.
- To prevent the glue from drying to the comb, constantly soak it in water.
- The crosses must be removed before the glue dries.
- Lean your knees on laid tile not desirable, as this may disturb its flatness.
- Tiles should be taken from different boxes, so a slight difference in tone will be invisible. Before starting work, be sure to check that the tone indicated on all boxes matches.
- On the back of the tile there is always the manufacturer's logo, by which you can understand where the tile has the top and where the bottom. Sometimes tiles have a special masonry orientation marker, which, for convenience, can be additionally marked on the end of the tile with a pencil.
- Have time to remove excess glue before it dries. It is best to remove it from the surface of the tile with a cloth moistened with solvent.
Alternative way of marking and laying the first row
Don't want to bother with markup? Then act the old fashioned way - start laying tiles from the most visible corner. If you are laying tiles on the floor in the kitchen, then you can start laying from the corner of the wall opposite the headset, then a row of cut tiles falls under it.
More useful information for marking and laying tiles on the floor with your own hands, you can learn from this video.
Step 4. Laying the remaining rows, cutting tiles
Hooray, the first row is ready and now, guided by it, we can lay the second row of cut tiles (see the figure below), and then all the rest.

- Attention! The first row is made up of only whole tiles, the cut tiles are placed later (in the diagram, the "cut" row is indicated as row 2).


How to cut the last floor tile adjacent to the wall? First of all, you need to determine the line of its cutting: put it on the penultimate tile already glued, put another tile on it and move it to the wall, but not reaching the wall at a distance of one seam. Along the outer edge of this tile, draw a line on the underlying tile. This line is the cutting line.

You can cut the tile in different ways and devices. Ideally, you should use a manual tile cutter or electric tile cutter(see photo above), if there is no such tool, then use a grinder. However, if the floor tiles are ceramic and not very thick (up to 9 mm), then you can apply the old construction trick and cut it ... with a regular glass cutter, as shown in this video.
How to cut tiles curved? Stick on the cut tile masking tape to prevent jagged decorative layer. Then, with a pencil, mark a rounded cut line, say under the pipe. Next, drill a few holes along the marked rounded line with a carbide drill bit (also suitable for porcelain tiles). And finally, with the help of wire cutters, pliers and special tile tongs, carefully break off the unnecessary part. Sand the cut with a file.
When you have covered the entire floor, make sure all crosses are removed and leave the flooring to dry for 24 hours.
How to cut the floor tiles with an L-shaped grinder, for example, under the protrusion of the ventilation duct, you can learn from this video.
Step 5. Grouting
After 24 hours, you can start grouting. To do this, first lightly wet the joints with a spray bottle or just a wet rag to improve the grip of the grout, and then dilute the grout.


Holding the rubber trowel at an angle, apply the joint compound to about 1 sq. meter of the floor and distribute it so that all the seams are completely filled. But be careful not to force the grout into the seams too hard.


After 15-30 minutes, remove excess grout with a damp sponge. In the same way, continue to grout the seams on other areas of the floor, with the exception of the joints along the walls. One hour after grouting the entire surface of the floor, it can be washed clean with water or mild detergents.


After a week, the seams can be additionally coated with sealant.
Attention! Walking on a freshly laid tiled floor is not recommended for the first 2-3 days, ideally 7 days.
Ceramic tile flooring is quite popular. Such material is often used to decorate floors in a bathroom, toilet or other utility rooms (for example, a boiler room). Laying floor tiles with your own hands is a rather time-consuming process. It requires care and precision. And how this is done, we will tell in this article.
Preparatory work
Work on laying ceramic tiles requires preparation. First of all, stock up essential tool. You will need:
- trowel, notched and wide spatula;
- building level and ruler;
- marker or pencil;
- tile cutter;
- hammer (simple and rubber), pliers, drill or puncher;
- plastic crosses for leveling seams;
- primer, grout, adhesive mass;
- ceramic tile.

To calculate the required number of tiles, it is worth resorting to simple mathematics. Knowing the area of \u200b\u200bthe room, divide it by the area of one tile. In this case, it is worth considering the width of the seams, 2–5 mm. As a result, you will receive the required amount of material. Add 10–15% to this value. This margin is necessary, the tile may crack during operation, or you will cut off any piece incorrectly.
It is imperative to stock up. The fact is that the shades of the tile can vary even in one batch. Therefore, if only one square is not enough for you, it will be very difficult to find the right color.

Now you need to prepare the surface. Remove all items from the room (furniture, plumbing, etc.). If there was on the floor old tiles, you need to get rid of it. You also need to do with the old adhesive mass. A puncher with a special nozzle in the form of a spatula or a chisel with a hammer will help you with this.
When performing dismantling work, do not forget about your own safety. Put on goggles, a mask, and put gloves on your hands.
The next step is to clean the entire surface. Remove large and small debris, sweep away dust and sand (or vacuum). Then proceed to level the base. If, as a result of dismantling, large depressions or bulges are obtained, then alignment should begin with them. The bulges are knocked down with a chisel, and the cavities are sealed with a cement-sand mortar. Then a sand-cement screed is laid on the concrete floor and it is leveled. At each stage, check the evenness with a level. The presence of irregularities in the range from 0.5 to 1 cm is allowed.

If the room has wooden floors, then the leveling technology is different. First of all, the boards must be impregnated with special paint on oil based. When the surface is dry, a layer of waterproofing is laid. Then, a reinforcing mesh is mounted to a height of 4–5 cm (for this you can use nails that are not completely driven into the floors). And only after that the entire area is filled with a leveling mixture (sand-cement mortar).
In rooms with wooden floors it is allowed to use thick plywood as a substrate (thickness not less than 12 mm). But the sheets must be laid on the surface without significant irregularities. Otherwise, under the weight of the tiles and the adhesive mass, the plywood may bend and break.

We markup
Laying ceramic tiles on the floor begins with markings. First of all (especially if you are installing for the first time) you need to do a dry layout. The tile is put into place without adhesive mass. This way you can calculate everything (where you need to cut, where difficult corners are formed, etc.). When laying out, do not forget about future seams between the tiles.
There are two main ways to lay out tiles.

The easiest is to start from one far corner of the room. This method is considered the fastest. This is how all novice tilers lay, or if you have to work in small narrow rooms, or rooms with complex geometry.
The second method is more complex - laying from the middle of the room to the sides. So the tiles are laid in large and free rooms. In this case, the room is divided into four equal parts. The first line is drawn from the middle of one wall to the opposite, the second is also in the middle, perpendicular to the first. Laying starts from any corner formed in the center of the room. In this case, you will have to cut the tiles around the perimeter of the room. When using this method of laying, a more attractive pattern is formed.

You can also choose the direction of laying tiles. Can be laid diagonally or in the usual straight way. The first one looks much more beautiful, but to create it you need to have experience in such works. That is why the second method of laying is much more common.

Whichever method you use, you still have to cut the tiles. Here it is important to remember one recommendation. Try not to cut too narrow strips, they will look bad. From a full tile, at least 20 percent of the area should remain. Also make sure that the most visible area is laid out from whole tiles.
Laying ceramic tiles
Now let's take a closer look at how to lay floor tiles. First of all, we prepare the glue. If you purchased a ready-made mass, then carefully read the instructions. If you like dry glue, then it must be diluted with water (also according to the recommendations from the manufacturer).
Since the process of laying tiles is quite long, it is necessary to dilute the adhesive mass in small portions. Otherwise, it will simply dry out and increase your financial costs.
The work is done square. That is, plots with an area of square meter and an adhesive mass is prepared for this area. After finishing one section, move on to the next.

First you need to cover the entire area with a primer. This will prevent mold from forming and make the surface more suitable for good bonding. Depending on the level of humidity in the room, one to three passes are made with a primer. Only after it has completely dried can you start laying floor tiles.
The surface is slightly moistened, and a layer of adhesive mass is applied to it. Using a notched trowel, the adhesive is leveled. In this case, care must be taken not to form voids and air sacs.

A layer of glue is also applied to the back of the tile. This is done using the same notched trowel. A thin layer should cover the entire surface. Then the tile is turned over and neatly laid in its place. In this case, you need to evenly press on the entire surface.
The tile is leveled by gently moving from side to side. Horizontal alignment is checked with building level or using a simple stretched thread. If the tile lay below right level, then a little glue mass is added, if higher, excess glue is removed.

A rubber mallet is used to level the tile along the plane. It delivers accurate strikes. So you can move the tile to the right place.
Leave an even gap between tiles. Its accuracy is achieved by using special plastic crosses. They fit into the resulting seam. If the tile is aligned with the crosses, then the gap is even and neat. Such a seam (2–5 mm wide) is needed so that the coating does not swell.

Near the walls you will have to cut the tiles. This is done with a tile cutter. A line is carefully drawn along the ruler, and then the tile is simply broken. But this must be done carefully.
Final stage
During work, it is necessary to periodically wipe the already made masonry section with a rag. This is necessary to wipe off the remnants of the adhesive mass before it hardens. And after laying the entire flooring, you can’t walk on it for at least two days.

After the glue has hardened, you can start grouting the seams. For this, a special moisture-resistant putty is used. This work can be done using rubber spatula. But first you need to clean the seams from construction debris and dust.
After all the seams are worn, you need to clean the entire floor from debris with a rag. Then the grout is given a day to dry and you can start wet cleaning.
This completes the tiling work. Some tricks and styling techniques can be found by watching the video and photos.
Video
Video about the features of laying tiles on the floor:
Photo


Laying tiles with your own hands is not an easy task, but it is quite feasible. If you cannot afford to pay the cost of these works, and a beautiful bathroom and kitchen do not leave your dreams, then with right approach everything can be done by yourself.
If you take into account all our advice, practice, you will definitely get your hands on it, and you will never be interested in the cost of laying tiles. You yourself can transform your room with the help of this practical, durable, beautiful material.
We calculate the required amount of material
So, for this stage you will need: level (plumb), tape measure, paper and pen. Calculations must be done very carefully.
The intended location of the tile, whether it be a wall or floor, is measured horizontally and vertically. According to the result obtained and the estimated size of the tile, the required number of tiles is calculated. Special attention should be paid to the corners. If the corners are crooked, you will additionally need a few incomplete tiles in order to avoid gaps.
Next, you need to sketch out the layout of the tiles and choose the type of cladding. Options laying of tiles protrude: diagonal laying, "butt-to-butt" and laying in a run. On this stage it is also necessary to determine the presence and necessary quantity decorative elements: friezes, borders, plates with drawings.
In order not to be mistaken in the number of tiles purchased, you can draw up a mini-diagram on paper on an appropriate scale, which will clearly indicate the location of both the tiles themselves and the decor. After that, you can only start buying and laying tiles, the price of which is often quite high. Therefore it should work important rule: "Measure seven times, and cut once!"
Laying tiles on the floor

Tiles fit perfectly flat surface gender. Therefore, if the differences are impressive, you should think about floor screed. Under the tile fit all types of screeds. over gypsum fiber sheets with a dry screed, the tiles are glued with Fliesenkleber glue. Only the completion of all preparatory work proceed directly to laying.
According to the rules for laying tiles on the floor, we first determine the pattern. To do this, lay out two cross rows along the longitudinal and transverse axes. And special plastic crosses inserted between the tiles will help control the thickness of the seam.

Exist different ways laying tiles.
Traditional

Diagonally

Offset (offset)

herringbone

Herringbone with attachment

Modular grid

Depending on what you choose, the first row of tiles is laid. When using the direct (traditional) method in large rooms laying starts from the middle, and in small ones - from the second row.
When using diagonal laying, the frieze is first marked, then whole tiles are laid around the perimeter, then cut tiles, and then the frieze is laid. Having laid the first trial row, be sure to check its plane with the help of a level.
Special attention should be paid to the corners. Since the tiles may not be concave equally, corners may protrude, therefore, in order to avoid uneven floors, the tiles must be set a little below the level. Be sure to ensure that the seams in perpendicular directions match.
With the help of a level and a corner, we lay lighthouse tiles. If the floor is uneven, they are installed in the high point. Next, a solution or glue is applied to the place where the tile will lie, the tile is placed on top and gently tapped with a rubber mallet. After that, you can fill in the remaining space in rows, periodically monitoring the level of tile laying.
The tile is perfectly attached to the floor with:
- cement mortar;
- glue;
- cement mortar diluted with plasticizers;
- bituminous mastic.
Laying tiles on the wall
Laying methods
Laying tiles on the wall can be done in three ways: traditional "butt-to-butt", in a checkerboard pattern ("ligation") or diagonally.
In the first case, you need to constantly monitor the coincidence of the vertical and horizontal seams, as well as measure the tiles in size.
When using "overlapped" cladding, the middle of the tile from the top row is located above the junction of the tiles in the bottom row. Laying using this method is greatly simplified, because. no need to constantly monitor the coincidence of the size of the tile.
Diagonal styling can often be seen in large rooms. The method is considered quite time-consuming and complicated, so if you decide to use the services of specialists, the prices for laying tiles may not please you. The main points that you need to pay attention to are the perpendicularity of the seams and the correct adjoining of the tiles to the walls.
Surface preparation

To start, check possible deviations surfaces from the axes: horizontally for the floor and vertically for the walls. The maximum allowable deviation percentage is 0.2%, i.e. it should not exceed 2 mm per meter of length.
Using a plumb or level, we check the vertical deviation for the walls. At correct installation plumb error will be smaller. It is best to hang the plumb line on nails specially driven into the corners of the room. With a long ruler, the deviation is checked over the entire height and width.
A flat surface is the key to success. Possible gaps immediately become visible if you apply an even beam or level. In the presence of large recesses, they must be carefully puttied. Small gaps up to 2 mm can be left unchanged.
Now, by tapping the surface, we check its strength. The presence of a baying sound indicates a fragile fit of the layer. In this case, the surface is cleaned up to brickwork or concrete. During tapping, sand shedding is also possible: such a layer is removed or enhanced using specially designed tools.
The technology of laying tiles on wooden surface involves the use of ruberoid and metal mesh. Reiki, roofing felt are stuffed on the wall, a mesh is attached. From above, it is plastered with a 15 mm layer of mortar, after which the tile is laid after drying.
In the figure: 1 - stuffed bars, 2 - wooden base, 3 - roofing felt or roofing felt, 4 - mesh, 5 - cement plaster, 6 - tiles
Grease stains, dirt, soap solution residues, paint - none of this should be on the prepared surface, otherwise the tile will not stick firmly enough. Painted walls are especially troublesome. Removing paint is a rather laborious process, but with the help of a perforator with a spatula or a cutting machine with a card brush, it can be greatly simplified and accelerated. The tile will hold better if the surface is primed.
Laying technology
The technology of laying tiles on the wall involves the preliminary laying of lighthouse tiles. To install the beacons evenly, pull the thread, which lags behind the surface by 5 mm. They are guided by it when installing beacons and leveling the plane. In this case, the parameters of the vertical and horizontal are necessarily monitored. For installation, it is best to use alabaster, because. it instantly hardens, and after laying a row, it is quickly and easily peeled off from the lighthouse tile, which is already installed on a permanent basis.
To clad the wall start from the center of the wall towards the corner. The center of the wall must be marked by drawing a vertical line to the floor with a pencil. From this place, laying begins. If, with a checkerboard pattern in the first row, the central line will pass along the junction of two tiles, then in the second row it will fall on a whole tile.
Now we mark the rows horizontally and carefully lay the tiles, starting from the bottom. If you are sure that the floors are even, then the tiles can be installed directly on them.
If during the laying process you notice that you have deviated from a straight line, you can slightly lift the already laid tile. This is done using wedges that are driven under the tile.
The tile can also be installed on a screwed rail, in the corners of which plumb rails with an attached cord are placed. All this is done in order to evenly lay the tiles both horizontally and vertically. After the tile is laid, all fixtures are removed and the voids are filled with mortar.

We do the laying directly as follows: on the reverse side of the tile, using a trowel, we apply a solution (cement, glue), distribute it with a comb, press it firmly against the surface, and tap it. To do this, use a rubber mallet. The level of the tile should match the level of the previously stretched rope. The entire space between the tile and the wall must be filled with mortar, otherwise adhesion will decrease over time and the tile may fall off. The applied layer of the solution should be from 7 to 15 mm. The remains of the solution that appeared on the seams are removed with a trowel.

We insert special crosses between the tiles, which will allow you to control the thickness of the seam. After the laying process is completed, carefully clean the seams from the remnants of the solution and dust, take out the crosses.

Tile cutting
In some cases, if the size of the room requires it, you need to cut the tiles. For floor use a tile cutter, for wall - roller glass cutter or carbide cutter.

Before cutting, the tiles are marked. Then, along the attached metal ruler with pressure, they are carried out with a cutter, after which they break the tile itself, placing it under wooden block or special tongs.

Grouting
The last step is grouting. Their width for tiles, the size of which is 10, 15, 20, 25, 30, 60 cm, should average 3 mm. The surface will look more aesthetically pleasing if colored grout is applied to the seams. But even the usual white grout will give the wall with the laid tiles a neat and finished look.

The grout is applied either with a special scraper, grater, or using a bag with a nozzle resembling a confectionery. After application, the grout is evenly distributed to fill all the seams. Then dry excess is removed with a grater, the seams are treated with a sponge soaked in water.

If the tile is glazed, then grouting can be done immediately after the mortar has dried. If the tile is matte, then it is moistened with a sprayer before grouting.
For grouting use cement mixture or epoxy resin. Unglazed tiles are additionally treated with a sealant. This will prevent the appearance of stains both on the tile itself and in the seams.
A master class on laying tiles (video) is easy to find on the Internet. Are you now wondering how much it costs to lay tiles? We are sure you can do everything yourself!