In many devices, when the power supply element (battery, accumulator) is replaced, the data is completely reset. In the case of replacing the battery on the Starline a91 alarm key fob, the time is reset, after which it must be set again. But not everyone knows how to set the time, and this is a must when using the timer function.
Modern car alarm system
Have been in use for many years modern systems car alarm. Once upon a time it was a luxury, but now it is convenience and safety. Car alarm refers to a 12 volt device. Has interactive authorization. Each alarm has its own encryption keys. They also have a function to remotely start the car engine according to the time set on the timer or the start is carried out according to the temperature of the internal combustion engine (when the engine temperature drops below the specified one, the engine starts).  The interactive authorization function protects the car owner from hacking, which is carried out through an electronic reader. Resistant to the latest code grabbers thanks to dialogue codes and the new frequency hopping method.
  Methods of such protection, such a method of data encryption are used in two control panels: main and additional. The StarLine A91 alarm device has good resistance at low temperatures. Works great at temperatures ranging from -45 to +85 degrees.
The functions that are capable of performing and are the same. Differences only in the operating range, reliability, ease of use.
Advantages of StarLine A91
- This alarm model is reliably protected from hacking, because it has a new data encryption method. But, attackers are also constantly improving equipment to steal the alarm code -.
- There is a mode "Megapolis". It should be used in densely populated areas where there is a lot of radio interference.
- It is possible to start the engine in different ways.
- The device is Russified.
- Thanks to modern software, the speed of the Starline A91 alarm is 20% higher than the speed of the same devices, but previous models.

How to set up the Starline A91 keychain
The remote control, remote control key fob can perform several functions, namely:
- Set the current time on the device display.
- Activation of the set alarm time.
- The ability to turn it on and off.
- Ability to set the countdown timer.
- The ability to activate the function of starting or shutting down the internal combustion engine.

How to set the time on Starline A91:
- Press and hold button #3 on the key fob. The third button is used to change the time. Keep this button pressed until the following beeps appear: one long melody - short signal— 2 short beeps. When the three sound modes have passed, the time display starts flashing. Button number 1 should be used to increase the time, number 2 - to decrease.
- After the time is set, you need to hold button No. 3 for a while to proceed to setting the minutes. As soon as the indicator with minutes starts flashing, we adjust the minutes with buttons No. 1 and No. 2.
- Then, again, press button No. 3 to set the alarm time. Also hold until the alarm starts flashing and set the time with the keys No. 1 and No. 2.
- Next, you need to adjust the minutes of the alarm. Again, hold button No. 3 until the minutes indicator blinks and also set the desired values.
- Then, with a short press of button 3, the alarm is turned on or off.
- By further pressing the 3rd button, the time setting mode for the timer is activated. When the timer time indicator flashes, set desired value.
- If you press button 3 again, you can also edit the minutes of the timer with buttons 1 and 2.
- If you still press the third button, the timer will turn on or off. The first button turns off, the second turns on.
As you can see, there is nothing complicated in setting the alarm time. This applies not only to this model, but also to the settings of key fobs. different models car alarms.
Video
This video shows how to set the time on the Starline A91 alarm key fob
And in this video in more detail how to turn off the Starline A91 alarm
And finally, the Starline autorun timer
Correctly setting the time on the Starline keychain is necessary in order to be able to automatically start the engine by timer. The nuances of setting the clock and date depend on the specific alarm model and will be different for the A series and versions E, D and B.
[ Hide ]
Time setting for series E, D, B
Instructions for setting the time on the key fob "signaling" StarLine models E90, E91, B94, B64, D94 and D64:
- Press button 4 with your finger and hold it down until one long and two short beeps sound.
- Wait until the beeps sound again (one short and two long) and the main menu functions appear on the display.
- By pressing the keys 1 or 4, activate the F-1 function, which allows you to set the time and date on the key fob.
- Press button 4 and do not remove your finger from the key until two short beeps.
- Using the buttons 1 (back) and 4 (forward) select the settings - step by step add the year, month, day, hours and minutes.
- Set the desired value for each of the parameters using buttons 2 (increase) and 3 (decrease).
Additionally, you can set an alarm, set a timer, select the type of signal you like from the list and adjust its volume.
- leave the key fob for 8 seconds, after which the menu will automatically exit with saving all the set values;
- press and hold button 1 until two short beeps, which will help you exit the menu and save all changes made.
How to set the time for A series
To set the time on the StarLine car alarm models A91, A92, A93, A94 and A61, you must perform the following algorithm of actions:
- Press button 3. Do not remove your finger from the key until you hear: 1 short melody, 2 short beeps, 1 short beep.
- When the hour display flashes, use the buttons 1 (increase) and 2 (decrease) to correctly set the hours.
- Briefly press button 3 and wait until the minute display flashes. Carry out the minute adjustment, also using keys 1 and 2.
- Quickly click on key 3 and wait until the key fob enters the alarm setting mode. Set the required parameters again using buttons 1 and 2.
- Press button 3 without a long hold to go to the timer setting function. Using keys 1 and 2 in the same way, set the correct values.
- To exit the menu, stop any actions with the key fob and after 10 seconds it will automatically hide the programming functions, saving all the entered parameters.
Photo gallery of key fobs of various versions of the Starline alarm
The photo shows the detailed location of the buttons on different models:
StarLine D64 StarLine A93/A63 StarLine B64 StarLine A64
Video about setting the time on the Starline A93 key fob
Causes of settings failure
The failure of the set time indicators in the StarLine car alarm key fob, as a rule, is caused by three main reasons:
- problems with the power supply;
- disruption at work software;
- mechanical damage.
However, there are other factors that can affect the operation of the device and disrupt the performance of the clock, alarm, and timer.
Why are the key fob indicators reset?
The main reasons for the failure of the key fob and resetting the time indicators:
- The battery discharged. When the battery is low, the device does not have enough power to normal functioning. As a result of this, serious violations can be observed in the operation of the pager, including zeroing of the time indicators. To prevent this, you need to regularly check the battery volume indicator, which is on all key fobs of the StarLine security complex. When the battery charge drops to a critically low level, the key fob emits a corresponding signal, and a characteristic icon appears on its screen. To replace the battery, you will need standard AAA batteries.
- Replacing the old battery with a new one. When you install a new battery, the time, date and timer settings are automatically reset. All other settings are saved in full and will be activated the first time the unit is connected to the alarm.
- Incorrect operation of the software. In the key fob software system, failures sometimes occur, which can not only reset the time and date, but also violate the settings of the alarm protection function. With this type of failure, the only way to optimize the operation of the key fob is to flash the device. It is recommended to entrust this task to specialists.
- Short circuit. The malfunction is a consequence of the ingress of water into the body of the device. To eliminate it, it is necessary to determine exactly which part burned out when the contacts interacted with moisture and whether it must be replaced.
- Mechanical damage. Dropping to the floor or hitting the key fob may cause the device to mechanical damage, such as unplugging some pins.
- Manufacturing defects. Sometimes a manufacturing defect is the cause of persistent failures in time settings. The key fob may stop working immediately after the alarm is set or after a certain period of time, depending on the severity of the assembly flaw. If a guarantee period not yet released, you need to replace the defective device with a working pager. Before you start using it for its intended purpose (arming the car, turning the alarm on and off), you must bind it to the anti-theft complex.
Trouble-shooting
If, after replacing the battery, the key fob still does not work, then a more serious breakdown that requires repair may have become the cause of the failure.
What will be needed?
To fix a problem in the StarLine car alarm key fob, you need to prepare the following tools, devices and items:
- a small Phillips screwdriver;
- brush with soft bristles;
- cotton buds;
- a bottle of medical alcohol;
- multimeter;
- soldering iron with a thin tip.
Repair instructions
To eliminate the breakdown and restore all functions of the remote control, you need:
- Remove the battery from the device.
- Using a Phillips screwdriver, unscrew the screw holding the two halves of the key fob body.
- Take a soft brush and gently clean the inside of the pager from dust and other contaminants.
- If stubborn dirt or liquid drops are present inside the device, carefully remove them with a Q-tip dipped in undiluted rubbing alcohol.
- Using a multimeter, check the operation of the motherboard, transistor, diode, and others. important elements. If, according to the results of the diagnostics, any part turned out to be inoperative, it must be replaced with a serviceable one. You can buy components for a key fob from an alarm at a radio parts store or other specialized points of sale.
- Using a soldering iron with a fine tip, install a new part into the device. With the same device, you can return the departed contact to its place.
- Assemble the pager body and tighten the screw with a screwdriver. Insert the battery back.
Keychain StarLine disassembled
How to reset the key fob?
To reset the already configured key fob parameters and return the alarm to the factory setting, you will need to do this:
- Get into the car, turn the key in the ignition and start the engine.
- With the engine running, briefly press the service button 9 or 10 times, depending on the model security system.
- Stop the engine and wait for 9 or 10 short sound signals from the anti-theft complex, which report a successful entry into the reset mode.
- Pick up the key fob and make one quick press on button 1.
- Wait until one short beep sounds from the security system, confirming the reset to factory settings.
- To leave the reset mode, you must turn on the car engine or wait a while until the system is automatically logged out.
If all the reset steps have been completed correctly, the car will respond with 5 flashes of side lights and 1 melodic signal, the duration of which will be longer than the previous ones.
The appearance of the StarLine alarm system on the automotive markets was a real discovery: a great combination of innovative features, a high level of protection and an intuitive interface made the system a leader among security systems. Why car alarms deserve such high marks, how it differs from analogues and how to set up the Starline key fob.
Features of the Starline alarm
The interactive data encryption method is one of the main features of the Starline car alarm, which reduces the risk of car hacking. All models of the system, designed for use in urban environments, have a large range, reaching one and a half thousand kilometers. Signaling resistance to radio interference is ensured by separate channels to which radio interference is directed.
A distinctive feature of the Starline alarm is self-diagnosis - the system automatically checks and controls the operation of all sensors in the car. The alarm key fob or the unit's LED indicator notify the driver of damage to the system or any of its elements. Any Starline alarm model is equipped with an instruction manual, which contains information about what type of protection is provided in a particular complex.
Car alarms are equipped with various protective mechanisms that prevent hacking attempts:
- Interception of the system signal is not possible through dynamic code;
- The alarm signal can be interrupted without removing protection from the car;
- The alarm signal is cyclic, but the number of repetitions is limited;
- In the event of a power outage, all car alarm settings are saved;
- You can turn off the alarm in an emergency by entering a personal access code.
Thanks to its compact and ergonomic shape, the keychain fits comfortably in the palm of your hand. The interface is completely in Russian, which simplifies the work with the system. The absence of an antenna on the key fobs simplifies their operation.
System Capabilities
When choosing a security complex, car enthusiasts pay attention primarily to its functionality and capabilities. Depending on the specific alarm model, the set of options and the number of protected zones may vary, each of which has an individual protection algorithm.
The functionality of Starline alarms includes:
- Control of the engine and its blocking in case of an unauthorized attempt to start are carried out by relays - digital or conventional.
- Remote ignition.
- Door, hood and trunk protection is guaranteed by limit switches.
- Glasses and a body of the car are protected from blows by two-level sensors.
- The condition of the car interior is monitored by a sensor installed inside it.
- Impossible to release the parking brake.
The instructions attached to the car alarm say that the system is able not only to protect the car, but also to notify the owner in case of hacking or his attempt. Notifications can be very different:
- Signal transmission to the key fob with feedback;
- Sound and light notification;
- Possibility of blocking the engine;
- Panic mode;
- The mode of safe blocking of the engine, simulating its malfunction.
Remote start and operation of the car engine are controlled by the car alarm processor. The functions of the system can be performed both automatically and manually by means of a key fob.
Principle of operation
StarLine alarm systems are equipped with special technology operating over a secure channel. After the security system receives a signal from the sensor, it checks it for authenticity. The response request for confirmation is sent in the form of encoded numbers.
A certain algorithm and a secret code allow the car alarm key fob to process the received signal and send a response to the control unit. The alarm will turn off if the signals sent and received in response match, and confirmation is received on the key fob. The entire process of signal exchange takes no more than a few seconds.
Instructions for use
The security system comes with an instruction manual, which not only explains the principle of its operation and how to use it, but also the installation process. Accordingly, the installation, configuration and operation of the car alarm can be carried out by the car owner independently, without contacting service centres and car repair shops.
Do-it-yourself Starline car alarm connection
The process of installing a security system requires a set of tools:
- wrenches;
- soldering iron;
- Nipper;
- Electric drill;
- screwdriver;
- Shrink caps;
- Tester - they will check the wiring.
Step by step installation process
Before proceeding with the installation of a car alarm, it is necessary to de-energize the car - disconnect the terminals battery. You can consider the installation process using the example of a Chevrolet Lanos car.
- The dashboard is removed. To do this, the dashboard is disassembled: the climate control and headlight control units, the lining under the “small” glove box and radio are removed.
Location of climate control and headlight control units
 The location of the screws on which the overlay of the headlight control unit is mounted
  The location of the lining on the right side
  The location of the fasteners above the dashboard
  Location of climate control unit mountings
 - The instrument panel itself is removed. It is attached with three connectors.
- The main car alarm connections will be made on the dashboard connectors.
- The pads of the torpedo and steering wheel are removed: the first is fastened with two self-tapping screws from the side of the steering wheel, two self-tapping screws and one screw from below, the second - with four self-tapping screws.
- A six-pin power connector is connected to the ignition lock.
- The cover is removed from the fuse box, the bolts that secure the fuse box itself are unscrewed.
- A wiring harness protrudes from the driver's door, located behind the fuse box. The central lock is connected to it.
- The LED lamp and the signal receiving-transmitting unit are installed inside the car interior.
- In the engine compartment there is a siren, a temperature sensor and a hood limit switch. The tailgate is attached to the trunk.
- All removed interior lining elements are returned to their place.
The locations of the parts of the system are determined in advance. The most reliable places for the control unit are the front seats or the space behind the instrument panel. The siren is mounted in a place protected from moisture - the space next to the engine is optimal. They try to position the antenna in such a way that it does not come into contact with the metal and wiring of the car.
A shock sensor is mounted in the central part of the cabin. This arrangement is chosen due to the fact that it must read the impact at the same distance from all sides.
An LED is attached to the center console. Such a prominent location warns would-be car thieves that the vehicle is under protection.
Connection of all elements is carried out only when the protected mode is enabled. After placing all the parts and setting up the system, grounding is performed and power is supplied. The installed alarm system is tested for correct installation and performance.
During the test, the car alarm may falsely work. The reason for this is the high sensitivity of the installed sensors - to eliminate such a reaction, it is necessary to recalibrate them.
Video: installing a StarLine alarm on a car
immobilizer crawler
An immobilizer is one of the anti-theft devices that block the operation of the engine and some other components in the event of an unauthorized entry and start of the engine. Similar devices are different increased efficiency what insurance companies use: agencies agree to conclude contracts with car owners only if the vehicle is equipped with such equipment.
It is impossible to visually determine whether there is such a device in the car or not - it does not give either sound or light signals. The main task of the device is to prevent the hijacker from starting the car. Even if the device is detected and subsequently destroyed, all components and elements of the machine will remain blocked, which often becomes a problem for the owner vehicle.
When installing an alarm system, you can bypass the immobilizer. There are several ways to do this, but one of the most popular is the use of a crawler - a module that allows you to overcome the immobilizer. Such prizhbory are created and sold by the same companies that are engaged in the production of security systems, related equipment and its installation.
The bypass module, or immobilizer crawler, is a compact device, inside and outside of which there are transceiver antennas. A chip or key is also hidden in the body of the device. Both antennas are designed to receive and transmit a signal when the vehicle engine is started using the alarm key fob. The crawler only works when the car is started from the alarm key fob and does not respond to the use of the key.
A specialist should choose an immobilizer crawler. The main difficulty in this process is the selection of a module corresponding to a specific car model: on many of them, the signal supplied by the immobilizer is too weak, which is why it has to be amplified first.
Bypass modules are developed specifically for specific models of alarm systems. For example, for the StarLine A91 Dialog system, the StarLine BP-03 crawler was created - it is this device that is synchronized with this car alarm model.
Setting up a car alarm
The first step after installing a security system is to properly configure it. It should start with binding to the key fob system.
Keychain binding
The keychain from the Starline car alarm cannot be worn together with metal keys. A similar taboo is imposed on any other security systems.
The car alarm comes with two remote controls. The main one - with a liquid crystal display and four control keys. The additional one does not have a display, it is equipped with only three buttons and a light indicator. Before using the key fob, the basic settings of the system are carried out:
- Set the date and time;
- Set an alarm - if the car owner needs it;
- Set up a timer;
- Adjust the volume of emitted signals;
- Select the beep tone.
Priority in system control is always given to the main key fob. In fact, it is the only remote control from which remote control security complex. An additional key fob can only be used as a duplicate in case the main one is out of order. Car alarm settings using the key fob buttons are carried out as follows:
- Several quick presses, each of which lasts no more than half a second;
- By pressing the key until a beep sounds;
- Double clicks on the buttons;
- Successive pressing of several keys.
The variations of actions with the key fob listed above are necessary to activate and deactivate certain functions of the Starline system.
Cursor setting
Some of the modes supported by the car alarm are programmed using the cursor method. In the user manual, the function keys are marked, with the help of which the configuration is carried out. Activation of the cursor method occurs by two keystrokes - one lasts until the sound signal appears, the second - fast - confirms the activation. As a result, an icon corresponding to the enabled function should appear on the LCD of the main key fob. The control buttons allow you to move from one character to another, selecting the desired function. Activation of the selected option is carried out by pressing other keys - their numbers are listed in the instruction manual.
Using the cursor method, you can activate and deactivate almost all Starline alarm functions:
- The function of locking and unlocking doors;
- anti-robbery function;
- Silent protection mode;
- Third party service mode;
- Turning the turbo timer on and off and many others.
Alarm modes
The Starline security complex has wide functionality and a set of programmable modes:
- Anti-robbery;
- Alarm immobilizer;
- Self-diagnosis of the system and sensors;
- Panic mode;
- Quiet mode with both running and off engine;
- Automatic start of the security system in case of its shutdown;
- Silent operation of sensors in response to impacts on glass, bodywork and wheels;
- GPS monitoring and determining the coordinates of the car;
- VALET mode - emergency call for help;
- Independent programming of a new key fob in case of loss of the old one with the destruction of the old encryption code;
- Automatic blocking of wheels in case of evacuation of the car by special equipment.
How to program them?
Activating the keys on the main alarm key fob allows you to control all the modes stored in the system memory. Changing certain parameters, adjusting and selecting modes are accompanied by sound and visual signals: icons appear or disappear on the display.
To program the modes, you must press a certain combination of keys on the alarm key fob. It matters not only correct sequence pressing buttons, but also the duration of their retention.
A few examples of programming car alarm modes:
- Sequential pressing of the first and second keys activates the silent guard mode;
- A similar pressing of the first and third keys starts the car engine;
- Pressing the second and first keys with a break in a second starts the car security with the engine running;
- Sequential pressing of the second and third keys turns off the engine;
- The key fob buttons are unlocked by simultaneously pressing the second and third keys;
- The lock of the key fob buttons is activated by simultaneously pressing the first and third keys;
- Panic mode is activated when the first and second buttons are pressed at the same time and the engine is turned off. With the engine running, a similar action will start the anti-robbery mode.
The meaning of the key fob keys and icons
Button 1
- A single press activates the sound mode of protection, a long press - silent;
- Double pressing activates and deactivates the shock sensor;
- A single click locks the car doors when the engine is running.
Button 2
- One press deactivates the armed mode with sound. Pressing again deactivates the same silent mode;
- A single press opens the door locks when the engine is running;
- Double single click activates the anti-robbery mode;
- A single press turns off the alarm.
Button 3
- One key press controls the system status;
- Double pressing turns on the search mode;
- Pressing the key on the key fob with the display starts the cursor programming mode. It includes various functions - temperature or time start, timer start, immobilizer and turbo timer activation, service maintenance.
How to set up system autostart
The autostart function of the security system is configured by the master who installed the alarm system using a personal PIN code entered into the modular control unit. During the first start-up, all factory settings and changes made to them are stored in the memory of the security complex.
Internal failures and system malfunctions are extremely rare, but if this occurs, they are eliminated by resetting all settings to factory settings. This can be done by pressing the service key VALET or entering a secret code.
Video: setting up the StarLine alarm
Sensitivity adjustment
A two-level sensor is installed in the Starline system, the principle of operation of which is based on the piezoelectric effect: before the car body is hit, it detects sound wave. Such sensitivity is guaranteed only by a rigid mounting of the sensor on metal surface associated with the body. To adjust the sensitivity, you need to increase the warning zones and decrease the other two. Then the security mode is turned on, and after 40 seconds a light blow to the body is made.
In a similar way, the level of sensitivity is checked: it is reduced if the reaction is too sharp. The zone of full alarm is debugged in a similar way. For the warning and alarm indicators of the shock sensor, the maximum sensitivity is 14, the minimum is 0.1. Zero value, of course, completely disables the sensor.
Decreasing the sensitivity level
In the service book of the car, the location of the alarm control unit is indicated only if the standard security system is installed in the car. Otherwise, you will have to focus on the VALET key: the wiring to the control unit departs from it. It is located, as a rule, not far from the pedal assembly. Sensitivity is reduced by adjusting the control responsible for this function. The indicator should not exceed the average values and not be lower than 4-5 units.
Setting incorrect sensitivity values can cause malfunctions in the alert system, due to which it will not be able to transmit signals about serious damage to the wheels and car body. The location of the antenna module also has an effect on the level of sensitivity. Mounting the antenna on windshield reduces to zero the probability of triggering the security system in the event of a blow to the rear of the body or wheels. You can change the alarm parameters and adjust the sensitivity by simply moving the module to another location and then checking it.
Car alarm problems Starline
The following failures can be considered common malfunctions of the Starline car alarm:
- Discharging key fob. The battery installed in the remote control does not have a long service life, therefore, at the first signs of incorrect operation of the system, it is worth checking and replacing the battery if necessary;
- Power problems - a discharged car battery, problems with the fuse box or the power supply system of the alarm itself;
- Damage to the central control unit. Such problems can lead to a complete failure of the entire system;
- Sensor malfunctions. Individual elements alarms can always be replaced with new ones.
Most problems can be solved by replacing the failed part with a new one. The most difficult is the control unit - its repair and replacement cost a large amount, since key fobs and some other alarm components must be replaced along with it. It is worth entrusting such work only to the masters who installed the security complex.
If the key fob does not respond
The lack of response of the key fob to pressing the keys is not always a symptom of a serious breakdown. In most cases, the cause of this malfunction is a dead battery. If, after replacing the battery, no changes have occurred and the key fob has not come to life, then it is worth looking for other causes of malfunctions in its operation:
- Near the parked car are high voltage lines or a powerful radio station - they can jam the signal coming from the key fob;
- The car battery is dead;
- The key fob is not in the alarm range.
In the situations listed above, it is enough to drive the car away and re-check the key fob. The absence of a positive result may require the disassembly of the system control panel.
- The key fob is disassembled. In the insides, it is necessary to look for cracks, traces of poor-quality soldering and other damage;
- With the help of a soft brush, debris, dust, wool must be removed. It is impossible to wipe microcircuits with liquids - they can fail;
- Departed parts are carefully soldered into place;
- All wires, conductors and other parts are checked with a multimeter.
If a complete check and analysis of the key fob did not begin to respond to keystrokes, then you should pay attention to the tuning capacitor. It is rotated 10 degrees with a screwdriver in programming mode and with the button pressed. The procedure is repeated until the system and key fob are synchronized.
Video: StarLine alarm key fob repair
Advantages and disadvantages of Starline car alarm
The main advantage of the StarLine car security complex is its ease of installation: a clear presentation of all installation steps in the instruction manual allows the vehicle owner to independently carry out all the necessary actions.
The advantages of Starline alarm include:
- The ability to install on any car, regardless of the type of transmission and engine.
- Resistant to temperature shocks and atmospheric influences.
- The durability of the key fob.
- Protection against third-party signals and interference.
- Autorun function, which increases the efficiency and comfort of using the system.
Car alarm at a relatively low cost has not only standard set function, but also additional options. Wide the lineup allows motorists to choose the most suitable system for the car. The Starline alarm functionality may vary depending on the model and include different options:
- Tracking the location of the car through satellite communications;
- Auto start of the engine;
- Various ways to alert the driver in emergency situations;
- A large number of channels to eliminate radio interference and many others.
The only downsides are a large number of electronic components, the failure of which may require the replacement of the entire alarm system. However, you can always avoid such consequences - it is enough to monitor the state of not only the security complex, but also the car.
StarLine car alarm can be called an ideal security complex that can protect any car. price category. Easy to install, wide functionality, additional options, intuitive interface, high level protection - all this is worth it to equip your personal iron horse with such protection.
Full use of all functions of the anti-theft complex is possible only after correct setting temporary parameters. How to set the time on the Starline A93 key fob is described in detail in the instructions for using the signaling.
[ Hide ]
Instructions for setting the time
Setting the alarm clock with automatic engine start of the Starline A93 car is done as follows:
- Take the communicator and install a battery in it. To do this, dismantle the back of the cover and install the battery in a special seat, taking into account the polarity.
- The key fob will turn on. If the key lock has been activated, unlock the device.
- Click on the button at number 4, hold it pressed until the communicator speaker plays a melodic signal. After a pause, the device will emit two more short-term sound pulses.
- The pager will enter the time adjustment menu. To set the clock, the second and third buttons are used. The second is to decrease the parameters, the third is to increase. To quickly add or subtract hours, these keys can be held down.
- To set the minutes, click on the fourth button.
- The same buttons (2 and 3) are used to adjust the minutes. The second key is used to decrease, the third - to increase the indicators. For quick adjustment, the buttons are clamped.
Andrey Sharshukov clearly showed the process of adjusting time parameters.
How to set up auto-start on an alarm clock?
Set the alarm time to start the car engine as follows:
- Activate the function programming menu.
- Move the cursor on the communicator screen to the indicator with a symbol in the form of a clock, then click on the first key. The auto lights will blink once, the speaker of the communicator will play a melodic signal.
- The communicator screen will display the time after which the alarm start function will be activated. Use the pager buttons to adjust the parameter.
- Five seconds after setting the alarm settings, the pager screen will display the time.
The setting of the option to start the internal combustion engine by alarm clock in the alarm is performed for one cycle of starting the unit. The activation of the function is indicated by active indicators with a symbol in the form of a clock and a bell on the remote control.
Alex Sila talked about adjusting the time parameters for remote start of the internal combustion engine.
Causes of settings failure
If the display of the communicator shows the wrong time, the reason may be that the battery is low. Key chains of Starline anti-theft systems have the function of indicating the battery charge, so the consumer can determine its condition in a timely manner. If the battery loses capacity, it will not be able to perform the main option. As a result, a symbol will appear on the display of the communicator, indicating a discharge, and the speaker of the device will emit a corresponding sound signal.
The problem may be due to the replacement of the power supply. When you install a new battery in your device, the system will automatic mode resets the time settings. In addition, when changing the battery, all parameters of the anti-theft complex from hacking will be reset. After the replacement, it is necessary to activate the protective function, that is, arm the car. Only then is it possible to adjust the time parameters.
The reason may be the incorrect operation of the pager. If you are sure that a working battery is installed in it, you need to look for the problem in the software part. Malfunctions in its operation may be due to moisture on the board. Sometimes the problem can be solved by flashing the device, but we recommend entrusting this task to specialists.
GO FASTRELIABLE talked about replacing the battery in the device.
Trouble-shooting
Troubleshooting begins with checking the communicator and replacing the battery if required. If the remote control breaks down, the pager is replaced with a new one or repaired.
When the key fob malfunction is corrected, the user must reset the time on the pager.
The repair is done like this:
- Disassemble the body of the device. Remove the battery from it.
- Using a small Phillips screwdriver, remove the bolt that holds the front and back of the pager together.
- Perform a visual inspection of the board. Use a soft brush to clean inner part devices from dirt and dust. If dirt is not removed from the board, use a cotton swab dipped in an alcohol solution. Carefully remove dirt without flooding the circuit with liquid.
- Check the condition of the board, this will require special equipment. Using diagnostic tools, you can determine the damaged tracks and contact elements on the board. Failed components must be resoldered, this will require a soldering iron with a thin tip. After soldering, wear residues are carefully removed with fine-grained sandpaper.
- Assembly is carried out in reverse order.
Remove the battery and disassemble the body of the device Soldering the Communicator Board Components Damaged board winding to be replaced
There are two ways to replace the battery:
- Ordinary. The battery is changed, after which the consumer adjusts the time parameters in accordance with the instructions.
- Non-standard. The battery in the communicator is changed at 00:00. This will automatically reset the indicators, after which the countdown will start from the specified point.
Why is it necessary and what will happen if you do not set the clock?
If the key fob is programmed correctly for remote start by an alarm clock, then the start of the power unit will be performed at a specific time. Therefore, it is so important to correctly set the time on the Starline A93 keychain.
If the user does not set the time correctly, this will cause problems with the timer used to start the motor in automatic mode. The start will be performed, but at a different time when the consumer does not need it. Accordingly, if a trip is necessary, the engine of the car will be cold. As a result of high starting loads, the starter mechanism wears out faster. If the alarm has an alarm function (not to start the engine, but a reminder), then the option will also not work correctly.
On the Starline alarm key fob, not only useful system information is displayed, but also the time that is manually set.
Most car alarm key fobs that have a screen can also display the time. This is not only practical in terms of controlling your schedule and time awareness, but also convenient for implementation. additional features automatic start. Starline does not lag behind its competitors and also uses the clock function in its arsenal. Setting them up is not difficult, you need to know the main principles of controlling the alarm key fob.
ATTENTION! Found a completely simple way to reduce fuel consumption! Don't believe? An auto mechanic with 15 years of experience also did not believe until he tried it. And now he saves 35,000 rubles a year on gasoline!
Even though Starline has simplified the time setting procedure to the maximum, some issues related to failed installation attempts continue to arise.
Possible Causes of Failed Time Settings
If you find that the time is no longer displayed correctly on your Starline keychain, then you should check the battery condition. It is quite easy to do this, thanks to the built-in battery indicator function. If the battery loses the necessary quality work energy, the corresponding picture appears on the display, accompanied by a sound signal. And although this reason is extremely rare, especially for Starline, check any possible options necessary.
The second reason could be a battery change. After installing a new battery, the time is automatically reset.
Be careful, replacing the battery inevitably entails resetting the anti-hacking protection, so the first thing to do is not to set a new indicator, but to put the car on the Starline alarm.
Another reason is incorrectly adjusted clock values or an incorrect set-up procedure.
Debugg
Regardless of the conditions that caused the failure or reset, you will have to restore the watch. You can do this in two ways:
- Classic. The time is set by service commands on the alarm key fob;
- Radical. Replace the battery at zero hours zero minutes. The time values will be reset to zero, the countdown will start from the given point.
Setting new indicators on the Starline alarm display has general principles for most models. They are performed using a specific algorithm of actions, which can be conditionally divided into three types, depending on the generation of the Starline alarm and some of its features.
Making settings for E, D, B series
Car alarms Starline markings , D and allow you to set the time period by performing the following actions: 
Press the fourth button on the control panel and hold it until the countdown of three signals - one long and two short. After that, 4 menu functions will appear on the screen. Select the desired one by pressing the fourth key again. You can set the date and time using the first function. It is designated as F-1. After that, hold down the fourth button again, wait for two signals and start setting the time using the first two service keys. 
Making settings for the A series
Installation required parameters on the Starline A series alarm depends on the model number.
And it provides for the presence of four service keys, which determines the features of the commands produced.
It is possible to set the time parameters on these devices by long pressing the fourth key. After three consecutive beeps, the hour digits will flash, and changing the values will be possible using the second and third keys. To set the minutes, press the fourth button again and repeat the above steps. 
And they have a simplified look and are content with the presence of three service buttons.
To carry out this procedure on the key fobs of these models, you will need to press and hold the third button with the image of an asterisk for up to three characteristic signals. After that, you can adjust the hours and minutes. The keys to open and close the lock allow you to decrease or increase the numbers, and the asterisk button to move between hours and minutes. 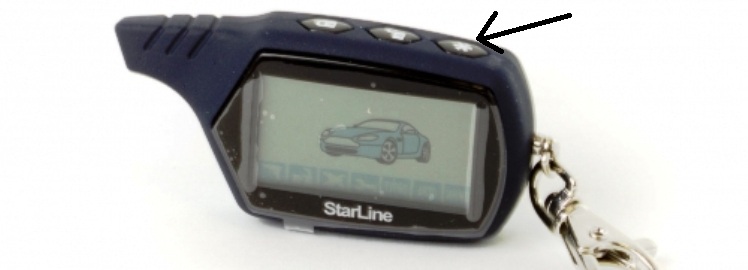
What happens if you don't set up
The least that can happen in this case is that you lose additional information. More - such autorun parameters as starting on an alarm clock, at a specified interval or on a timer will be lost for models a91 and b9.
The consequences of this can be a cold engine and increased collection time, failure of the starter due to high loads during a standard start in the cold season, as well as the need to replace the battery when the vehicle is not used for a long time at low temperatures.