Quite often, after replacing the batteries in the remote control, the owners do not know how to set up and set the time on the StarLine A91 key fob. Especially for the owners of such devices, we will briefly talk about this so that many who encounter such a problem can independently set the current time on the display. It is important to perform such an operation correctly, as many owners use the services of a timer to start the motor.
It is possible to configure and set the time on the StarLine A91 key fob for any driver, regardless of the length of time they have been driving a car. The development of this model of security car alarm fully meets the requirements of car owners to ensure their safety. Therefore, the key to ensuring the correct and long-term use of such a system will be to study the instructions for its operation.

A few words about the security system
These developments of security systems are among the most modern and reliable 12 Volt devices that have dialog authorization, encryption keys are individual for each product, have such a function as remote start at the set time on the control panel timer or engine temperature. The performance is maintained even in conditions of strong radio interference in the city.
The use of interactive authorization made it possible to exclude the possibility of intelligent electronic hacking, and provides high resistance to all currently known code grabbers. This became possible after the use of conversational encoding algorithms, and individual encryption keys are used, as well as a new, previously unused frequency hopping method.
This encryption method is used for both remote controls, both for the main key fob and for the additional one. The existing system fits well with machines that also have such a button. The device has good resistance to changes in outdoor temperatures. High performance is maintained at temperatures from minus 45 degrees to plus 85 degrees.

Benefits of using it
- The product has a high resistance to hacking attempts, thanks to the use of new encryption methods;
- The presence of the "Megapolis" mode allows the use of products in places with large quantity radio interference;
- You can use multiple different ways remote start of the motor;
- All inscriptions and pictograms are made in Russian;
- The use of modern software developments has made it possible to achieve an increase in the speed of the devices by about 20% compared to other models of similar devices.

About setting the current time
The alarm control panel allows you to perform several different functions. Among them are the following modes:
- Setting the current time on the display;
- Fixing the time of the alarm;
- Ability to enable or disable it;
- Turn on the timer to start the countdown;
- Function to start or stop it.

Setting the time is done as follows:
- It is necessary to press and hold the button under No. 3, which is designed to adjust the clock. You need to hold it until one melodic signal is heard, then one short, and after two such short signals. After such actions, the icon with the clock starts flashing. Button No. 1 increases the clock readings, and button No. 2 decreases them accordingly;
- After that, you need to briefly press button No. 3 to set the minutes. As a result of such actions, the icon with minutes starts blinking. Again, the first button increases the readings, and the second decreases;
- Again, briefly press the third button, the alarm setting will start. When the alarm icon flashes, again with the first button you can increase, and with the second decrease the readings;
- Press the same button briefly again to set the alarm minutes. Also, buttons one and two increase and decrease the readings;
- The next short press of the third button will turn the alarm on or off. The first button can turn it on, and the second one can turn it off;
- If you continue to press the third button briefly, the timer setting mode is called up. After the timer clock icon flashes, use buttons one and two to increase or decrease the reading;
- Another short press of the third button will flash the minutes icon of the timer. They are corrected by the same buttons one and two;
- Pressing button three further will turn the timer on or off. With the first button you can turn it off, and with the second button you can turn it back on.
On the Starline alarm key fob, not only useful system information is displayed, but also the time that is manually set.
Most car alarm key fobs that have a screen can also display the time. This is not only practical in terms of controlling your schedule and time awareness, but also convenient for implementation. additional features automatic start. Starline does not lag behind its competitors and also uses the clock function in its arsenal. Setting them up is not difficult, you need to know the main principles of controlling the alarm key fob.
ATTENTION! Found a completely simple way to reduce fuel consumption! Don't believe? An auto mechanic with 15 years of experience also did not believe until he tried it. And now he saves 35,000 rubles a year on gasoline!
Even though Starline has simplified the time setting procedure to the maximum, some issues related to failed installation attempts continue to arise.
Possible Causes of Failed Time Settings
If you find that your Keychain Starline the time is no longer displayed correctly, so you should check the condition of the battery. It is quite easy to do this, thanks to the built-in battery indicator function. If the battery loses the necessary quality work energy, the corresponding picture appears on the display, accompanied by a sound signal. And although this reason is extremely rare, especially for Starline, check any possible options necessary.
The second reason could be a battery change. After installing a new battery, the time is automatically reset.
Be careful, replacing the battery inevitably entails resetting the anti-hacking protection, so the first thing to do is not to set a new indicator, but to put the car on the Starline alarm.
Another reason is incorrectly adjusted clock values or an incorrect set-up procedure.
Debugg
Regardless of the conditions that caused the failure or reset, you will have to restore the watch. You can do this in two ways:
- Classic. The time is set by service commands on the alarm key fob;
- Radical. Replace the battery at zero hours zero minutes. The time values will be reset to zero, the countdown will start from the given point.
Setting new indicators on the Starline alarm display has general principles for most models. They are performed using a specific algorithm of actions, which can be conditionally divided into three types, depending on the generation of the Starline alarm and some of its features.
Making settings for E, D, B series
Car alarms Starline markings , D and allow you to set the time period by performing the following actions: 
Press the fourth button on the control panel and hold it until the countdown of three signals - one long and two short. After that, 4 menu functions will appear on the screen. Select the desired one by pressing the fourth key again. You can set the date and time using the first function. It is designated as F-1. After that, hold down the fourth button again, wait for two signals and start setting the time using the first two service keys. 
Making settings for the A series
Installation required parameters on the Starline A series alarm depends on the model number.
And it provides for the presence of four service keys, which determines the features of the commands produced.
It is possible to set the time parameters on these devices by long pressing the fourth key. After three consecutive sound signals the hour digits will flash and the values can be changed using the second and third keys. To set the minutes, press the fourth button again and repeat the above steps. 
And they have a simplified look and are content with the presence of three service buttons.
To carry out this procedure on the key fobs of these models, you will need to press and hold the third button with the image of an asterisk for up to three characteristic signals. After that, you can adjust the hours and minutes. The keys to open and close the lock allow you to decrease or increase the numbers, and the asterisk button to move between hours and minutes. 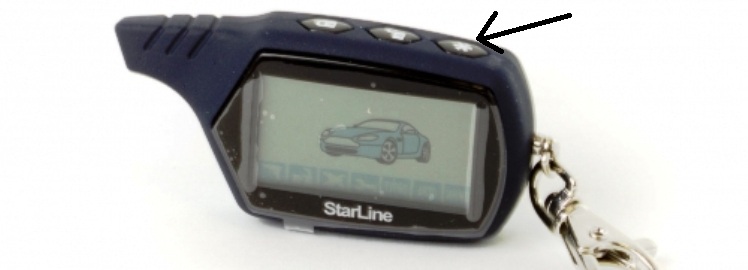
What happens if you don't set up
The least that can happen in this case is that you lose additional information. More - such autorun parameters as starting on an alarm clock, at a specified interval or on a timer will be lost for models a91 and b9.
The consequences of this can be a cold engine and increased collection time, failure of the starter due to high loads during a standard start in the cold season, as well as the need to replace the battery during long periods of non-use. vehicle at low temperatures.
Full use of all functions of the anti-theft complex is possible only after correct setting temporary parameters. How to set the time on the Starline A93 key fob is described in detail in the instructions for using the signaling.
[ Hide ]
Instructions for setting the time
Setting the alarm clock with automatic engine start of the Starline A93 car is done as follows:
- Take the communicator and install a battery in it. To do this, dismantle the back of the cover and install the battery in a special seat, taking into account the polarity.
- The key fob will turn on. If the key lock has been activated, unlock the device.
- Click on the button at number 4, hold it pressed until the communicator speaker plays a melodic signal. After a pause, the device will emit two more short-term sound pulses.
- The pager will enter the time adjustment menu. To set the clock, the second and third buttons are used. The second is to decrease the parameters, the third is to increase. To quickly add or subtract hours, these keys can be held down.
- To set the minutes, click on the fourth button.
- The same buttons (2 and 3) are used to adjust the minutes. The second key is used to decrease, the third - to increase the indicators. For quick adjustment, the buttons are clamped.
Andrey Sharshukov clearly showed the process of adjusting time parameters.
How to set up auto-start on an alarm clock?
Set the alarm time to start the car engine as follows:
- Activate the function programming menu.
- Move the cursor on the communicator screen to the indicator with a symbol in the form of a clock, then click on the first key. The auto lights will blink once, the speaker of the communicator will play a melodic signal.
- The communicator screen will display the time after which the alarm start function will be activated. Use the pager buttons to adjust the parameter.
- Five seconds after setting the alarm settings, the pager screen will display the time.
The setting of the option to start the internal combustion engine by alarm clock in the alarm is performed for one cycle of starting the unit. The activation of the function is indicated by active indicators with a symbol in the form of a clock and a bell on the remote control.
Alex Sila talked about adjusting the time parameters for remote start of the internal combustion engine.
Causes of settings failure
If the display of the communicator shows the wrong time, the reason may be that the battery is low. Key chains of Starline anti-theft systems have the function of indicating the battery charge, so the consumer can determine its condition in a timely manner. If the battery loses capacity, it will not be able to perform the main option. As a result, a symbol will appear on the display of the communicator, indicating a discharge, and the speaker of the device will emit a corresponding sound signal.
The problem may be due to the replacement of the power supply. When you install a new battery in your device, the system will automatic mode resets the time settings. In addition, when changing the battery, all parameters of the anti-theft complex from hacking will be reset. After the replacement, it is necessary to activate the protective function, that is, arm the car. Only then is it possible to adjust the time parameters.
The reason may be the incorrect operation of the pager. If you are sure that a working battery is installed in it, you need to look for the problem in the software part. Malfunctions in its operation may be due to moisture on the board. Sometimes the problem can be solved by flashing the device, but we recommend entrusting this task to specialists.
GO FASTRELIABLE talked about replacing the battery in the device.
Trouble-shooting
Troubleshooting begins with checking the communicator and replacing the battery if required. If the remote control breaks down, the pager is replaced with a new one or repaired.
When the key fob malfunction is corrected, the user must reset the time on the pager.
The repair is done like this:
- Disassemble the body of the device. Remove the battery from it.
- Using a small Phillips screwdriver, remove the bolt that holds the front and back of the pager together.
- Perform a visual inspection of the board. Use a soft brush to clean inner part devices from dirt and dust. If dirt is not removed from the board, use a cotton swab dipped in an alcohol solution. Carefully remove dirt without flooding the circuit with liquid.
- Check the condition of the board, this will require special equipment. Using diagnostic tools, you can determine the damaged tracks and contact elements on the board. Failed components must be resoldered, this will require a soldering iron with a thin tip. After soldering, wear residues are carefully removed with fine-grained sandpaper.
- Assembly is carried out in reverse order.
Remove the battery and disassemble the body of the device Soldering the Communicator Board Components Damaged board winding to be replaced
There are two ways to replace the battery:
- Ordinary. The battery is changed, after which the consumer adjusts the time parameters in accordance with the instructions.
- Non-standard. The battery in the communicator is changed at 00:00. This will automatically reset the indicators, after which the countdown will start from the specified point.
Why is it necessary and what will happen if you do not set the clock?
If the key fob is programmed correctly for remote start by an alarm clock, then the start of the power unit will be performed at a specific time. Therefore, it is so important to correctly set the time on the Starline A93 keychain.
If the user does not set the time correctly, this will cause problems with the timer used to start the motor in automatic mode. The start will be performed, but at a different time when the consumer does not need it. Accordingly, if a trip is necessary, the engine of the car will be cold. As a result of high starting loads, the starter mechanism wears out faster. If the alarm has an alarm function (not to start the engine, but a reminder), then the option will also not work correctly.
Setting the time on the key fob is needed for a reason: the alarm has the ability to automatically start the engine on a timer. You will be able to go out to an already warm car all week long without making any effort for this - and park the car so that it has a stable connection with it.
An auto electrician-diagnostician works on the site, certified specialist StarLine. If you have questions about car alarms, ask them at the end of the article in the comments or Vkontakte.
Clock setting
To enter the setting mode of the keyfob itself, press and hold button 4: first, the keyfob will give one signal, after a pause - 2 more. Then release the button. The clock indication will start blinking - set the desired hour by increasing the number with button 2 or decreasing with button 3. Then briefly press 4 - the minutes will start blinking, set them the same way.
Pressing 4 again will take you to setting the alarm time - set the hours in the same way, then the minutes. The next press on 4 will put the keyfob into the alarm on / off mode: if set to ON, the keyfob will sound every day at the previously set time. Select the desired setting and press 4 again - now set the auto-start timer.
The principle of setting the autorun time does not change - set the hour and minute, press 4 and then turn on the timer (ON) or disable autorun by timer (OFF).
You can also activate the timer start in the second way, and there will be some differences in the operation algorithm:
- Press and hold button 2 or 3 until you hear long signal and then short.
- The alarm icon will start flashing on the bottom row of the screen. If you press button 1, it will light up constantly, buttons 2 and 3 will switch to the adjacent icon.
- To exit this mode, hold button 1 for a long time until the beep.
What is the difference? If the alarm icon is displayed on the screen, then autostart will not occur at the time set by the timer, but at the time for which the alarm is set. If you activate the hourglass icon, then it will occur from the time you activate this mode, and then every few hours. What is it for? In cold weather, this mode of operation allows the car not to get cold, and it is used on diesel cars, or when spending the night in a car in winter. To set up periodic autostart, you need to activate the "hourglass" and set the key fob timer and set the correct interval.
As soon as you activate the "hourglass", the indication on the screen will change: the inscription 4H will initially appear, and further short presses on button 1 will change the inscription to 6H, 8H, and so on up to 24H. Periodic engine start will occur at intervals of 4 hours, 8 hours, and so on. When you exit the setting mode, the engine will automatically start.
Video: Setting the time on the starline a 93 alarm key fob (without unnecessary information)
Car alarms have a wide range of functions, including not only security systems. Not everyone can set the time on the Starline A93 keychain using the buttons.
In addition to the standard engine shutdown, locking doors, hood and gearbox, Starline car alarm owners get access to many secondary functions.
The system can enable a timer for the turbine. After an active ride on turbocharged engines, some elements of the intake tract warm up to about 800 degrees Celsius. Cooling occurs due to engine oil circulating through the system. Therefore, turning off the turbo engine immediately after aggressive driving is not recommended. Turning on the turbo timer is a useful watch-dependent feature.
It is possible to set an alarm clock and autostart on it. This setting will be one time only. It is convenient to set an alarm if the owner is going to after hours for non-standard cases (pick up someone from the airport, meet from the station). At the set hour, the Starline key fob will play the wake-up melody, and then give a command for auto-heating. During daily operation, you will need to constantly restart the system: go to the top menu (clock-alarm-timer), and then set the alarm to activate again.
Instructions: how to set the clock on the Starline A93 keychain with 3 buttons

Some alarm key fobs have only three keys. You can set the time on the Starline device like this.
- Press and hold button 3 until a beep sounds.
- Then the clock will flash. With keys 1 or 2 we can increase or decrease the value.
- After that, press button 3 of the Starline key fob again to switch to the minutes setting mode. Set the desired value.
- You don't have to press anything to confirm the command. After five seconds, the menu will be automatically exited, and the specified values will remain in the alarm memory.
Clock setting with 4 buttons
The main alarm remote control Starline A93 has four keys. Therefore, the standard procedure for setting the time looks like this.
- You should make sure that there is a battery inside the Starline alarm key fob and the remote control is functioning properly, and the keys are not blocked.
- We press and hold the number four button until one melodic signal sounds. Then two more short beeps will follow, announcing that the key fob has entered the time setting mode.
- Now the value will blink. You can set the appropriate number of hours using the two or three buttons. The first key of the Starline keychain increases the value, the second one decreases it. After setting, press the button four again, switching to the minute setting mode.
- The procedure for setting minutes is carried out in a similar way - by holding the keys two or three on the Starline key fob.
- The next press allows you to set the functions or settings of the alarm.
- The exit from the Starline programming mode is automatic, after 8 seconds. You can not press anything, the set time parameters will be saved independently.

Causes of settings failure
Sometimes the Starline A93 alarm brings unpleasant surprises. Among the various "glitches":
- failure to unlock doors;
- lack of command transmission from the Starline remote control;
- reset time settings or autorun.
There are several reasons for the failure.
- Car battery failure. If it is heavily discharged, it may not receive signals sent from the Starline tuning console. The battery of the machine must be replaced for normal operation.
- Short circuit wiring. Due to incorrect connection of the Starline A93 car alarm, problems may arise. Another reason is a broken or frayed wire on the road, contributing to a short circuit. To eliminate the problem, you will need the help of a car electrician at a specialized service.
- The reason may be the Starline keychain itself. It should be examined for mechanical damage- there should be no breaks or chips of plastic, a cracked screen and other malfunctions.
- Dead battery. The signal, as well as the time setting, may go astray due to a defective battery in the Starline tuning key fob. It is necessary to open the compartment, inspect it. The battery should not be swollen, and the remote control contacts should not have traces of oxides or rust. Otherwise, you need to put new battery and clean the contacts. To prevent such situations, it is advisable to change the battery in advance - approximately every 3-4 months. Install nutrients from trusted brands.

In the event of a malfunction, glitches or resetting the time, it is advisable to reset the Starline alarm parameters to the factory settings. To do this, you need to know the location of the Valet service button, which is mounted when installing a car alarm.
It allows you to enter the Starline programming mode, start the car without a key fob, etc. Therefore, they hide it. If you do not know the exact location of the service button, you should check these places:
- under the dashboard;
- on the side cards;
- per decorative covers center console;
- under the sun visor.
After the button is found, you can start resetting Starline to factory settings.
- We turn off the ignition.
- Press the service key 9 times to reset the first programming table.
- We turn on the ignition. The car will emit nine sound and light signals, indicating that it has entered the appropriate mode.
- For a complete zeroing, it is worth carrying out the procedure twice - the second time it takes ten clicks on the button to zero the second table.
- After the end, you need to press the service key, and then listen to one siren signal.
- Click K1 keychain Starline. The machine will beep to indicate a return to default settings.
- We turn off the ignition. The car will flash the emergency flasher three times, indicating successful completion procedures.
Setup video