In the kitchen, interior renovation is required more often than in other rooms. Usually it is enough to re-paste the wallpaper with your own hands or paint the walls. In this article - the subtleties of the technology of finishing work in the kitchen. A video to help a beginner will tell you how to properly putty walls for wallpaper or painting.
Wall putty - is it possible to do without it?
Are the walls in the kitchen dilapidated and cracked? Are the wallpapers covered in oil stains? No wonder! The kitchen is a room where you often have to update the interior. In order to carry out repairs correctly, you must follow some rules.

Wall repair includes three stages of preparatory and repair work:
- Preparation of wall surfaces - at this stage, it is necessary to thoroughly clean the walls of old wallpaper, glue, layers of paint and crumbling plaster.
- Rough wall finishing - carry out a thorough alignment of the kitchen walls, patching irregularities with plaster, as well as reinforcement (if necessary).
- Fine wall finishing is the final stage of wall finishing, which includes puttying, painting or.
When performing repair work on our own, the rough preparation of the walls is often not performed or is performed in places. Neglecting the leveling and puttying of the walls will affect the overall quality of the completed repair: the paint lays unevenly on an unprepared surface, burrs are visible on the surface, “bubbles” may form under the wallpaper.

Applying a layer of plaster on the walls reduces the number of cracks, scratches, and reliably smooths out the influx of plaster. And leveling the surface of the walls with putty helps to get an ideal surface, the fine finishing of which is absolutely no difficulty.
Wall putty technology: base preparation
The technology of applying putty on walls for painting and wallpapering has significant differences. The process of applying the working composition to the walls has its own techniques and methods. The preparation of putty also has its own characteristics.

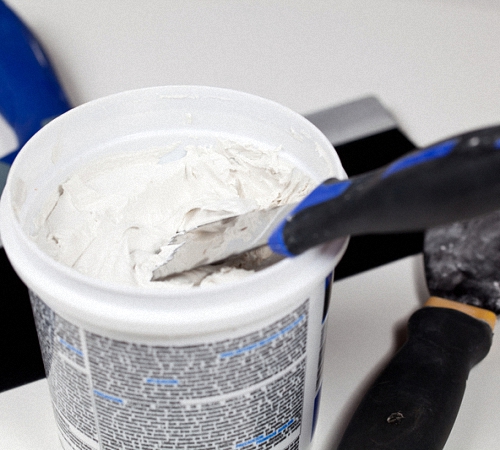
For the preparation of putty, it is best to use ready-made dry mixes, which modern manufacturers offer in abundance. Before purchasing a dry mix, you need to carefully read the recipe for preparing the mix and the consumption rates per 1 m2.
Advice! It is very important to strictly follow the recipe for the preparation of putty in accordance with the manufacturer's recommendations. Properly prepared mixture will provide a more even smoothing of the layer and better adhesion to the wall surface.
It is important to remember that the putty layer applied to the wall under the wallpaper should not exceed 2 mm in thickness. Preliminary preparation of the walls should be done very carefully. It is necessary to close up small cracks and scratches, deep potholes must first be cleared and then carefully filled with plaster. Sometimes there are influxes of old plaster on the walls, such places need to be thoroughly cleaned, knocking down the protruding parts.
A special requirement for the removal of old whitewash is that the walls should be completely cleaned. Ideally, wash and then let dry.
Important! Putty applied over old lime does not have strength. Wallpapers that are heavy, especially vinyl and non-woven, will not hold onto poorly finished walls.
Primer application
After removing the old coating from the walls of the kitchen, it is required to treat the surface with a hard metal brush - such an operation will remove the maximum amount of dirt. After cleaning the walls with a brush, you can start applying the primer composition. This is only done if the wall is relatively flat. If there are significant curvature, you should first correct the curvature of the walls with plaster.
It is convenient to use a roller to apply the primer, thus it is easy to achieve uniform distribution of the primer on the wall. The primer composition can be purchased ready-made, on sale you can always find a primer in the required packaging.
Advice! It is difficult to work with a roller in the corners of the room. For a better application of the primer in the corners, use a narrow brush with a long, stiff bristle.
After applying the primer, dry the walls thoroughly. Do not apply putty on wet surfaces. When applying putty on plasterboard walls that have a smooth and even surface, it is enough to apply one layer of putty, which will be the finish. Old, plastered surfaces are smoothed with plaster until absolute smoothness is achieved.
With the methods of work on puttying the surface under the wallpaper can be found in the video for this article.
How to properly putty walls for painting
Special actions for applying putty for the subsequent painting of the walls should be considered multi-layer (one layer cannot be dispensed with). Sometimes, on particularly problematic walls, it may be necessary to glue a layer of masking mesh, which is alternately covered with several layers of plaster mixture, followed by sanding. and then putty is applied.
Attention! It is important to purchase only high-quality tools for work. The spatula must have an absolutely smooth blade without nicks and scratches.
Manufacturers produce a variety of mixtures for puttying walls. The consumption of raw materials in terms of 1 m2 can vary significantly:
- Oil-adhesive putty - consumption 3.0 kg / m2.
- Adhesive compositions - consumption 0.47 kg / m2.
- Gypsum plaster - consumption 0.85 kg / m2.
- Finishing putty - the consumption of the composition is 0.44 kg / m2.
Here are the average consumption rates of materials, subject to the ideal condition of the walls.

From the possible types of putty, choose the one that suits you
As with preparing walls for wallpapering, walls for painting before applying plaster must be carefully prepared: remove old paint or wallpaper, beat off the influx of the plaster composition, and clean deep cracks.
Important! All wooden plugs, nails, screws and other fasteners should be removed from the walls. Holes in the wall must be sealed with cement mortar. The same composition is used to fill the old lines for wiring, deep cracks and potholes.
Cleaning the walls is continued with a metal brush, after which you can start applying the primer. Applying putty is allowed no earlier than 24 hours after the primer layer has dried.
It is convenient to start applying the composition from the right corner of the wall. It is worth monitoring the thickness of the applied layer - it should not exceed 2 mm.

Do not be upset if the first layer of putty turned out to be imperfect, re-applying the composition will correct the situation. It is important not to start applying the second layer of putty until the first layer has set. This will take about 12 hours.
Perfectly even corners are made using a special tool - an angled spatula. It should be ensured that the thickness of the applied layer in the corners does not exceed 5 mm.
Puttying walls for painting: video
Wall puttying: photo


After installing plaster beacons and leveling the walls with plaster, they must be puttied. It does not depend on whether we are going to glue wallpaper on the wall or paint them.
How to properly putty walls for wallpaper and painting
Since we carry out repairs on our own, without the involvement of workers, we should consider the entire process of puttying surfaces in more detail.
Materials needed for wall puttying
We will find out what materials will be required for do-it-yourself wall decoration and what exactly can be purchased in our stores. We know that the building materials market is currently very large. However, at this stage of work, we only need mixtures for puttying walls, which, like plaster, are of two types: cement-based and gypsum-based.
Gypsum-based mixture
If we want to wallpaper or paint the walls, gypsum-based mixtures are ideal, as they are white when dry. But it should be borne in mind that this type of putty is suitable only for indoor work.
Another negative feature of gypsum-based putty is the very short life span of the solution. And yet, despite this, it is with such building finishing materials that the vast majority of internal walls are puttyed.

cement-based mixture
Cement-based putty after final processing and drying has a gray color. Its clear advantage over gypsum-based putty is that the viability of the solution is much higher.
The downside is the final gray color, which is undesirable for painting walls and when using transparent thin wallpapers. Recently, do-it-yourself wall putty, indoors, with cement-based mixtures is almost never used due to this very reason.
Application technology
Before starting work with putty, the surface of the walls must be primed. This is necessary to prevent the development of mold and fungus, as well as to ensure maximum adhesion of the putty layer to the wall.

In addition, special antiseptic primers are used. The primer is applied to the wall with a brush or roller, depending on the condition of the surface. You can use a spray gun or primer gun.
Having completed the priming, we begin to work with putty using two spatulas - narrow and wide. Using a narrow spatula, we catch the mixture to transfer it to a wide spatula.
We smear the putty on a wide spatula, then carefully stretch it along the wall, while adhering to the horizontal orientation. We remove excess mixture from the surface by treating it with a clean spatula. Likewise, layer by layer, we go through the whole procedure.
P.S. And for dessert, I suggest watching a video clip: Do-it-yourself wall putty
If it becomes necessary to update the premises in the home, many people think about the possibility of self-conduct. In most cases, for this you need to properly treat the surfaces, paint them either. The editors of the site will help you navigate the difficult issues of repair. We will tell you how to properly putty walls, share the secrets of the correct technology for applying working mixtures and present detailed instructions that will help beginners avoid mistakes.
Puttying is commonly understood as the process of treating wall surfaces with finishing materials immediately before gluing or painting. If the building mixture is applied incorrectly, as a result, unrepaired flaws will appear under any decorative coating - cracks, bumps and pits.

After eliminating the existing defects, a smooth and at the same time even surface of the wall or ceiling is achieved using putty. For these purposes, materials are used for starting, as well as finishing, which are dry mixtures of coarse and fine grinding.

The wall is easy to check by applying a rule to it: if there are gaps, they are eliminated by applying a layer of putty mass. The spatula should be held at an angle of 25-30° with respect to the wall. If you don’t know how to putty the walls under, you can choose a ready-made acrylic mixture and an average facade spatula for these purposes. For finishing grinding of the dried wall, abrasive paper marked P-150, 180 is used.
Article
Almost any type of wall decoration involves their puttying. With the help of putty, it is possible not only to level the walls, but also to prepare them for further finishing. In order for the result of the work to be of high quality, it is necessary to adhere to certain recommendations for its implementation. About how to properly putty the walls, we will consider further.
Do-it-yourself wall puttying: the benefits of finishing
The first and most important advantage of puttying walls is their leveling with a putty mixture. As a result, it is possible to obtain an even coating, ready for painting or other type of finishing.
In addition, puttying is a fairly easy process that is quite realistic to do on your own, having studied the recommendations and technology for its implementation before that. The correct use of putty and the tool with which it is applied allows you to get a high-quality result in the form of a smooth and even surface.

There are many options for putty, which is suitable for a particular type of wall. Also, there is a putty used in ordinary rooms and in rooms with high humidity. Therefore, the choice of one or another variant of the putty mixture should be justified by the individual performance characteristics of the room. Also, there is a putty for external work, which is distinguished by additional resistance to temperature changes, moisture and solar radiation.
The use of putty before the start of wall decoration is characterized by such advantages as:
- ease of work:
- affordable cost of materials;
- obtaining a flat and perfectly smooth surface;
- speed of work;
- a variety of compositions in the field of their application.

Tools for puttying the surface of the walls
The key to obtaining a high-quality result in wall puttying is the correct choice of the tool used in the process of work. Without fail, during the work will require the presence of:
1. An electric drill with a special nozzle - a mixer. Most often, putty has a dry consistency, so to dilute it with water and to obtain a uniform consistency, you will need to mix it with this tool. A special nozzle will allow you to get a high-quality mixture, without lumps and additional inclusions.
2. Spatulas in the set. For work, several spatulas should be prepared, each of which will perform a specific function. So, with the help of a small spatula, hard-to-reach places are puttyed and putty is applied to a large spatula. The best option for a large spatula for puttying walls is 35-50 cm.
3. A set of rollers and brushes with which the ground solution will be applied. Priming is a mandatory work process before and after puttying. Since with the help of a soil solution it is possible to achieve an antiseptic effect, thereby preventing the formation of fungus and mold on the surface of the walls. In addition, the primer increases the adhesion between the wall and the putty. For its application, most often a roller is used, as well as special trays into which a soil solution is poured.

4. If putty is applied to the walls to level them, then in the process of work you will need a rule that will help you identify and eliminate all existing irregularities. The long steel rule is relevant when the walls have very large irregularities.
5. Spirit level or laser type also allow you to determine the irregularities on the walls, if any.
6. The use of sandpaper is relevant after applying each layer of putty. With its help, the surface of the wall acquires perfect smoothness and is polished. It is recommended to use medium-fine skins at the stage of starting puttying, and at the final puttying, the skin should be very fine.
7. In order to speed up the process of sanding the wall, it is recommended to use a manual skinner.
8. In addition, in the process of work, you will need a container in which the putty will be stirred.
This list of tools is mandatory for puttying walls.

The choice of materials for the wall puttying process
Putty is a paste-like material that is applied to the wall, thereby leveling it. With the help of putty, it is possible to prepare the base for further finishing.
In relation to the degree of readiness of the putty mixture, it is of two types:
1. Dry putty - requires additional dilution with water. Among its advantages we note:
- affordable cost of the material;
- the possibility of preparing a composition having almost any consistency;
- ease of preparation;
- This material is easy to transport and has a long dry shelf life.

However, dry putty needs additional work to prepare it for application, so the time for puttying is increased. The finished mixture has a limited use time, so it is prepared in small portions. Before starting work, you should read the instructions and strictly follow their instructions. Otherwise, the quality of puttying will deteriorate.
2. For the manufacture of a ready-made putty mixture, a latex base is used. The release form of this material is buckets or tanks. The finished solution is used for a long period of time and does not dry out. Another advantage of this composition is the absence of the need for additional time to prepare the solution. However, the cost of this material is much higher than that of dry mixes.
In relation to the main substance used for the manufacture of putty, they are divided into:
1. Cement-based putties - they are distinguished primarily by good resistance to moisture and excellent performance. Among the shortcomings, we note:
- slight shrinkage after drying;
- low level of elasticity of the coating;
- small cracks after drying.
2. Gypsum-based putty - practically does not shrink and is very elastic. However, this putty dries very quickly. In addition, it is unstable to sudden changes in temperature and moisture.
3. Polymer-based putty - has a high price, but allows you to get a high-quality surface after puttying.
When choosing putty for walls, you should pay attention to its fractional indicators. The smaller the putty fraction, the more flat and smooth the surface will be as a result of puttying.
In relation to the purpose of putty, it happens:
1. Starting - has high strength, affordable price, is used at the beginning of leveling walls, applied with a thickness of three to twenty millimeters.
2. Decorative or finishing - complete the puttying process. This putty has a white color, fine grain, high strength.
3. Universal putty - combines the two previous options. It is used if the walls have small flaws.

Phased wall puttying technology
Before you start puttying plastered walls, you should prepare them for this process. If there are grease stains, wallpaper or traces of paint on the wall, you need to get rid of them. If the walls in the room are frozen, then their puttying is unacceptable. The walls in the room must be absolutely dry.
Before starting work, the wall should be treated with a primer solution. Thus, the adhesion between the wall and the putty will improve. A special roller is used to prime the wall. It is enough to apply a putty mixture on the wall in one layer and wait for it to dry completely.
The initial puttying of drywall walls is done with a rough material called starter putty. This putty allows you to get rid of large differences in walls, strobes and various kinds of holes. The application thickness of this putty is about 15 mm. Please note that each layer must be completely dry before applying the next. In order for the putty to adhere well to the wall, it is recommended to use a special reinforcing mesh, on the surface of which the putty is distributed. Puttying the wall is carried out by applying a continuous layer. The reinforcing mesh allows the putty to be perfectly fixed on the wall. This improves the strength and flatness of the wall.
Puttying the walls under the wallpaper using the beacon method involves the use of beacons, in the form of a wooden, gypsum or steel lath, exposed in a vertical direction. In order to fix the beacons on the wall, use a plaster mortar. Also, the walls are aligned in the horizontal direction. In this case, a rule will be used to align the wall. Thus, as a result, the surface of the walls is obtained, on which there are no flaws. However, this finishing option is used very rarely, due to the high cost of its implementation. Most often, it is replaced with a starting putty.

Finishing puttying of walls is carried out after complete drying of the starting layer or lighthouse puttying. Finishing compositions are used to perform this kind of finishing. With the help of this putty, it is possible to obtain a perfectly flat wall, without cracks, chips and pores. The application of the finishing putty is carried out using a very thin layer. If the initial puttying is of poor quality, the finishing layer will not correct the shortcomings. Finishing puttying is performed only after the perfect alignment of the walls.
In order to get rid of cracks in the walls, it is necessary to use gypsum mixtures. Since they have a certain elasticity. In order for the crack to connect well with the putty, it should be roughened.
Instructions for preparing and applying putty on the wall:
1. Prepare putty, in the case of dry materials. Combine it with water, mix until a homogeneous mass is obtained. The consistency of the putty should be such that it sticks to the spatula.
2. Use a large spatula to apply starter putty. Apply the putty on the wall, distributing it over the surface in both vertical and horizontal and diagonal directions. In order to prevent bumps from appearing on the wall, putty should be applied with a slight overlap.

3. To improve the quality of work, the solution should be prepared in small portions, otherwise dried parts will form on the wall. It takes 24 hours for one layer of putty to dry.
4. Puttying the corners of the walls is carried out using a special spatula for finishing the corners.
5. After complete drying of the starting putty, the final layer is applied. For work, you will need the presence of spatulas of large small sizes. The layer thickness at this stage does not exceed two millimeters.
6. Before puttingtying the walls under the wallpaper, you should wait until all previous layers have dried. Only after that the finishing putty is applied.
In the process of puttying the walls, the spatula is held to the wall at an angle of thirty degrees. In order to get the perfect angle, apply a little putty mixture to the corner spatula, then evenly distribute it over the corner area.
Before you start puttying the walls under the wallpaper, you should determine the thickness and type of wallpaper. Since the amount of leveling putty that is applied to the wall depends on these indicators.
Qualitatively prepared walls for wallpaper will allow you to get a perfectly flat coating, on which there are no folds of wallpaper and air bubbles. Putty should be applied to the wall with a thickness of not more than 1.5 mm. Therefore, all cracks and potholes must be repaired in the previous step.

If, after puttying, the walls will be painted, then more attention should be paid to the preparation of the walls. Since after applying the paint, all the bumps will be visible. The leveling layer is applied very thinly. If there are defects on the wall, putty should be applied in several layers. Leave the walls to dry completely. Apply a decorative layer of putty and, after drying, sand the coating.
In order to determine the required amount of putty, you should initially measure the area of \u200b\u200bthe walls on which it will be applied. More economical - the use of dry mixes. However, more convenient to use - ready-made formulations. The choice of one or another option is determined by the material preferences of the buyer.
Wall plastering video:
Putty and methods of working with it
Puttying is the finishing part of the work of preparing the walls for decorative finishing: applying paint or wallpapering. Applying a layer of putty is an important step, without which it is impossible to start working with a decorative finish. A thin layer of putty fills small cracks in the wall and eliminates minor defects, if any. How to putty the walls under the wallpaper? Putty is divided into several categories.
According to the consistency, putty mixtures are divided into two groups - dry (you need to additionally dilute before applying) and ready-made, which can be found in stores in sealed buckets, such mixtures do not require any additional actions, you can immediately work with them.
To achieve the best result, it is recommended to use two types of construction work - starting and finishing. The first contains small stones and a cement mixture in its composition, which, as a result, makes the surface very durable and stable. The second is created on the basis of gypsum and effectively levels the surface to a state suitable for decorative finishing. There is a mixture that is universal in properties, which combines the qualities of the two previous types and allows you to prepare the surface for subsequent work.
When buying putty, be sure to look at its expiration date. Expired material must not be used. If the putty was stored in the cold or in a building with a high degree of humidity, most likely it can no longer be used, since stones appear in it from non-compliance with the conditions. It is advisable to buy starting and finishing putty from the same manufacturer, such materials will be better combined and provide a higher quality coating. 
Surface preparation
How to putty the walls with your own hands? You won't be able to start the process right away. Before applying the putty mixture, you need to prepare the surface. The wall should not have pronounced defects or irregularities; you also need to remove all layers, remaining debris and construction dust.
You can level the wall using beacon plaster. If there are holes in the wall, then the cement mixture will help to repair them. On a wall sheathed with drywall, it will be necessary to close up the joints with a paint grid and carefully putty. You also need to process the location of the screws. Before applying the putty, you will need to additionally treat the surface with a special antibacterial deep penetration emulsion. This will ensure better adhesion of the material to the wall surface. You can use a sprayer during operation so that the emulsion is less consumed.
What you need to have for puttying work:
- Finishing and starting putty mixture.
- Ground emulsion with a tray under it.
- Roller or brush.
- Large (about 50 cm) and small (about 15 cm) spatula.
- Rule.
- Drill with a mixer type nozzle.
- Plastic bucket.
- Grid for grout putty. You can also use a grinder.
Preparation of putty
In the case of purchasing a dry mixture, it must be pre-prepared before application. To do this, pour water into a bucket and pour the mixture into it. Usually, detailed cooking instructions are on the packaging with the material. To stir the mixture, you need a drill with a nozzle. The result should be a homogeneous substance, not too thick, but not liquid. You do not need to make a lot of the mixture at once, since it hardens quickly enough and becomes unusable, it would be better to dilute several servings as needed. After carrying out all the work, you will need to wash the container and tools. The remains of the dry mixture can be left for storage, wrapped in a film, you need to choose a dry, cool place for storage. If you bought a ready-made mixture in a bucket, then you can leave it for storage by filling it with water. 
Working with the start layer
When the surface is prepared for applying putty, it's time to move on to the main work. How to putty walls for painting? Take a large spatula and use it to apply putty. A small spatula is also useful - with its help, the putty is carefully and evenly distributed over a large tool so that it is applied in an even layer to the surface. You need to do the work with precise movements, without applying much effort - do not put too much pressure on the tool. You need to hold it at an angle with a turn of 45 degrees, which in the future will help to avoid uneven marks from the edges of the tool. The order of applying the mixture - from the bottom up, starting from the corner - overlap. To check how smooth the surface is, you can take the rule. If there are bumps, they need to be leveled over the entire surface, and if there are pits, apply another, new layer of the mixture. Evenness must be checked while the putty layer is still wet. It is worth paying attention to the corners - these are usually the most problematic areas in which cracks can occur. If an even layer did not work out right away - it's okay, it's rare when it turns out to put putty perfectly the first time.
When the layer on the wall is dry, you need to use a grout mesh or sandpaper and go over the entire layer. This is done to get rid of the pebbles that are part of the starting mixture. In addition, rubbing can remove spatula marks and transitions. After that, you need to check the evenness of the resulting layer with the rule again. In the recesses, if any, you need to apply another layer of the mixture.
Working with the finish layer
When all work with the starting layer is completed, you can proceed to further application of the finishing layer to the surface. Finishing putty, in fact, is applied in exactly the same way as the starting one, from the bottom up and from the corner. The tools used are the same, a large spatula for application and a small one for leveling the mixture. The layer should be thin, no more than 2 mm. Irregularities and any traces of the spatula must be carefully smoothed over the surface. It is important not to forget to check the evenness of the layer. The final mixture is applied according to the rules in two layers, while the initial layer must first dry completely.
When the second layer of the mixture dries, it will be necessary to process the entire surface with a grout mesh or sandpaper, but always with a fine grain - a large one will leave scratches that will remain visible even after painting. If there are still scratches, cracks or pits on the wall, then they need to be additionally treated with a mixture. It is necessary to pay attention to hard-to-reach problem areas - corners or space behind pipes - it is there that defects most often occur. When the layer is completely dry and processed, a primer emulsion must be applied on top.
Much also depends on how the decorative finish will be made. If it is planned to paint the walls, then the surface must be perfect, without a single scratch, crack or other defect, since the paint layer makes all imperfections more noticeable. But if the walls are covered with wallpaper, then this, on the contrary, will hide any minor flaws.
When all work with putty is completed, you must not forget to thoroughly wash and dry the tools so that in the future they can be used again in repair work. 
In order for the result of the work to be of high quality, it is desirable to observe some nuances in the course of work.
- All work with putty must be done in good light so that defects and irregularities are immediately noticeable and do not have to be redone a lot.
- It is not necessary to apply the starting mixture with a layer thicker than 5 mm, otherwise it is fraught with cracks.
- The previous layer of the mixture must be completely dry, and only then can the next one be applied. The drying time depends on the temperature in the room, the level of humidity and the thickness of the application of the layer itself.
- You can not use any artificial methods to make the putty dry faster. For example, you should not make a draft in the room or turn on the heater.
- The process of rubbing the surface also needs to be carried out with good lighting so that everything can be seen as accurately as possible.
- If someone has not done this kind of work before, then you should not immediately take too large a spatula for work, because it will be difficult to stretch the layer evenly out of habit. If it is not entirely clear how to properly putty the walls, videos from various construction sites can help sort out this issue.
- It is important not to forget to check the evenness of the surface at each stage of work.
- To putty the corners, there is a special tool - an angular spatula, which allows you to make these problem areas smooth without much effort.
Security measures
During work, you need to protect the skin and head from putty. This will require clothing that covers the body, and a scarf or cap on the head. When mashing, care must be taken to ensure that dust does not get into the eyes, nose and mouth. Special respirators are sold that will help protect the respiratory system. Goggles can be purchased to protect your eyes. All this can be found in hardware stores. If work is carried out at height, then you need to take care of the stable fastening of scaffolds and structures.