Making repairs in the bedroom with your own hands is the dream of many homeowners. Although this is not a “public” place in a house or apartment, children do not play here, guests or the whole family do not gather, a lot of attention should be paid to repairs in the bedroom.
At the same time, many people want the interior to meet all the plans of their owners, investing their most unrealizable dreams in it. This article will tell you how to do repairs in a sleeping room with your own hands.
A bedroom is a room where everyone spends a lot of time. The room can be multifunctional or adapted only for sleeping, which requires appropriate technical and design techniques.
This leads to the fact that before repairing the bedroom, you should carefully consider all its stages, taking into account the varieties of such a room, how it will be used, how the renovated room will look like.
According to their cumulative features of the bedroom, the following categories can be conditionally distinguished:
- Spousal or parental. Here it is necessary to create the necessary psychological attitude for both spouses (see).
- Children's(cm. ) . This room, where children not only sleep, but also play, do their homework, which requires a special approach to its design.
- Bachelor's bedroom(cm. ). Its features are that it is usually a small room that can easily be transformed from a recreation area into a study or a bedroom for two.
- In a one-room apartment. This type of bedroom is characterized by its versatility. She and matrimonial, and a room for children and a dining room. An example of the design of a one-room apartment is shown in the photo.
Any of these types can have a simple configuration in plan or be with an alcove, have:
- Niche for a bed.
- Balcony or loggia (see ).
What are the types of repairs
The degree of increasing complexity characterizes the type of bedroom renovation.
He can be:
- Cosmetic or simple. In this case, the repair comes down to cleaning the room, it is possible to replace a window or a balcony block, re-pasting wallpaper. Before it is carried out, the main thing is to choose the right wallpaper and new furniture. During this repair:
- a new one-piece flexible floor covering is laid over the existing one, without floor repair;
- curtains change (see);
- lambrequin pendant;
- screens are installed, if necessary.
- Decorative. This is a more complex renovation. This includes, in addition to the above activities:
- installation of a new ceiling;
- new wall decoration;
- the floors are being laid;
- it is possible to insulate a balcony or loggia;
This is already quite difficult work, but still quite doable on your own. Decorative repairs also include the installation of light partitions made of tongue-and-groove blocks or drywall, plywood or lumber.
- capital. In addition to the complete cleaning of the premises, its drying includes:
- overhaul of walls, floor, ceiling and installation of their insulation;
- floor repair, in which the screed is changed and its sealing, insulation and vapor barrier are made.
- European-quality repair. The concept of "Euro-renovation" is a style, the creation of an unusual look for a bedroom that will express the individuality of its owners. Such repair can be of any kind, even cosmetic, but it requires either the good artistic taste of the owner of the premises, his possession of special working methods, or the recommendations of an experienced designer. The cost of renovation, in any case, will be quite large.
- Refurbishment with remodeling. In this case, most often performed:
- combining a balcony with a bedroom;
- heavy capital partitions are arranged, giving a large concentrated load that acts on the floors;
- the device in the sleeping room of a panoramic or French window.
This repair requires the development of a project, a special permit for work, accompanied by complex documentation, professional technical supervision of all operations, their acceptance with confirmation of the act of putting the premises into operation. The execution of such work is possible with the experience of a builder who knows how to make technical calculations and who knows SNiPs. Repair with redevelopment on their own is carried out only in exceptional cases.
Tip: In any bedroom there should be a corner for a boudoir device, in which will be placed: a chest of drawers or a wardrobe, a dressing table, an ottoman. In a bachelor's bedroom, the functions of a boudoir and a table for work are perfectly combined by a secretary with a mirror arranged in its niche.
Room with design features
When it comes to bedrooms, another problem is quite common: the room has a pencil case configuration, that is, it is narrow and long. Let's see how professional designers get out of this situation.
Such a room must be zoned, and in the photo below you see that this was done using a suspended ceiling with lighting and curtains.
So:
- The coffered plasterboard ceiling is made only in that part of the room where the bed stands, and it stands under the window. Therefore, the heating battery was covered with a decorative grill, and roll-type blinds were hung on the window. The curtains were not placed above the window, as is usually done, but in front of the bed, thus creating a kind of boudoir.
- Such an idea may be of interest to the owners of "Khrushchev", where there are rooms of a similar configuration. By the way, partial zoning can also be done by arranging a curly plasterboard partition. Most often, it is an element of the ceiling-wall zoning structure.
- One or another option for dividing a room into zones is selected taking into account the location of windows in it. The boudoir example is good when the window is at the far end of the room, as is often the case.
In the example below, it is located on the side wall, near the entrance.
- The bed is in a part of the room that is not lit by daylight, and if it is closed with curtains, the sleeping area will be almost in darkness. Therefore, another zoning option has been chosen here.
- A short curly partition separates the zones only visually, without blocking the light. Due to insufficient daylight, for the decoration of this bedroom, white and muted pink were taken as the basis.
- And yet, in high-rise buildings there are long balconies with two exits, one of which is in the bedroom, or it can be an exit to the loggia. One way or another, this is not very convenient, and there is a desire to remove this door, especially since rooms with a balcony often have poor lighting.
- What can be done in this situation? The door leading to the balcony can, of course, be removed, but only if it is well insulated and heating is carried out there. Now there are all the possibilities to do this - however, they will require certain costs.
- It is necessary to close the gaps well, insulate the parapet and the ceiling of the balcony according to all the rules. The expanded clay screed will raise the floor higher, and the underfloor heating system installed under the floor covering will even save you from the need to arrange traditional heating on the balcony.
How to redecorate a bedroom
The renovation guide includes:
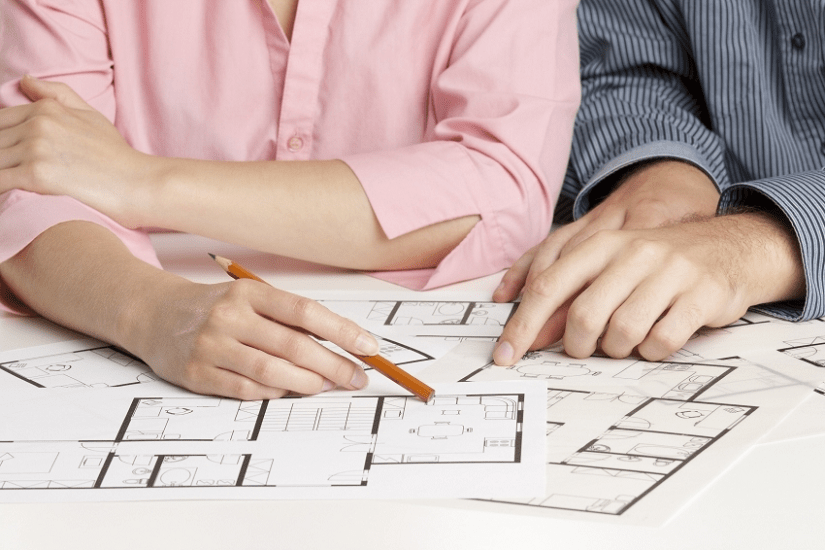
- A design project is being drawn up.
It reflects what kind of bedroom should be after the renovation is completed. The sketch is applied to paper or reproduced using a special computer program, if available.
In this case, it is necessary to take into account all the dimensions of the room, correctly perform zoning of the space of the room. Usually the bedroom is isolated from all other rooms of the apartment, but you can organize a dressing room or a place to work here.
- Estimate for repairs.
After determining the design of the room, a list of materials necessary for the work is compiled, and repair costs are formed. At the same time, the main condition is to correctly maintain the ratio of good quality and reasonable price for the renovation of the premises.
- The workplace is being prepared.
Before starting the repair of the bedroom, all furniture should be removed from it, chandeliers, sockets and switches should be removed. If you do not plan to change windows and doors, they must be protected with a special film from scratches and dust.
- Removed old coatings.
This removes:
- old wallpaper;
- traces of whitewash;
- dye;
- old tiles;
- damaged flooring.
Dismantling is a rather long procedure that requires certain skills and attention. Skirting boards and thresholds should be removed.
- The premises are being re-planned and its structural elements are being replaced.
Repairs can begin with redevelopment of the room, which involves the demolition or installation of partitions. In addition, when repairing a bedroom, you can do:
- replacement of radiators;
- installation of air conditioners;
- carry out electrical work;
- replace windows and doors.
Tip: The bedroom, more than any other room, should be finished with environmentally friendly materials that are safe for human health.
How to finish the ceiling in the bedroom
The ceiling plays a significant role in the design of the room.
He can be:
- puttied.
This is a rather time-consuming process that requires skill and experience.
- From drywall.
Such a device can be done independently. The advantages of drywall constructions are:
- leveling of surface differences;
- hiding all communications;
- suitable for any lighting device;
- are an ideal option for creating multi-level structures of any complexity.
- Stretch.
Features of such devices can be:
- they hide all the imperfections of the ceiling surface;
- protect the room from unexpected ingress of moisture from the ceiling into the room;
- a wide selection of textures and colors.
Stretch ceilings can be arranged in multi-level versions, where they will bring a touch of uniqueness and originality to the bedroom.
Much attention must be paid to the color scheme of the ceiling. It depends on the dimensions of the renovated premises and on the style used. Dark colors reduce the visual space, and light colors increase it.
Tip: In the bedroom, it is not recommended to install glossy and multi-colored ceilings that distract attention and do not contribute to relaxation. All shades are chosen so that they are calm and unobtrusive, and to include a rich color in the interior, it is better to make a small color accent in the middle.
Repair of windows and doors
Doors are selected in such a way that they are combined with the design of the entire room. Windows are an important element of the interior. Their shape and size dictate the design of the room.
In addition, they prevent the penetration of cold into the bedroom, have thermal insulation properties. The sound insulation of a window depends on the thickness of the glass, the distance between the glasses, the density of the joints.
Depending on the type of window opening, they can be:
- Combined.
- Swing vertical.
- Swing horizontal.
There are a variety of window models:
- Standard made of plastic.
- Original wooden with attractive design.
Tip: When designing a house plan, you need to consider that the windows are directed to the south or east. Then sunlight will enter the room in sufficient volume, which improves the functioning of the human body, stimulates the activity of the central nervous system and controls metabolism.
How to decorate the walls in the bedroom
Wall decoration is the main operation in the repair of a room. First of all, they align.
To do this, you can use one of the options:
- Alignment of walls with drywall. This is a simple and quite time-saving option. Drywall can hide quite large differences on the surface of the walls and create a perfectly flat surface. The disadvantage of the material is a decrease in the area of \u200b\u200bthe room and the unusual hollowness of the walls of the room.
- Plastering. This is a more difficult, time-consuming and costly procedure. In addition, it cannot be used for rooms where there are large surface drops. The advantage of this method is the saving of the usable area of the bedroom.
For finishing the walls in the bedroom, wallpaper or decorative plaster is most often used. When choosing wallpaper:
Tip: The best option for wall decoration is paper wallpaper, which is environmentally friendly and affordable. Their only drawback is their short service life.
- Those who are creative in organizing the interior can take non-woven wallpaper for painting. Such materials pass air well, are environmentally friendly, they can be repainted, if desired, change the color and style of the room.
- Textile wallpapers look quite original in the bedroom:
- have a long service life;
- great abundance of colors and structures;
- provide excellent sound insulation in the room.
It allows you to create an original work of art in the bedroom, and its owner can be sure that the design of his room will be one and only.
Color shades for the bedroom are best to take:
- Blue.
- Light green.
- Pearl grey.
- Light pink.
How to repair a floor
The floor in the bedroom should not be cold. If possible, it is better to arrange the installation of the "warm floor" system.
As a floor covering you can use:
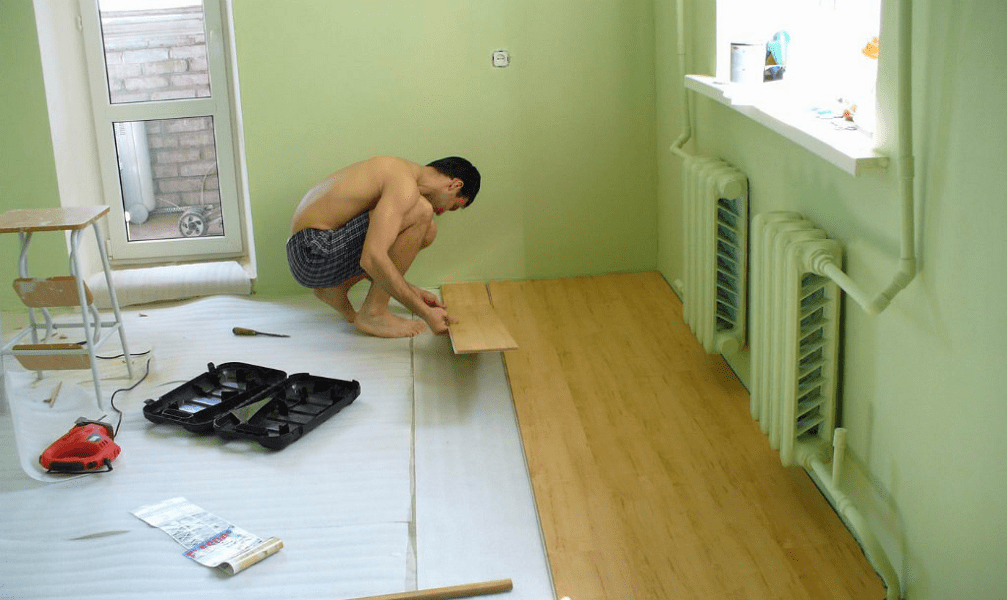
- Laminate. This is an affordable material, it is easy to fit. The coating does not require special care, but when installing under it, a soundproofing substrate should be laid.
- Parquet. The material is quite expensive, very capricious and requires special care.
- Linoleum. It has high wear resistance and is unpretentious in operation.
- Cork floor. The coating is pleasant to the touch, warm, comfortable and environmentally friendly. Does not tolerate aggressive cleaning agents.
- Bulk floor. Original and modern finishes. With it, you can get a very flat surface on which you can apply a 3D pattern.
Tip: If the bedroom is small, a laminate or parquet laid diagonally will make the room visually more voluminous.
Installing furniture in the bedroom
The bedroom renovation ends with the selection of textiles:
- curtains;
- curtains;
- bedspreads;
- capes;
- decorative pillows.
Podium for the bedroom
The simplest version of the podium is a frame made of wooden beams, sheathed with plywood or OSB wood-polymer boards. As a front finish, the body of the podium can be finished with carpet, piece parquet, laminate, cork.
So:
- Experienced specialists manage, with the help of a podium, to organize the space of the cramped bedroom so that everything you need is placed in it: from a table to a linen closet. In general, it is believed that the podium should be made: either in a small or in a fairly spacious room - the main thing is that the ceiling height allows this.
- In Japanese-style interiors, you will hardly see traditional beds - just a soft mattress set on a low podium. In a large room, it can be located in the center of the room. Then it makes sense to decorate its surface with expensive wood, to make a backlight.
- If you, starting to repair the bedroom, decided to make a podium, in this part of the room you will need to dismantle the flooring. Next, you will have to level the base and cover it with a cork substrate, which usually fits under the laminate. This layer will serve not only as a shock absorber, but also provide normal sound insulation.
- The size of the beam for the frame should be selected taking into account the expected loads - if it is only a bed, a section of 30 * 30 mm will be enough. In principle, an aluminum profile can also be used for this purpose, especially if the podium is sheathed with GVL. The distance between vertical posts should be no more than 40 cm.
- In those places where the podium adjoins the walls, the frame elements can be rigidly fixed to their surface. Horizontal and vertical belts are installed at a right angle, if these are bars, then they should be additionally fixed with metal corners.
- If plywood is used to cover the horizontal surface of the podium, then in order not to feel deflection under load, it is necessary to take material with a maximum thickness (21 cm). The use of OSB boards allows you to reduce the thickness to 15 cm - they are much stronger than plywood due to the polymer filler. Gypsum-fiber sheets (GVL) can have a thickness of 12 mm, but the step between the lags, at the same time, should be less: 30 cm.
To build such a structure, special knowledge is not required - every second man will perfectly cope with this task. For sheathing visible vertical surfaces, making the front side of a drawer, you can take chipboard with a laminated finish, or use parts of unnecessary cabinet furniture.
Loggia as part of the bedroom
What disfigures any room the most is pipes and heating radiators, which are not always possible to hide. And if the room also has access to the loggia, the whole wall practically does not participate in the design.
So:
- You can, of course, hang chic curtains, but if you constantly pull them, going out to the balcony and back, their appearance will soon be deplorable. You have to move the curtain so that it does not interfere with free walking.
- For this reason, the owners of such premises often prefer to connect the room with a loggia. Why exactly with a loggia, and not with a balcony? The answer is simple: a balcony is a remote structure, and making it as warm as a room is quite difficult.
- The loggia, in principle, is part of the interior, and its floor and ceiling are not balcony slabs, but floor slabs. Therefore, in winter it is much warmer inside the loggia than on the glazed balcony - and this is very important, especially for the bedroom.
Before removing the window and door, you need to get rid of the battery under the window and solve the main question: how the room will be heated.
And the choice is:
- If you make the parapet low or do without it altogether by installing a glass wall, the bedroom will have excellent natural light, and you will be pleased with the panorama of the city that opens up to your eyes. It will only be necessary to raise the level of the floor of the loggia to the level of the floor of the room, make a common flooring and finish in harmony with the general interior - and you will get a large bedroom with a separate area reserved for relaxation or study.
- Do not forget that the interior decoration of the walls and ceiling on the loggia should be done in a frame way. This will make it possible to waterproof the surfaces and lay a layer of insulation under the skin. By the way, when removing the window and the door leading to the loggia, you can leave the wall under the window - it will play the role of a zoning partition.
- The opening can be decorated with a contrasting casing, mounted along the wall and along the ceiling with beams of the same color, and you will get a design similar to the one in the picture above. And yet, above the wall, you can install a decorative partition made of wood or drywall.
- If you prefer to leave a wall, then you can not remove the battery, but close it with a decorative grille. Alternatively, a table can be made on the basis of the wall, since its height is ideal for this.
All the details on repairing the bedroom are well shown in the video in this article on the topic: “We do repairs in the bedroom with our own hands.”
The issue of repairing a room almost always rests on the budget for future work. Most often, the owners of an apartment or house are faced with a choice - to do a cosmetic renovation of the room with their own hands, without putting it off indefinitely, or to plan a major restructuring with redevelopment and a major design update for an indefinite future. Most masters in such a situation recommend a redecoration of the room, during which the vast majority of problems with the interior of the room can be solved.
How to approach the organization of repairs in one room
Starting repairs in a room is always inconvenient and even scary, especially if there is not enough experience, and of the assistants at hand, there is only a cheat sheet on doing a do-it-yourself room renovation for beginners. But, as a rule, uncertainty and doubts pass when the scope of future work becomes clear and the question is resolved in what sequence to make repairs in the room.
Therefore, the first step is to draw up a master plan for cosmetic repairs, and most importantly, before trying to make repairs in the room, it is necessary to draw up a detailed estimate for the purchased materials and consumables. This is a prerequisite, even for repairs in a small room you will need to make a list of several dozen items.
Where to start repairs in the room is not important, you can carry out repairs in the sequence that seems more convenient in these specific conditions. Traditionally, do-it-yourself room repairs begin with the most “dirty” or rough work and end with fine finishing procedures.
A typical list of work or a sequence of repairs in a room is as follows:
- The old finish is removed from the walls, ceiling and floor. Removing the floor covering gives the largest percentage of dust and dirt, so it is removed first;
- A rough preparation of the floor is being carried out for further laying of a new floor covering;
- Wiring is being repaired, lamps, switches are being moved and hung, corrugations are laid out for television and Internet cables;
- Walls and ceilings are cleaned and plastered. If the plans for cosmetic repairs involve changing the wallpaper to a more modern type of finish, then you will need to level the walls with gypsum plaster;
- The ceiling surface is leveled in a similar way. For whitewashing or painting with a water-based emulsion, the ceiling is overwritten, plastered with a lime-gypsum mixture and a decorative coating is laid;
- Decorative wall decoration is being carried out, ceiling plinths are being glued, the lining of interior doors is changing;
- A new floor covering is laid, skirting boards are installed, lamps are hung, switches are being installed.
Of course, at each stage of repairing a room, a photo, a large amount of debris and dust will be generated. Not only will you have to regularly clean the room and take out rubbish blockages, you will need to try to cover areas with already completed repairs with a protective plastic film to avoid dusting the surface.

What not to include in a room remodel
Master finishers often call redecoration work "for three days", in order to update the interior in a room, more, as a rule, is not required. The list of repair measures does not include the most expensive work:
- Redevelopment of premises with the transfer of interior partitions;
- Replacement of the heating system;
- Installation of expensive multi-tiered suspended ceilings;
- Balcony glazing and replacement of windows with double-glazed windows;
- Underfloor heating equipment in the room.
It is clear that all of the listed components of the repair require serious financial costs and the involvement of qualified specialists in the work. It will take more than a day or two to carry out such serious events. In addition, such is the specificity of the repair in the room that, willy-nilly, dust and construction debris spread throughout the apartment. Therefore, the situation is regulated in this way - either cosmetic repairs are made in a single room, or the entire apartment “gets up” for major repairs.
In general, the redecoration plan includes everything that can be done in a couple of days with your own hands for relatively little money.

The main task of cosmetic repair
The main goal of repair work is to refresh the interior of the room, remove minor defects and damage accumulated over the years, which are insanely annoying and interfere with everyday life.
In rare cases, cosmetic repairs are the result of force majeure, for example, the flooding of the room by the neighbors on the floor above or the preparation of the premises for rent. There can be many reasons, but the main thing is still maintaining the premises in a comfortable condition for living.

Properly performed cosmetic repairs make it possible to save on the volume of future overhauls. For example, performing a floor base screed and leveling the walls will at least reduce the time and effort spent on preparing for a major overhaul, of course, provided that the repair of the room with your own hands is done as conscientiously and efficiently as possible. .

The next stage of repair, distribution of costs and loads
One of the most difficult stages of redecoration is fairly considered to be budget planning and material procurement. Especially if you plan to do most of the repair procedures yourself. The reason is simple - amateurs and novice craftsmen have no idea at all how much specific material is required for a particular area of work.
In this case, the problem is solved in two ways:
- Compiled List works and estimates can be shown to an experienced craftsman who will help calculate the expense by squaring the room;
- Calculate flow on the basis of standard recommendations of building materials manufacturers, increasing the stock of glue, plaster mixtures, wallpaper, flooring by 10% of the calculated indicators.
In the latter case, the cost of purchasing materials will increase significantly, but in the end, the remains of cement, dry plaster and glue can be used to redecorate other rooms in the apartment. In addition, having a list often helps to get a wholesale discount, so there should not be significant gaps in the budget for a future cosmetic renovation of a room with a competent organization of the purchase.

Preparatory stages of repair in the room
The first, most time-consuming stage has always been and remains the rough peeling of the walls and ceiling. Usually, repairs in a room begin with the removal of furniture and sealing the front door with a protective awning. You can use thick plastic wrap or an old blanket. An impromptu curtain will protect the rest of the apartment from noise and dust, which, even with very careful work, the use of a vacuum cleaner and wet cleaning of floors, always accumulates in considerable quantities in the room.
Before repair, lamps must be removed, instead of a chandelier, a cartridge with a light bulb is left in the room. If double-glazed windows are installed in the room, then it will be useful to tighten the window opening with foil before repair. It is clear that the floor covering is also covered with a film, it is easier to roll up the laid polyethylene than to wash out the dirt in the room every evening.
Removing old finishes from walls
It takes about a third of the planned time to prepare for cosmetic repairs. During this time, you will need to remove the whitewash and wallpaper from the walls of the room. If there are areas with damaged plaster, it will take another day to knock the plaster off the walls.

Old wallpaper is removed either with one panel or scraped off in small pieces for a long time, it all depends on the glue used. Before removing the wallpaper, the surface is moistened with a spray bottle with a small amount of water. After 20-30 minutes, the tapestries can be removed in patches. For particularly strong adhesives, boiling water and steam are used. In any case, after peeling off the old trellises, you will need to go through with a vacuum cleaner and a stiff brush to remove dust and glue residue.
Stripping and restoration of the ceiling surface
The ceiling is freed from the decorative coating much faster and easier than the walls. If the plans for cosmetic repairs include sticking polystyrene plates or laying plastic panels, then it will be enough to remove the top layer of whitewash.
The situation is more complicated if the ceiling in the room is painted with water-based paint or whitewashed with lime. In this case, it will take at least a day to remove the durable layer of the old finish.
The most common option for restoring the ceiling during cosmetic repairs involves leveling the plane of the ceiling. In any room of any apartment, floor slabs lie with a trim of several degrees, which leads to a difference in ceiling height near the opposing walls of the room from 2 to 5 cm.
If the time and budget for cosmetic repairs allow, then it is best to level the ceiling with high-quality gypsum plaster.

To do this, plastic slats are sewn onto the ceiling and the plane is tightened with a plaster mesh. Reiki-lighthouses are glued with alabaster, guided by pre-stretched marking horizontal cords. The mesh is sewn on dowels. The total time required for the final leveling of the ceiling in the room is 5-6 hours of work.
In one working day, you can complete a complete ceiling repair. The next day, you can rub, prime and paint the surface.
Cosmetic repairs to the walls of the room
During cosmetic repairs, the walls are leveled and plastered only in exceptional situations when the situation requires it, for example, the appearance of a large number of cracks or chipping of the plaster. In addition, the total area of the walls of the room, as a rule, is three times the area of \u200b\u200bthe ceiling, which in itself requires a lot of time and materials.
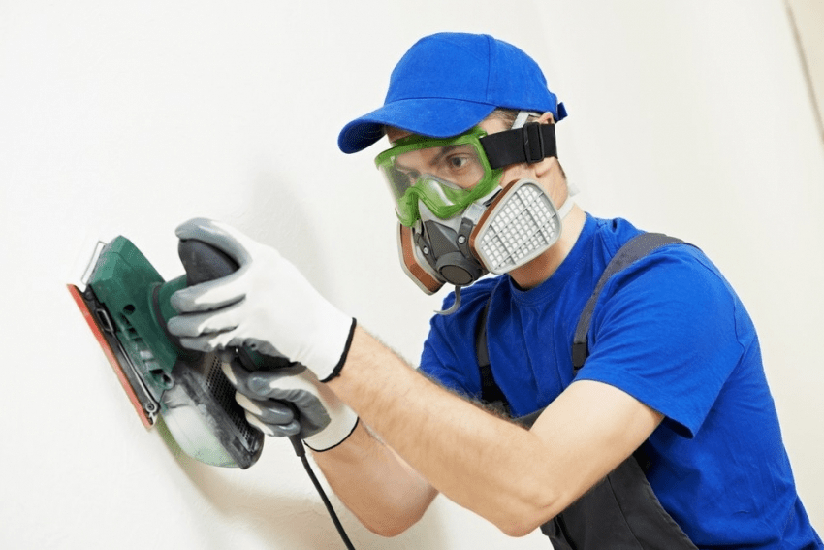
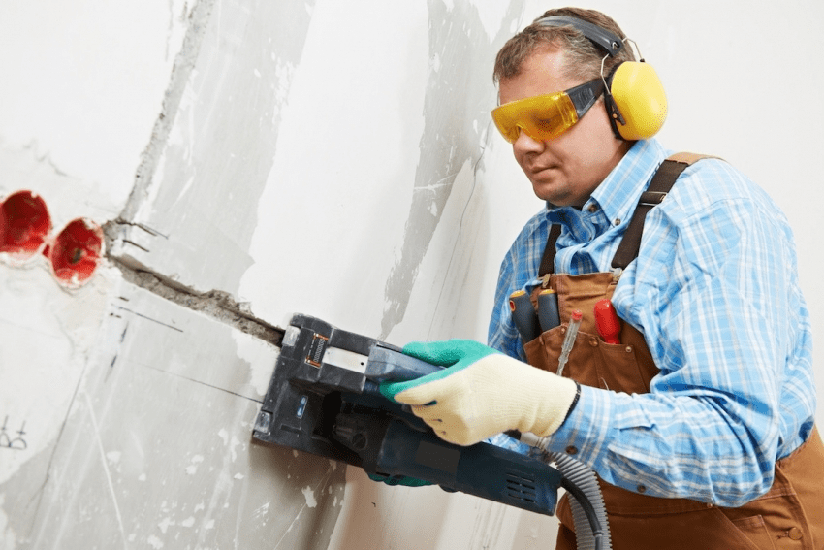
Therefore, during cosmetic repairs, the preparation process is limited to cutting small cracks, followed by puttying and grinding the surface. Sometimes, in order to level the plane of a single wall, especially problematic areas are subjected to grinding with an electric grinder.
In addition, at this stage of the repair work, it is not difficult to change the profile and configuration of the electrical wiring in the room. It is enough to drill channels in the lower part of the walls to the installation site of new electrical outlets, break through the "glasses" for the undercuts and install the outlets themselves. Corrugations with wiring laid in channels can be rubbed with gypsum or alabaster mass. All work will take a maximum of 2-3 hours. At the end of the preparation for finishing, the surface is vacuumed and primed.
Rough floor preparation
After the completion of the most time-consuming work with the preparation of the ceiling and walls, you can proceed to cleaning and preparing the floor. If the floors are concrete, with laminate-based flooring, then cosmetic repairs may be limited to re-laying laminate boards, with or without replacement of the lining material. Most often, damaged plates are changed in the room, after which the coating is polished using wax mastic.
During cosmetic repairs, linoleum coatings are cut out, the base is cleaned to concrete, primed and covered with a heat-insulating lining based on polyethylene foam.

If the room has wooden floors, then first of all the floorboards themselves are cleaned and repaired, then the joints are clogged and minted, after which the surface is polished and prepared for painting.
Don't forget about debris and dust
Any repair work, even the most simple and superficial, is always accompanied by the formation of a large amount of debris and dust. Before repair, you need to prepare two or three polypropylene bags, in which all the garbage from the room will be collected daily. At the end of the day, after each finishing operation, the walls and floor are cleaned of crumbling crumbs and plaster residues, and before finishing, the walls are vacuumed or wet brushed.
If it is supposed to level the walls of the room with gypsum plaster, then the amount of garbage will increase by five to six times. It will be necessary to think in advance and find a way to collect and remove from the premises 150-200 kg of cement-sand garbage screenings. You cannot send it to the garbage chute or garbage cans; you will need to order a special service for the removal of construction waste.
Fine cosmetic repairs in the room
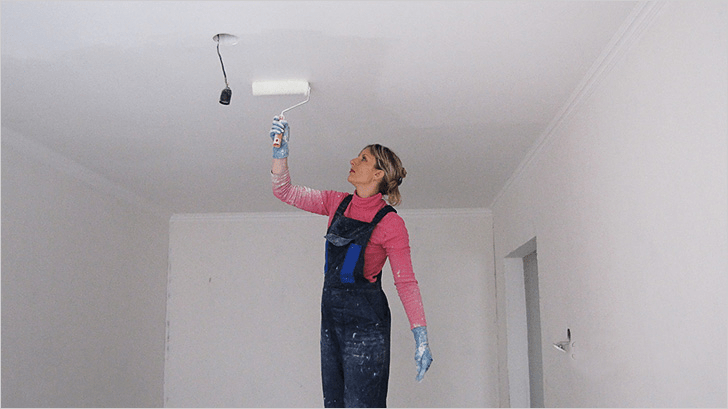
The first is the finishing of the ceilings. Usually, the repaired and sanded surface is primed and painted with light-colored acrylic paint.

If wallpaper is used in the interior of the room, the ceilings can be decorated with non-woven or vinyl wallpaper to match the future wall decoration. A common practice for decorating lamps and chandeliers is the use of imitation styrofoam moldings and decorative ceiling plinths.

The fine finishing of the walls in the room is considered one of the most responsible and at the same time time-consuming cosmetic operations. Even taking into account the fact that half of the walls in the room will be covered with furniture, a certain part of the walls will still be clearly visible to everyone in the room. If during the cosmetic repairs it was not possible to qualitatively level the surface of the walls, you can hide the flaws only under the wallpaper. Best of all, tapestries on a fabric basis or with a pronounced embossed textured surface. It will take 7-8 hours or a full day to paste over the room.

Repair of doors and floor in a small room
The wooden plank floor of the old layout often has to be hidden under linoleum or laminate. In this case, the surface of the floorboards is polished with a sander, and the joints are sewn together with nails hammered at an angle to the board. At the next stage of the repair, the floor surface is sewn up with OSB boards, after which linoleum or any other type of flooring can be laid in the room.

The situation becomes more complicated if the concrete floors are aligned with the level of the screed throughout the apartment. In this case, any floor covering in the room will lead to the appearance of a threshold, so the laying of laminate or parquet must be planned simultaneously in all rooms.
The final stage is the restoration of interior doors. The hatch and the door itself, if they are in good condition, can not be changed, but restored with cleaning and polishing of the surface. The outer lining of the door frame during the repair is traditionally replaced with a new one. The replacement of doors with a carrier frame is planned for a major overhaul, usually so that the entire apartment or house has doors of the same style and design.

Conclusion
Repair of a room, even in a cosmetic version, requires careful preparation, first of all, in the details of the future interior of the room, the method of decorating walls and floors. Any attempt to postpone the decision to the future, to do it randomly, as it happens, will lead to a significant increase in costs and increase the time required to restore the room by two to three times.
16.07.19 38 430 83
Do it yourself and on a small budget
I renovated a room that was last renovated twenty years ago. I spent 16,921 R on this.
Victoria Tsarenkova
renovated grandma's room
I inherited from my grandmother her room in our family apartment. In this article, I will tell you how to make simple repairs and restore furniture so that the room takes on a modern look.
What will you learn

What did the room look like before the renovation?
Our apartment is located in the old housing stock of St. Petersburg. This is the name of the houses built before the revolution. Ours was built in the 1890s. Such buildings differ from modern ones in uneven walls, high ceilings and bizarre layouts. They also have ceilings with stucco, painted walls, tiled stoves, stained-glass windows and old type-setting parquet. I like it when they preserve the special, old spirit of St. Petersburg apartments during repairs - this is their highlight.
16 921 Р
I spent on redecorating the room
In the apartment, we renovated all the rooms, except for my grandmother's. She objected to the refurbishment as being too hectic, and we didn't push it. Therefore, gradually her room fell into a deplorable state: old wallpaper, dilapidated wooden frames and Soviet furniture. Only the parquet is well preserved.


Preparation for repair
I decided that the renovation would be my creative project, not a debilitating inevitability. And it helped me to relate more easily to all the vicissitudes of this process. There was excitement: what will I get in the end. In addition, I was in no hurry and did repairs only in my free time.
I am not a designer, but I feel the colors, style and combination of textures. This is a family thing for us: my brother is an artist, and my mother has recently become interested in watercolor painting. I also love different sites and groups in social networks where interesting interiors are found. It seems to me that such “observation” helps a lot when you come up with interior design on your own.
Therefore, an approximate picture of how I want to see my room immediately appeared in my head. That's what was important to me.
Painted walls, not wallpaper. I wanted bright colors, so I decided that three of the walls would be blue and one would be yellow. I also didn’t want to glue the wallpaper, because this is an additional procedure, and I needed to make everything easier and faster. The option of painting old wallpapers didn’t work either: they had been hanging on the walls for twenty years and I wanted some kind of update.
Gray furniture. I decided that I would repaint my grandmother's lacquered furniture to make it look more modern. I chose the gray color because I thought that the gray shelving would look cool against the yellow wall. The combination of these colors is one of my favorites.
Bed in the form of an ottoman. I didn’t consider a sofa or a couch, because I wanted to sleep on the bed: in the evening, just throw back the covers and lie down, and put everything back in the morning. I'm tired of "sofa rituals": in the evening, lay out and make a bed, remove the linen in the morning and assemble the sofa back.
Before proceeding with the repair, I found and saved pictures from Google and Pinterest with the desired result to a folder on my laptop, sorting everything by color and their combination. I knew that's what interior designers do: they put together "mood boards" or "mood boards" for visualization and inspiration.

Pinterest is also convenient because you can save all your favorite pictures directly to your board - this is how the user's folders are called on this site. I also recommend doing a search query in Pinterest in both Russian and English, because the results are very different. If you request in English, you will get more images, as this social network is popular all over the world.
 |  |
Work plan
It always seemed to me that repair is difficult and expensive. I thought that I couldn’t cope with it on my own, because I don’t understand building materials, I don’t know what and how to do. But there were no other options, because there was no money to hire craftsmen. Therefore, we had to do everything ourselves and as cheaply as possible.
My brother helped me. He himself did the renovation a few years ago and suggested what materials to buy. For example, he advised instead of the famous "Rotband" to take ordinary plaster. It's cheaper and works great for my needs. Another brother said what kind of paint is needed for the walls, ceiling, windows and radiators. He explained what to paint and in what order. Without his advice, I would have spent much more time, effort and money on repairs, figuring out what's what.
I did not want to do everything perfectly correctly and strictly according to technology. It was important for me to meet the budget and put the room in order - so that it was clean, tidy and just nice to be in. And I also wanted to preserve the spirit of St. Petersburg, which the apartments in the old fund are so famous for. Therefore, I did not strive to level the walls, ceiling and window openings to European standards.

I was to:
- Rip off wallpaper.
- Seal up nail holes and small potholes in the walls.
- Prime the walls.
- Paint the walls, ceiling, windows and doors.
- Repaint furniture.


Painting works
Ceiling. I started by painting the ceiling. Since I had a “no rules” repair, I decided not to remove the old whitewash, not to process the leaks and not to close the cracks - but to paint immediately according to what I have.
For the ceiling, I bought the cheapest water-dispersion paint in a construction hypermarket. I planned that one bucket of 3 kg would be enough for the entire ceiling. The label said "3 kg ≈ 18-24 m²", and the area of \u200b\u200bmy room was 14 m². As a result, it took me three such buckets to the ceiling. Painted in two layers. Perhaps I used up so much paint because I did not follow the technology - that is, I did not prepare the ceiling for painting in any way.
9 kg
it took me paint on the ceiling with an area of 14 m²
At first, I had difficulty with the ceiling: the roller did not apply fresh paint, but only removed the old whitewash. I had to paint with a wide brush, and make a curly strip at the junction with the wall with a thin brush. As a result, it seemed to me even easier to paint with brushes than with a roller. In addition, I stood on a high stepladder almost under the ceiling, so my hand didn’t get tired much.
One bucket of paint cost 159 R. Painting the entire ceiling cost me 477 R.


Firstly, I primed the walls - that is, I applied a special compound so that the paint would better adhere to the surface of the walls. In addition, the primer protects the walls from mold and mildew. One liter of liquid primer was enough for my room. It must be diluted with water, applied with a roller on the walls and allowed to dry. In what proportion to dilute and how long to wait for drying, indicated on the package.
1 l
liquid primer went on walls with a height of 3.2 m and a total length of 11.5 m
Secondly, I patched up the nail holes and small dents so that dust would not accumulate in them and the surface of the wall would look more uniform. There were many such holes and potholes in the walls. For this, I needed a plaster mixture. I bought a 5 kg bag, which I completely used up. The mixture must be diluted with water until smooth. For this, I used a construction mixer that my brother gave me. Whether it will be possible to whip the mixture by hand - I do not know.
I did not breed the whole bag at once, but in parts. The mixture quickly hardens, and it must be applied to the wall in time. I added water by eye, focusing on the fact that the plaster should be in consistency like thick sour cream.
Applying plaster on the walls is simple: you take the mixture on a spatula, cover the hole, level this patch on the wall with the sharp side of the spatula. I liked this part of the work: compared to painting the ceiling, it was almost a vacation.
In general, first it was necessary to close up the holes and only then primed the walls. But I made a mistake and did the opposite. It did not affect the result of painting.
It was also easy to paint the walls with a roller. But I have a problem with the color scheme. I planned to make one wall yellow, but when I painted it, it turned out terrible. This wall moved forward and visually crushed. And the brother came up with such a move: leave a wide yellow stripe on the wall, and paint blue paint on the sides.


On the advice of my brother, I bought one of the most budgetary paints - the Marshall brand. He painted such walls and was pleased with the result: the paint lay well on the surface and covered it with a dense layer. The colors are vibrant and have not faded or faded over time.
It took me five buckets of 2.5 liters: four blue buckets and one yellow. I painted in two layers, but I didn’t use up all the paint - half a bucket of blue paint remained and a third of the bucket of yellow. I plan to use them later when repairing the toilet and bathroom.
10.4 l
paint went on the walls with a height of 3.2 m and a total length of 11.5 m
The paint is sold in white, and in order to get other colors, you need to do “tinting”, when a little paint of the desired shade is added to white paint. I was tinted in a construction hypermarket, where I bought paint. There are special machines that strongly rotate the bucket and thus mix the colored paint with white. The tinting of one bucket cost 63 R.
Yellow paint cost more than blue. The most budgetary paint for 399 R was not suitable for tinting yellow, so I had to buy a bucket of yellow from another price range of the same brand - 455 R each.
In total, I spent 2297 R on wall paint.


Windows and door. Before painting the windows and the door, I scraped off the cracked paint from them with a spatula, and in the wall between the windows I patched up several obvious irregularities with a plaster mixture.
I painted the windows and the door in two coats of universal acrylic enamel. I did not understand the nuances and took the most budget option on the shelf in the construction hypermarket.
5 kg
enamel was used on two windows and one door
My windows are wide - each 1.25 m. The door is also rather big - 2.7 × 0.95 m, plus it had to be painted on both sides. This work took two full buckets of 2.5 kg. At first I bought one bucket, and when I realized that I needed more paint, I had to take a second one.
I painted the window frames and the figured part of the door with small rollers 6 cm long, and everything else with brushes and large rollers. To prevent paint from getting on the glass, I sealed them with construction tape around the perimeter of the frames. In general, the glass was also in a deplorable state. But I decided not to do anything with them yet. I just washed and scraped off the paint from the last repair.
One bucket of enamel cost 364 R. I spent 703 R on painting two windows and a door, since I bought one bucket at a discount, asking for a discount card from a neighbor in line at the checkout.

Batteries. Batteries require special paint. If you paint with a regular one, when heated during the heating season, it may crack or rust will appear. So I bought acrylic enamel for radiators. I'm lucky the heating hasn't been turned on yet. Otherwise, there is a risk that even special paint may dry unevenly on warm batteries.
Before painting, I did not remove the old coating and did not prime the batteries - although this is recommended in articles about repairs. I just wiped the batteries with soapy water to remove dirt and dust.
241 R
worth a bucket of enamel
I painted mostly with a brush. And for the internal surfaces I used a roller 6 cm long with a handle: it is easy to slip it between the sections of the radiator, and it painted over all the internal surfaces of the sections well. It took a little more than half a 0.8 liter bucket for two batteries, although I painted in two layers and did not save.
I also bought the most budgetary enamel, a bucket cost 241 R.
 width="1000" height="667" class="" style="max-width: 1000px; height: auto"> The parquet in the room is well preserved. I just brushed it with a brush for 110 R and a solution of ammonia, which removes dirt. Due to this, the boards became lighter. But if you peel it off and varnish it, it will be generally gorgeous
 Materials for repairing walls, ceilings, windows, radiators and doors - 4091 R
Wall paint "Marshall" and its tinting
Quantity
5 buckets of 2.5 l
2297 R
Enamel "Lacra" for windows and doors
Quantity
2 buckets of 2.5 kg
703 R
Paint "Lacra" for the ceiling
Quantity
3 buckets of 3 kg
477 R
Enamel "Tex" for radiators
Quantity
1 bucket for 0.8 l
241 R
Liquid primer for walls
Quantity
239 R
Plaster mixture for walls
Quantity
1 bag per 5 kg
134 R
Why I decided to repaint the furniture
Of the furniture in my grandmother's room, there were two racks, a square table and a round table, as well as an ottoman stool, a TV stand and an old sofa.
I built a TV cabinet through Avito. The sofa at first agreed to be picked up by the employees of the housing office, but they could not pull it out of the room through the doors. As a result, my brother and I broke the sofa and threw it into the construction waste container: there was no time to attach it further, and it looked shabby.
We decided to leave the rest of the furniture for two reasons. The first is sentimental. This furniture is a memory of people dear to me. My grandparents bought a Riga set in the mid-70s. And when my grandmother passed away, my mother and I could not give this furniture to strangers.
The second is practical. It was necessary to furnish my room, but it was not possible to buy new furniture. And this set, which has wandered around for 40 years in different apartments, is still in excellent condition - certainly stronger than the furniture that we bought in the nineties and even two years ago.

And then I decided on this experiment. The fact that furniture in the style of "Soviet chic" can be transformed beyond recognition, I learned even before the repair from the Internet.
I had to remove the varnish from the furniture and paint it in a new color.
How to remove varnish from furniture
I studied articles and videos on the topic and found three ways to remove varnish from furniture.
Thermal way. The surface is heated with a building hair dryer, and then the varnish is scraped off it. I immediately refused this method: such a hair dryer can heat up to 600 ºС, and I decided that it was simply dangerous. Suddenly I do something wrong and set fire to the surface or burn my hands.
Chemical way. A wash composition is applied to the surface with a brush, and after a certain time specified in the instructions, the varnish is removed with a spatula. Minor residues of varnish are removed with sandpaper. I decided to try to remove the varnish from the table in this way. In a video from one restoration workshop, it looked like this: a wash was applied, and the coating was easily removed to a light living wood. But there was a nuance: the master used a car paint remover. I bought the V-52 Paint Destroyer for furniture. And I didn't succeed.
The "destroyer" removed only 1-2 mm of varnish and deformed the table in several places. Perhaps because I left it instead of the prescribed 30 minutes for 45. Or maybe this wash just didn’t fit my furniture.
I was also worried about the toxicity of the drug. Although I worked in a respirator mask, the smell filled the entire apartment and did not disappear immediately. And on the jar, a short list of the components of the product was coquettishly completed by the words "additives that ensure the penetration of the gel into the polymer coating." I was puzzled that the manufacturer did not indicate the exact composition, so to "decontaminate" I washed the table with water and vinegar. And I decided to go the third way.

mechanical way. The surface is treated with sandpaper - manually or with a grinder.
At first I wanted to remove the varnish with a grinder. Thought it would be easier. But the machine would have to be bought or rented. In addition, I was told that it is no easier than doing it manually. So I decided to manually “walk” on the furniture and bought a sandpaper holder.
I went through all the surfaces with sandpaper twice: first, coarser with P120 grit, then softer with P180 grit. The surface of the table was softened by the chemical wash, and the varnish was rather difficult to remove. With racks it was easier: both of these giants, two meters long each, and even with shelves, drawers and internal sections, I sanded quickly and easily.
Width="1000" height="667" class="" style="max-width: 1000px; height: auto"> The sandpaper holder cost 120 R , and the cheapest grinder would cost me somewhere around 1000 R . I only processed the corner sections of the furniture with small pieces of sandpaper without a holder - otherwise you can’t get close to them


How do I paint furniture?
I made a mistake when I chose light gray for furniture. I painted the table, but it looked so dull and cold against the background of blue walls that it immediately became clear that it was impossible to leave it like that.
So I went through the paper palette again and suddenly settled on purple. I never liked this color, but I liked how it goes with yellow and blue. I also thought that it would be unusual - purple furniture. So I decided to paint them.


 I like the combination of colors on the walls and furniture. The question may arise: do I get tired of such bright colors? No, I love bright colors and their combinations, so I don’t get tired, but, on the contrary, I recharge
 March 24, 2018 No comments
Renovation of residential premises always opens up several options for its owners: take it into their own hands, or turn to professionals for help. The second option is much simpler, because the designer is working on the interior, and a team of narrow specialists is working on the implementation of the project, where everyone is responsible for specific actions. And before you make repairs in the room with your own hands, you need to study more than one construction site. Yes, and skills, at least initial ones, are very desirable.
This issue is most often considered from the material side, because the price tags for the services of designers and repair and construction teams are high, and hand-finishing will always help save a significant amount.
After weighing all the pros and cons, everyone stops at a variant that is closer to themselves, and our article will be a guide for those who decide to act independently. So, repairing a room with your own hands, where to start, what to buy and how not to spend extra money on ruinous waste materials. About everything in order.
We draw up an action plan that crowns an independent design project. It should include not only the decorative design of the room, but also display all the power points and lighting fixtures, furniture arrangement and even the placement of textiles.

It is better to create a schematic image with a markup of dimensions and in the correct scale in order to be able to purchase materials in the right quantity. This will allow you not to spend extra money on waste, to select the optimal wallpaper width for individual walls, the right number of panels, tiles, etc.
The purchase of materials can be made on the construction market, however, supermarkets offer more loyal exchange / return conditions, pleasant discounts when buying a large amount, and targeted delivery. Within the framework of one construction hypermarket, you can buy absolutely everything, down to the smallest detail. At the same time, do it in comfortable conditions and with the opportunity to consult with specialists.
Preparation of the project using a special program or paper with a pencil, as well as the purchase of the necessary equipment for repairs can be considered the first point of the preparatory work.
Before you make repairs in the room yourself, the room must be carefully prepared. We take out of it all the pieces of furniture and interior, things and indoor flowers.
Depending on the complexity of the repair, we determine the objects that remain in it: switches, sockets, window sills, doors, etc. If all this cannot be replaced, then it is worth isolating them with film and masking tape. Floors and baseboards are also better to cover.

Whitewash is washed off with a roller and warm water. It is necessary to soak not the entire area at the same time, but 1-2 square meters each. Soaked - removed the layer with a spatula.
If the layer thickness is large, then we wet it again and remove everything up to the floor slab or old plaster.
The paint on the ceiling is removed with a hard trowel or sandpaper, but it is faster and more effective to soften it with special solvents. These are sold in hardware stores and construction markets, they are inexpensive, but they can soften even a very thick layer of paint in up to 24 hours.

If there were wallpapers on the ceiling, then they can be removed dry, and the remaining glue can be removed by moistening and the same spatula. In any case, all loose remnants of the old finish are removed, only the immovable, dense part of the structure remains in place.
The same procedure applies to walls. We tear off and wash off all the old finishes, remove the walls, if necessary. We carefully clean the floor and prepare materials for the start of finishing work.

Actually repair
A primer is exactly the procedure with which you should start repairing a room with your own hands. It is sold as a liquid solution, and is applied to the surface from a special tray using a roller. There are also wide brushes that will help primer in corners and hard-to-reach places.

We apply one layer on the ceiling and walls, let dry according to the instructions. At this stage, it is necessary to protect the eyes and exposed areas of the body with high quality, since the primer is toxic and can cause a chemical burn.
After the wall has "grabbed" and has ceased to absorb liquid, it can be considered prepared for applying plaster. The latter can have a gypsum or cement-sand base; it can be replaced by drywall sheets mounted using metal structures or glue.

Most often, drywall is used in the case of large parepads at the level of walls and ceilings, its significant drawback is its large thickness.
Monolithic plaster will cost more, its application will be much longer. However, its presence on the walls will practically not affect the area of \u200b\u200bthe room. As well as at ceiling height, if applied there.

After the plaster has completely dried, it is the turn of the next layer of primer. Then - finishing in the form of putty and grouting the surface with a special grater. Putty is applied in a very thin layer. The purpose of its use is to eliminate the friability of the surface, which is achieved through the use of rough plaster.
Prices for popular types of plaster
Using a wide spatula or rules, it is leveled on the surface of the ceiling and walls, after which it must dry completely. In order to avoid cracking at the corners, a masking net is placed here, which is slightly deepened with a spatula into the still damp putty. This will make the surface stable and make repairs that you have to do yourself more durable.
The mesh must be laid when finishing slopes and doorways, it is appropriate to use a ready-made plastic corner, along the edges of which this textile is already present for repair. Further processing of the walls depends on what is chosen as wall and ceiling cladding.
If the surface will be covered with panels, wallpaper, cork or other sufficiently thick and opaque materials, then it can not be finely processed with a grater.
If your choice fell on painting, then the condition of the base must be brought closer to the ideal. After all, the paint, even applied in several layers, can give out processing imperfections.

Final arrangement and decoration
After all the stages of processing and drying the ceiling / walls, the most interesting thing comes - gluing or painting surfaces.
Wallpaper will always give a wide variety of combinations, since most of the collections are produced in the palette: pattern + plain companions. Paint will help express your creativity and ensure that the pattern on the wall belongs exclusively to your home.

Cork, photo wallpapers, embossed paper panels or fiberboard analogues are also considered from a design point of view as a very original solution. However, it is worth choosing materials for finishing on the basis of ease of daily maintenance during operation, as well as fire safety properties.
If the floors in the room also need fresh solutions, then for the rooms you can consider laminate or carpet, carpet tiles or felt-based linoleum. The installation of these materials is adapted for independent implementation, everywhere there is the opportunity to use glue or a simplified locking system.

After pasting the walls and finishing the ceiling, it's up to the small - the installation of lighting fixtures and the arrangement of furniture.
After a thorough cleaning of the room, furniture can be brought in here, having previously provided its legs with felt “patch”. This will help you keep the integrity of the floor covering for as long as possible.
Video: Do-it-yourself room repair:
Consider design and layout
At the very beginning, decide what you want to see in your apartment: what will be its design, furniture arrangement. Where there will be deaf, and where light zoning partitions. In order not to forget anything, transfer ideas to paper or to a spreadsheet. Consider your long-standing desires: when else to realize them, if not now? This may be the replacement of old windows, laying underfloor heating, redevelopment.
Decide what you are not willing to give up. It is often from such fundamental desires that people start when they think through the arrangement of furniture and other details. For example, the decision to turn a wide window sill into a seating area may entail a reworking of the kitchen set. Adjust the points written out by comparing them with real possibilities.
Schedule a work plan
List everything that needs to be done. In the next column or a separate table, make notes: a shopping list, the approximate cost of materials and services of craftsmen.
Create a budget for the entire project
At the same stage, draw up a schedule for the supply of materials. Downtime will increase costs, and the disruption of the sequence of work will negatively affect the result. If you get out of the previously planned amount, decide what you can save on, and what you definitely can’t. For example, inexpensive wallpaper is easier to replace after a couple of years than cheap linoleum that has fallen into disrepair.
For an approximate budget, it is also wiser to ask for help from designers, architects or builders. They will help to estimate the amount of work and funds that will have to be invested. They will determine the condition of utilities, the degree of wear of the screed and, based on the data obtained, develop an estimate that will be useful even if repairs are planned to be carried out on their own. Such services are not free, and there is a temptation to refuse to assess the condition of the apartment, hoping for a chance. This decision can hardly be called reasonable - you will have to be prepared for unpleasant surprises and, as a result, unforeseen expenses.
How can you reduce costs
We offer you 10 tricks that will help reduce the cost of the project with almost no damage to the future interior.
- Lay the warm floor only in open areas of the rooms. But keep in mind that making a permutation will not work.
- Estimate what you can do on your own or with the involvement of friends, and for which you will definitely need a specialist.
- Reduce the cost of double-glazed windows and by purchasing products in standard sizes as standard. Make sure that the openings meet these requirements in advance.
- Stationary plasterboard structures will cost several times cheaper than sliding glass, stained glass and radius partitions. But sliding interior doors will come out a little more expensive than swing doors.
- can cost you 10-20% cheaper if you buy it online. Upon receipt, check the completeness and quality of the devices.
- Apply a primer to the surface before painting. This will help reduce paint wastage.
- Find plain wallpapers - you can buy them almost "on account", since there will be little waste. But a drawing, especially a large one, requires a margin of 20-30%, which sometimes hits the wallet significantly.
- Not very expensive, but beautiful flooring -. Outwardly, it can be practically indistinguishable from an oak board or piece parquet, but the price will be much lower. In addition, the laminate is extremely simple even for beginners, which means that laying will cost quite inexpensively or you will do it yourself.
- To save on stretch and hemmed fabrics, order a simple design, without piling up levels and curved lines.
- You can reduce the cost of laying tiles by buying the remnants of different collections at a bargain price. Why not collect the original "patchwork quilt" from them and decorate part of the bathroom with it? If the rest of the space is lined with neutral light tiles, the interior will look impressive.
Walls almost always have to be leveled - strict verticals and right angles are extremely rare for builders. A lot of plaster and putty may be required. You should not choose cheap mixtures - there is a very high risk that low-quality materials will soon begin to crack and crumble. If the walls are too far from ideal geometry, it makes sense to completely abandon their plastering and level the surfaces with drywall. Most likely, it will be more profitable.
Once you've finalized your budget and list of changes, you're ready to take action.
Buy materials with a small (about 10%) margin. Additional trips to the store or to the market are fraught with temporary and financial losses. Unused surplus can then be returned to the store by check.
Find workers
Some processes are too time-consuming and independent execution will take a long time. For example, the dismantling of partitions. Special qualifications are not required for this, so people will be found quickly. But the installation of plumbing, wiring, underfloor heating is sometimes better to entrust to specialists.
Their search is not easy, and it is difficult to give any recommendations. Those for whom savings are important choose private teams, relying, as a rule, on word of mouth. That is, the recommendations of those who have already collaborated with these masters and are satisfied with the result. Most likely, you will have to cooperate with such masters only by oral agreement. If something goes wrong, it will be impossible to get compensation from them.
Official ones are more expensive, but the relationship between them and the customer is built on the basis of a work contract, which clearly spells out the rights and obligations of the parties. In addition, according to the law on consumer rights, they provide a guarantee for a period of one year.
In advance, give builders information about all plumbing fixtures and their features. At this stage, a detailed one from the architect-designer will be very useful.
Make a measurement plan and visualization
Measure the rooms and do it. Or entrust this task to designers. They also measure each room taking into account communications and provide you with several options for planning solutions already with the arrangement of furniture.
When you choose a project, it will be worked out stylistically. To have a clear idea of what your house will look like, you can order sketches or 3D visualizations using graphic editors. The latter option is preferable for complex solutions (reconstruction of space, built-in furniture, complex ceilings, many details). Visualization allows you to get a visual realistic image of rooms in all possible angles, but it is quite expensive and simply unnecessary for simple solutions.
After the approval of the project, the specialist will make detailed drawings that can be used by contractors in the future. As a rule, it takes 2-3 weeks to create a design project "from and to".
Stages and sequence of overhaul
If you live in an apartment, it is better to carry out repairs sequentially: first in one room, then in another, so as not to carry dirt around the house. Start from the room where more garbage is expected. Usually this is a bathroom, as tiles are often laid in it. Then they go to the back room and move to the kitchen.
Furniture and things will have to be disassembled, packed and taken to other rooms, some sent to the dacha, to the garage, and some thrown away.
Dismantling of old coatings
This stage is relevant only for the secondary fund. Removing old wallpaper, flooring, plaster, tiles, windows can take one to two weeks. You also need to remove switches, sockets, doors, plumbing. Entrance and interior openings are covered with a thick film.
Thinking of a remodel? The demolition of partitions, the installation of new openings, the dismantling of the old sanitary cabinet is carried out right now. Please note: such transformations are considered redevelopment and are possible only after appropriate approval by the housing inspectorate.
After dismantling, a lot of bulky waste will appear. They must not be thrown into a garbage chute or an ordinary trash can - a violation is fraught with administrative penalties.
Construction of new partitions
If a main wall is needed, brick or tongue-and-groove blocks are used. If you need a lightweight structure that visually separates one zone from another, drywall sheets mounted on a metal frame are enough.
Large labor costs will require hollow or porous bricks. It will be faster and easier to build partitions from cellular concrete blocks. The least time will be taken by the construction of tongue-and-groove slabs and gypsum boards. Please note that block and brick structures are placed on a concrete floor base, drywall - on a finished screed. Term - 2-3 weeks.
Front door installation
If necessary, adjust the openings: increase or decrease them. To meet deadlines, order in advance (preferably with spare draft panels). The dismantling of the old structure and the new one will take only one day.
Experts advise to embed two locks - cylinder and level. We recommend giving the work crew the key to the cylinder lock only. Subsequently, it can be recoded or the core replaced. By the way, in most companies this service is absolutely free.
Electrical work
This step starts the sequence. It includes wall chasing, installation of electrical installation products and electrical panel, laying TV, Internet and telephone cables. With the finished project, you will need five to ten days.
The electrical project is developed in an authorized organization that has the appropriate license. Further, it will have to be coordinated with supervisory and regulatory authorities in order to obtain permission for implementation. And after completion, you need to draw up a contract for electricity and a subscription book.
Approving authorities are the local authorities of Rostekhnadzor and the power supply company. They need to provide documents.
List of documents
- An act of delimitation of balance sheet ownership and operational responsibility of the parties.
- Specifications for connection to the power grid with an indication of the allocated power and a diagram for connecting the object to the switchboard.
- Plan of the room with the indicated location of lamps, sockets, switches, switchgears and electrical wiring.
- Ready project of power supply of the object.
The development and coordination of an electrical project is necessary if there is an increase in energy consumption or partitions are demolished. This parameter determines the number of devices that can be connected to the network.
If there is no project, then you need to independently consider the location of the switches,. To do this, you will need a design project developed at the preparatory stage - it already indicates the location of electrical appliances. Please note that the electric stove requires a special outlet. In the bathroom, grounding is required, all sockets must be waterproof.
In panel houses, it is advised to ditch the walls vertically, and do the wiring under the ceiling or near the floor. Let's make a reservation that this step includes only gating and laying wires. Switches, lamps are installed later - at the finishing stage.
Installation of the air conditioner route
In one day, wires and freon pipelines will be laid for you, and an outdoor unit will be installed. The indoor unit is not mounted at this step.
Sewerage, plumbing and heating pipes
Old communications are dismantled and new ones are laid according to the plan for the location of the heated towel rail, washing machine and plumbing. Install filters, gearboxes and meters, a module for hanging plumbing (if planned). Old radiators are removed and plugged, new wiring is made, but the devices are not yet hung. Approximate time - 2 weeks.
Assembly of new windows
It will take you one or two days, depending on their number. Order new windows a little in advance - while they are being made, you will complete the main stages. Do not remove the protective film from the double-glazed windows until the rough finish is completed.
Please note that some jobs can be done at the same time. For example, the construction of partitions and subsequent steps. This will speed up the process.
Alignment of the ceiling, window, interior openings and walls
Duration - 1-2 months. The first in the repair sequence is the ceiling. It's all about the plaster. GKL or stretch fabric is installed at the very end. It is not necessary to putty and plaster the surface. The second level walls, openings and slopes.
How to level surfaces:
- First, apply a primer-primer on them, after it dries - a plaster composition.
- Further, for sealing minor defects - putty and finally a primer, which provides better adhesion to the finishing composition.
If for some reason the wiring was done after puttying, we close up the places where the wires “lie”.
Please note that each layer must dry before the next one is applied. Do not rush contractors with a fine finish - all leveling layers must dry. It is impossible to force drying with the help of heat guns. Such a measure will lead to the formation of cracks.
After alignment is complete, be sure to check the geometry of the corners with . If it is broken, it may be difficult to install furniture (for example, a wardrobe). Uneven joining of floor slabs makes leveling the ceiling a laborious and expensive process.
It is possible to reduce the time for leveling walls and ceilings with the help of plasterboard structures. At the same time, before finishing, you only need to putty the seams between the GKL and prime the skin.
Floor screed
The process will take no more than three days. The composition on a cement basis seizes in 12-24 hours, on a plaster one - 3-4 hours. Tiles can be laid on a gypsum screed after 3 days, and linoleum, laminate, carpet or parquet - after a week. On a cement-sand screed, the floor covering is laid no earlier than after 2 weeks.
There are slab-based prefabricated technologies. The name itself suggests that there is no need for curing and drying time, which means that the time is reduced. The disadvantages of experts include sensitivity to flooding.
Installation of a warm floor
Lay on a flat base. Only the electrical system is allowed in the apartments. It may take 30-45 days to arrange it. There is also a heating system based on mats - it is mounted in 8-10 days. Film heaters are installed the fastest and can be installed in 1-2 days.
Continuation of electrical work
Installation of socket boxes and internal parts of sockets, switches usually takes place within two days or a week. This step is not recommended to be carried out earlier, as when leveling the surface it will be difficult to guess the depth to which the socket or switch needs to be planted.
When should you take out the trash?
First of all, the garbage must be stored. Pieces of old wallpaper can be collected in ordinary plastic bags. For tiles, plaster and fragments of partitions, strong bags will be required. They can be purchased at any building supermarket. But where do you put what you have collected? In some new buildings, this task is taken over by the management company. She subcontracts a transport company to remove the waste. The cost of its services is distributed among the tenants. However, more often the issue has to be resolved on its own.
The easiest option is to contact the garbage collection company directly. In this case, you get rid of any hassle associated with disposal, but you should keep in mind that you have to pay for this service. And since it is expensive to call a car for every two or three bags, you will have to provide a place in the apartment for construction waste, so that later you can take them all at once.

Clean ceiling finish
Painting usually takes three to four days. It is recommended to paint only even plates, with small differences. It is possible to install a suspended or tension structure in one or two days, provided that several people will do it. Pre-install mortgages under the fixtures. At the same stage, ceiling plinths and stucco moldings are mounted.
During a long break in work, the paint on the brushes or rollers will not dry out if they are placed in a tall container of water.
Fine wall covering
You can restore beauty both in ten days and in 1.5 months. The term depends on the selected materials. They use paint, decorative plaster, porcelain stoneware, metal or wooden mosaics, glass tiles, tiles. The most popular. To prevent them from deforming, after sticking them, do not open the windows for two to five days.
Wallpaper is glued at a temperature above 10 ° C and a humidity of not more than 65%, with windows and doors closed to avoid drafts. Gluing canvases start from the window.
Installation of radiators
Install when the walls are ready. Otherwise, it will no longer be possible to paint the space behind them or paste over it with wallpaper. It will take 1 day to complete the work. Do not forget to contact the management company in advance with a statement about turning off the heating system.
Installation of plumbing
A bath, shower, toilet, washbasin, faucets, washing machine (if you plan to place it in the bathroom) are installed. Time frame: three to five days.
Floor finishing
It is extremely important that at least 14 days have passed since the screed was poured. Better - 28. That's how much it takes for moisture to evaporate from the concrete. Otherwise, water vapor, rising, will penetrate the materials and destroy them. And if the ceramic tile withstands such tests, then the parquet or laminate will be damaged. Laying floor coverings (parquet, laminate, tiles, etc.) takes an average of 2 weeks.
If you laid the flooring before finishing the ceiling and walls, cover them with a film so as not to stain.
Installation of interior doors
Before ordering them, you need to know the height of the flooring. Otherwise, a large gap may turn out under the canvas or the box will not fit into the opening. The term will be one to three days.
If you do not change old interior doors for new ones, then it is better to remove the canvas for the duration of the work and take it out to a room where it is not so humid. Otherwise, they may swell.
Arrangement of headset and household appliances
Within one or two days, the assemblers will install furniture modules, countertops, stoves, hoods, dishwashers, washing machines, sinks, which is stipulated when ordering the headset and is fixed in the contract.
Embedding underfloor heating thermostats
The sequence of repairing a bath, kitchen, any other room is the same. First, the coatings are dismantled, if any. Then - the wiring of communications, leveling the surfaces and at the very end - a fine finish.
Stages of cosmetic repair
Here you will need an individual approach, since each apartment has its own nuances. Somewhere you just need to re-paste the wallpaper, somewhere you only need to re-lay the floor, and somewhere you need to update the entire interior, but without leveling surfaces, replacing jambs and wiring. Let's write a rough plan of action.
Purchase of materials
In order not to take up space in the apartment, order them gradually. If you do everything with your own hands and in a small composition, it will be more convenient. After all, it will not work to simultaneously deal with several rooms or affairs. In this case, you must first draw up a procurement plan with dates - this way you will avoid downtime.
Freeing up space
It is better to start from a distant room or the one in which the most ambitious transformations are planned.
- Free her from all things. In the studio, they can be moved to the center of the room.
- Cover furniture, interior doors with foil. The floor, if it does not need to be changed, also close it.
Electrical disassembly
At this stage, the chandeliers, the front of the sockets and switches are removed. The internal elements are sealed with masking tape.
Removal of old materials
This process can take several days or even weeks. Depending on the number of square meters. You need to remove everything that you decide to update.
Surface leveling
Now you need to eliminate the bumps - putty them. After that, a primer and plaster are applied to even surfaces. You should always start from the top. Then come the walls and floor.
The final stage
Painting, pasting and laying of new materials are carried out in the same sequence as at the previous stage. At the very end, the electrician is put back, furniture and household appliances are arranged.
Few people think that the installation of new communications can harm neighbors. But it is enough to recall the stories of experienced people about the bays that occurred during the implementation of the project, and caused damage to more than one apartment, as the question immediately arises whether it is possible to protect oneself from scandals with residents and payments of material compensation.
There is a life-saving remedy - this is civil liability insurance for the time of repair. Such a program assumes that if damage is caused to the property of neighbors, then the insurance company will incur compensation for losses. When it comes to a light cosmetic finish, such a policy will not be so relevant.
If the plans include reconstruction, replacement of pipes and other major refurbishments, insurance should be one of the first mandatory items in your program. By the way, a similar contract is drawn up at the end of the redevelopment - who knows what force majeure will happen.
