Repair of stretch ceilings after a cut, if the gap exceeds 1-2 cm, definitely requires the intervention of professionals. Specialists in the arsenal have several options to restore the integrity of the PVC film:
- The first method of repairing a stretch ceiling in case of a cut involves installing a patch. A piece of film is glued on the inside of the canvas, and the outer edges are gently pulled together. The “seam” is practically invisible if the work was done professionally, and the ceiling itself is colored or patterned. For a white glossy finish, to mask the cut of the stretch ceiling, use the applique decoration method.
- If the cut of the stretch ceiling is in the corner or from the edge, the repair is even easier. The damaged part of the canvas is removed, the film is heated again and stretched to the desired size. This method allows you to leave no traces of cuts and repairs to the stretch ceiling.
Expert Tip:
in case of significant damage or cut of the stretch ceiling, do-it-yourself repairs are strongly not recommended. Any intervention by a non-professional will lead to an aggravation of the situation.
How to fix a cut on a stretch ceiling if its duration is up to 10 centimeters?
When this happened, it is impossible to repair stretch ceilings after a cut with your own hands. Specialists can provide effective assistance, for example, using the holes in which an auxiliary lamp or a false ventilation grill is installed. A functional or decorative element will help hide the stretch ceiling cut, but only professionals can install it, since amateur manipulations with the canvas will damage it even more.
How to eliminate a cut on a stretch ceiling if its size exceeds 10 centimeters?
If it is not possible to repair the stretch ceiling after a cut due to the extent of the damage, the canvas needs to be replaced. For the repair of stretch ceilings after a cut, the price will be less than the installation of a new design, since specialists change only the damaged film, replacement of fasteners is not required.
Cut on the stretch ceiling: who to contact?
As a rule, companies specializing in the manufacture and installation of these products are engaged in the repair of stretch ceilings after a cut or rupture. In St. Petersburg, the Nevado company provides a professional repair service for PVC ceilings. A team of specialists is ready to go to your address after filling out an application by phone or on the website. The price for repairing a stretch ceiling depends on the degree of damage to the canvas and the method of its restoration, which is optimal for a particular situation.
Our masters do not recommend self-restoration of the integrity of the film if the necessary skills are not available. The only thing that the owner of the premises can do when a cut is found in the stretch ceiling is to fix the edges of the gap with adhesive tape and call professionals for help. In this case, material losses will be minimal.
Do-it-yourself repair of a stretch ceiling makes it possible to eliminate various cuts and punctures that form on the coating as a result of careless handling during operation.
By themselves, they are quite durable and reliable in use. But their improper operation can cause various defects to appear on the surface of the coating. Most often they occur in the following cases:
- With poor-quality installation of metal profiles that move away from the attachment points and cause breaks in tension structures.
- During the installation of cornices. The sharp edges of these products often tear the ceiling material. When installing cornices, it is imperative to place between the edges of the mounted product and the web of a gasket made of some kind of soft material.
- When throwing up various objects. A hole in the ceiling may well be formed when the coating comes into contact with sharply thrown children's toys - pistols, arrows, dolls, darts, as well as books, shoes, and so on.
- When installing lighting fixtures and their operation (a powerful lamp may well lead to melting of the tension structure).
Defects on the surface of the tension coating
The need to repair ceilings, in addition, often arises from the careless opening of bottles of champagne. Also, holes in the coating can also form during unprofessional installation (excessive film constriction, poor quality seam).
If a defect has formed on the ceiling covering not far (no more than 15 cm) from the wall, professionals recommend dismantling the material from the side where the gap appeared. Then you need to cut off the damaged piece of material and install the updated product in the guide.
When the hole is more than 15 cm from the wall, the described repair method is not suitable - there is a high probability of damage to the entire ceiling. In such situations, you can try to hide the place of damage with a ventilation grill or a lighting fixture. Just install an additional luminaire or the indicated grid on the defective area.
At the same time, remember that you will need to reinforce the hole that you make for a new accessory. For these purposes, a plastic thermal ring is usually used.

Thermo rings made of plastic
It is attached to the ceiling material with a special adhesive. And then they make a hole in the ring of the required size for the lamp.
Large cuts can be sealed with applications or multi-colored film. Such a creative approach to repair will allow you to get rid of the defect and bring an original touch to the decor of the room. If the cut area is large, applications, unfortunately, will not help, you will have to completely replace the coating.
The installation of a new coating is also carried out when the film is torn along the seam. It is unrealistic to seal such an impulse. It is due to unprofessional installation of the ceiling or the poor quality of the material used.
Small holes in such ceiling coverings are eliminated in several ways. You can:
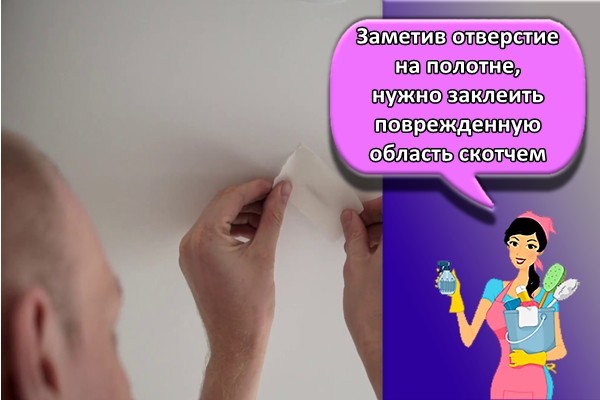
- Seal the hole with a patch from the remnants of the material that was used to mount the ceiling. You need to take a patch of slightly larger geometric parameters than the defect itself, smear it well with glue (it is best to use paint adhesive, not) and press it to the cut. Perform this operation with extreme caution. You can not strongly press the patch into the ceiling, as there is a risk of glue droplets spreading over the material and the appearance of so-called assemblies on the surface. After installing the patch, do not forget to carefully and gently smooth the repaired area with your hands.
- Seal the cut with tape. Small holes are repaired in this way very simply - clean the damaged area of \u200b\u200bthe canvas from dirt and dust, cut off a piece of adhesive tape and attach it to the ceiling. You can try to restore the integrity of the ceiling and with more serious damage. Prepare a piece of canvas that matches the texture and color of the existing coating, attach it to the gap, and then glue the patch with adhesive tape on all sides. If there is no suitable material, try experimenting and sealing the defect with an appliqué or insert from another fabric. By the way, instead of adhesive tape it is allowed to use glass wallpaper, the effect will be the same.

Fabric stretch ceiling repair
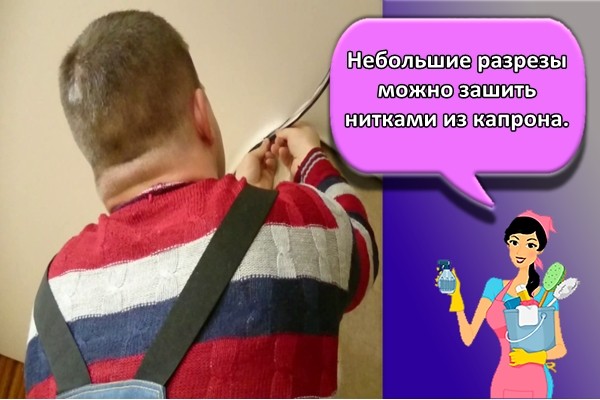
Small holes are allowed not to be sealed, but simply stitched together. In this case, you need to use kapron threads. Subsequently, it is desirable to mask the stitched area with paint that merges with the ceiling coating.
Let's talk a little more about installing any decorative ornaments, chandeliers, ventilation grilles, and a lamp in place of the cut of the canvas. You can eliminate the ceiling defect, for example, in a very original way. Take an ordinary plastic plate, cover it with paint of the desired shade and glue this decoration on the defective area of \u200b\u200bthe coating. Such an accessory will look very unusual!

Installation in place of the cut of the chandelier canvas
It is also allowed to mount small lamps on damaged areas of the coating. In this case, the lighting device may not be connected to the mains if there is no electrical wiring at the cut site. Just install a beautiful ceiling or sconce - the gap will not be visible.
If you want the mounted lamp to fulfill its function - to illuminate the room, use the thermal ring, which we have already talked about. Note! Hanging a massive chandelier or lamp is carried out exclusively on a special hook, which is attached to the base ceiling surface.
Good luck with your self-repair of stretch ceilings!
When carrying out modern repairs in residential and office premises, many choose installation. However, they do not suspect that in the event of minor damage to the canvas, even if it is a small cut, a lot of difficulties can arise.
In contact with
Classmates
In most cases, such ceilings cannot be repaired and the canvas has to be completely changed. It all depends on the size and location of the problem area. Therefore, the most important thing is not to rush to restore the ceiling and not to make any decisions in a hurry.How to extend the life of the ceiling?
In order for the ceilings to be used for the maximum period, simple rules should be followed:
- Install high-quality seamless canvases and durable baguettes. Installation should be carried out after all construction work has been completed. You need to trust it only to specialists who know what to do and how.
- Do not rearrange large furniture and other items that increase the risk of damage.
- Follow all instructions for use and care of the canvas.
The first steps in case of damage to the canvas
If damage is found, the web should be fixed near the defect with adhesive tape as a temporary measure. Before making a decision and taking actions to eliminate defects, the room should be maintained at an optimum temperature of + -20 0 С. Overheating is fraught with melting, and freezing - with irreversible changes in the structure of the material.
Note!
If condensation forms due to excessive moisture, water may accumulate on the inside of the blade and the incision will increase.
Small cut can be repaired
Solutions to the problem
There are several ways to solve the problem, which are implemented if the cut is near the tension fasteners at a distance of up to 20 cm. In this case, you can heat the canvas with a special heater and try to stretch it to the fastening. As a result, the ceiling will be absolutely free of defects and have a presentable appearance. For large cuts, the ceiling will have to be dismantled and glued or replaced. However, there is a more original way out of this situation - to install a decorative element or an ordinary lamp in a damaged place.

Try not to widen the cut
How to dismantle the stretch fabric?
The first step is to figure out the type of attachment. There are harpoon and non-harpoon connections, which are distinguished by the method of tension. It depends on them whether it is possible to repair the stretch ceiling with your own hands. In the first version, a special-shaped plastic strip is rigidly soldered along the edges of the canvas, which is inserted into a special lock. Therefore, it is quite easy to remove them. In the second case, the stretched canvas is inserted into a special clamp and therefore the edges are partially deformed. That is, it can be very difficult to get them out of the mounts without damage. During subsequent installation, difficulties with uniform tension will appear.
We carry out gluing a thin seam of the ceiling
You can hide a cut only if its length does not exceed 20 cm, since it is not possible to seal large damage. If it is located far from the fasteners, then in order to prevent the appearance of wrinkles and waves, you can try to glue it with adhesive tape on the non-front side or with the remaining piece of the canvas. Another more reliable method is gluing with a special mixture designed for PVC or fabric-based sheets. To reduce the visibility of damage from the outside, they can be carefully painted over.
The remaining excess after pulling the ceiling must be removed
We eliminate complex gaps in the stretch ceiling
Cuts near fasteners are subject to high tensile forces and therefore conventional bonding will not work. Therefore, they take a cable in a plastic braid with a cross section of 2.5 mm and glue it along the cut from the side of the nearest wall. After that, the place of gluing is carefully warmed up with a building hair dryer. On the other side of the seam, a similar procedure is done.
Note!
If, when pulling, a stretch ceiling was pierced, which is not recommended, then you will have to additionally patch it with tape.
Two wires are connected with a special metal clamp along the entire length.
Installing the lamp in the ceiling
Before installing the luminaire, it is necessary to bring the electrical cable in compliance with all safety standards and regulations. To do this, it is desirable to approximately determine the location, and leave the cable with a margin. A special holder frame is attached to the intended installation site. A wire is threaded through it, and then the canvas is stretched. It should be tightened so that the damaged area falls clearly into the location of the hole for mounting the lamp. Then it is carefully adjusted to fit, and a decorative plastic insert is put on top.
In many apartments and private houses, stretch fabrics are used as ceiling finishes. This is due to the ease of hiding defects on concrete slabs and the low cost of finishing. External impact on the canvas can lead to damage, so it is recommended that you familiarize yourself with the information on how to glue the stretch ceiling after a cut.
Defects in the material occur for various reasons. Most often, a stretch ceiling breaks in the following situations:
- negligence in the process of performing construction and installation work, due to which a sharp spatula or other tool leaves a cut;
- dismantling and installation of window structures, moving furniture and other work in which there is an inaccurate touch to the material;
- installation of an initially defective low-quality canvas, improperly executed cutting of the ceiling;
- the formation of bulges and subsequent cracking during flooding as a result of leaking plumbing in the apartment from above;
- long-term operation of the material with unstable indicators of temperature and humidity in the room.
Do-it-yourself puncture repair methods
It is impractical to eliminate large defects in the tensile structure, since it will be cheaper and less labor-intensive to stretch new material. At the same time, small punctures and cuts can be masked if, immediately after the defect occurs, it is possible to prevent spreading. Having noticed a hole in the canvas, you need to seal the damaged area with tape or electrical tape and proceed to further work. You can eliminate the puncture yourself with the help of a fabric or a PVC sheet, and these methods are performed in different ways.
Textile
In the absence of a patch, you can choose a piece of fabric that is suitable in shade and texture. When the search for matter is unsuccessful, it is worth contacting the company that was engaged in the installation of the ceiling in order to find a similar or similar fabric in color. Then the damage is repaired according to the following instructions:
- Measure the dimensions of the cut and adjust the patch. It is recommended to leave a couple of extra centimeters on each edge of the defect.
- A transparent layer of adhesive solution is applied to the surface of the patch on one side.
- The material is applied to the damaged area of the stretch coating and carefully smoothed out.
- With a little effort, the patch is pressed against the canvas. Pressing too hard can cause the adhesive to come out and cause the treatment site to sag.
- When the glue dries and the patch will hold securely, if necessary, the surface of the canvas is partially painted for additional masking.

PVC sheet
With the help of a PVC cloth, damages no longer than 2 cm long can be repaired. The process of masking defects is similar to the method that involves the use of a fabric patch, but has a number of features. Including:
- PVC film cannot be repainted in a different color, so you need to prepare a patch from the material remaining after the installation work, or independently come up with an application to match or contrast;
- if you cannot find a suitable patch, you can close the cut with a decorative element - a butterfly, a flower, an abstract geometric figure;
- the slots on the PVC material tend to grow rapidly, so the adhesive tape is removed from the damaged area immediately before gluing the permanent patch.

Adhesive selection
You can fix the patch on the damaged area of the stretch ceiling with different types of glue.
Regardless of the brand chosen, the adhesive solution must necessarily meet the basic requirements: be transparent so as not to leave stains on the ceiling, instantly harden and not destroy the surface of the tension coating.
Cosmofen
Glue "Cosmofen", according to many experts, is considered the best option for stretch fabrics. The solution is a universal agent and ensures the bonding of the material in a few seconds, leaving no residue. Complete drying occurs 15-16 hours after application to the material. It is not recommended to use "Cosmofen" only for gluing cuts on the ceiling with a porous surface, as this may affect the quality of gluing.
Cyanoacrylate solution is not susceptible to sudden changes in temperature and moisture, which allows it to be used in rooms with any conditions. The adhesive comes in a small package and is economically consumed - a few grams of the substance is enough to fix the patch. You can buy Cosmofen at any hardware store or building materials department.
Somafix
Somafix Universal Adhesive Activator instantly forms a heavy-duty bond between patch and stretch fabric. The final setting time does not exceed 10 seconds. The solution contains an ethyl cyanoacrylate gel and a hardener aerosol. After application, Somafix glue does not spread, remains transparent and invisible. To ensure a good bond, the work surface must be dusted and dry before using the Somafix solution.
"Contact"
One-component super-glue "Contact" forms a strong seam and dries almost immediately after application. The formed connection differs in durability, resistance to influence of organic solvents and temperature differences.
Loctite
Loctite Instant Adhesive is a one component solution that cures at room temperature. Different types of adhesive produced under the Loctite brand differ in viscosity. The solution is used for durable bonding of a large number of materials, including stretch fabrics. The setting speed is a few seconds.
Cosmoplast
Cosmoplast's instant cyanoacrylate adhesive forms a strong bond with just a few drops. The practical polyethylene packaging ensures precise application on the tension coating patch. The advantages of the adhesive solution "Cosmoplast" include:
- hard adhesive seam;
- resistance to a humid environment and temperature extremes;
- no solvents in the composition;
- fast fixation;
- UV resistance.
How to glue a cut on a stretch ceiling
The method of gluing a cut on a stretch coating depends on its size and distance from the walls. In each case, the elimination of the defect has its own peculiarities.
Small incisions can be sewn up with nylon threads. To mask the slot, you need to pick up threads of a suitable color. If the resulting seam remains noticeable, it is allowed to paint it with water-based paint using an airbrush.
Major damage is more problematic to repair, so for a quality result, it is better to use professional help.
As a temporary solution to the problem, you need to seal the damaged area with tape. This precaution helps prevent widening of the cut until it is completely healed.
When the cut is close to the wall, it can be repaired by pulling a small area of the canvas. Thus, the hole remains in the baguette groove and is visually imperceptible. To pull the matter, you will need to use high-quality glue and a piece of antenna cable. To eliminate the cut, a cable no longer than 10 cm is glued parallel to the baguette to the edge of the damage. When the glue hardens, the coating at the work site is treated with a hairdryer. Then the cable is pulled up and hidden in the baguette groove. If folds have formed in other places of the stretch ceiling, they will be removed according to similar instructions.
A cut located far from the wall is eliminated with a patch. To do this, use one of the previously described methods, selecting a suitable patch and fixing it on the damaged area.
How to seal a hole at home
The best way to restore a stretch ceiling at home is to use a patch. This option is optimal when the gap is not even, but slightly rounded or diverges in different directions. Applying adhesive to the patch is allowed only if the shape of the coating is retained after the defect has occurred. When sticking a patch on a hole in the material, you need to be as careful as possible so that the restored place does not stand out too much against the general background.
Ways to decorate a large defect
The appearance of large defects on the stretch ceiling complicates the task of restoration and repair of damage. An ordinary patch will not help restore the integrity of the matter, so you need to use non-standard ways to decorate the damaged area.
Applications
Using the application helps not only to visually hide the slit on the fabric, but also decorate the space. Customers can choose from a wide variety of applications made in the form of butterflies, flowers and patterns. Various materials are used for the production of decorative applications, but the most popular are plastic and vinyl products. They are non-toxic, attractive in appearance, easy to stick and remove.
It is important to understand that the application will hide the defect, but first you need to fix it. For this purpose, an adhesive solution and a stationery stapler are suitable. The edges of the slot are connected with paper clips and smeared with glue to enhance strength. The selected application is applied on top, fixing it with plastic glue.
Lamp device
In place of the damaged matter, you can place a spotlight, which will not only hide the defect, but also improve the lighting in the room. To mount the lamp step by step, perform the following steps:
- A rounded profile is applied to the canvas at the site of damage and markings are made. Then the slot is leveled along the drawn circle and the profile is finally installed.
- Racks are leveled so that they coincide in level with the canvas. Through the cut hole, the electrical wiring is led out and the lamp is fixed to it, having previously put on thermal rings on its body to prevent contact between the lighting device and the tension coating.
- After installation, the lamp is leveled, the lamp is screwed into it and the performance is checked.
Ventilation grill installation
Arrangement of ventilation on the tension cover not only hides defects, but also helps to preserve the original appearance of the material. Installing ventilation grilles is no more difficult than installing fixtures, so you can do the work yourself if you follow the step-by-step instructions. Installation of ventilation consists of the following stages:
- The place of damage to the canvas is pulled together with nylon threads. This is necessary so that the cut does not expand during further work.
- In places where the grating will come into contact with the canvas, a tread ring is fixed with glue, preventing further tearing of the fabric.
- When the ring is glued, the remnants of the coating are cut off inside it.
- If the room is equipped with an air duct system, the pipe is led out through the hole and covered with a ventilation grill, fixing it on the back of the ring. For natural ventilation, where there is no automated air duct, simply put the grate on the tread ring.
Ventilation grilles are available in various colors and configurations, which allows you to find discreet options. Not finding the right shade, you can process the front side of the product with water-based paint in a suitable color.
In what cases it is impossible to glue the coating
There are a number of situations when even experienced craftsmen do not need to try to repair damage on a tension coating. These situations include:
- Fabric tear at the seam. Bonding the damaged area will only exacerbate the problem, so the material must be stretched from scratch.
- Detachment of the cover from the wall. In these circumstances, it becomes necessary to dismantle the ceiling, strengthen the profile / baguette, or install a new one.
The only right decision would be to contact the company that did the installation to replace the coating or return the funds.
To reduce the risk of damage to the stretch ceiling, in the first place, it is possible through careful handling. During construction and repair work, moving furniture, installing windows, do not touch the ceiling with bulky and sharp objects. For safety reasons, you can build a protective structure above the ceiling.
For prevention, it is recommended to periodically inspect the surface of the tension coating and take care of it. Clean the canvas with a soft sponge, a lint-free cloth and a non-abrasive detergent. The content of solvents and abrasive particles in the cleaning agent will damage the cloth and lose its appearance.


Films for stretch ceilings are strong for bending and stretching, but it is easier to cut or pierce them. Such an incident happens not only during installation. During operation, various kinds of violations of the integrity of the web may also appear, requiring repairs to the stretch ceiling.
Stretch ceiling - a suspended structure with a film stretched over it. This material visually seems durable and strong. However, this is a misleading impression. Film must be handled carefully and with care. But only installers who work with this material on a daily basis know about this. Consumers do not attach due importance to the rules for the operation of a stretch ceiling.
The most common causes of film damage are:
- the formation of stretch marks and holes during the skid, removal, assembly of furniture;
- cuts and holes during the installation of interior and entrance doors, slopes and platbands;
- film exit from the baguette due to inaccurate replacement of lighting fixtures or other actions;
- stretching of the film and its exit from the baguette during flooding from above;
- cuts and punctures of the canvas due to too active children's games with the tossing of sharp-angled objects.
It is important for the owners of stretch ceilings to know what actions can lead to damage to the film. But you can't foresee everything. In most cases, certain troubles with a thin film cannot be avoided. This is where knowledge of how repair stretch ceiling.
Types of damage and ways to eliminate them
In order to most fully represent the scale, labor intensity and financial cost of the upcoming work, we will consider how to repair stretch ceilings in each specific situation. There are several issues that require attention:
- a cut;
- hole;
- exit from a baguette or other fastening;
- melting or burning;
- stretching;
- puncture.
The stretch ceiling, the repair of which is to be done, must be prepared accordingly. If eliminate a cut, the edges of the canvas are stretched and glued. If this hole, it will take creativity, which often requires trimming the film. Each type of action will need its own materials and tools.
Ways to eliminate cuts
Stretch ceiling cut repair- the task is simple, but requires accuracy and precision of movements. The way to solve the problem depends on where the cut is located: not far (no further than 30 cm) from the baguette, or at a considerable distance from it.
If the cut is next to a wall
- The edge of the film, located opposite the problem area, is removed from the baguette. Further take out more 20-25 cm film left and right. They find that its edges are wound into a harpoon, a strong elastic strip that is inserted into a baguette.
- With a sharp knife (preferably a stationery knife), cut the film along the lower (rear) part of the harpoon. That is, they cut it off, the so-called "skirt".
- Smooth flat line cut off the defect.
- Apply glue to the harpoon and carefully, evenly glue the canvas to it. This is how cuts are sealed on stretch ceilings, where the problem area is located at the baguette.
- Next with a regular hair dryer the film is heated, stretched, filled into a baguette. For refueling, you will need a spatula, the blade of which will have to be made blunt and rounded.
If the cut is far from the wall
Repair of stretch ceilings after a cut away from the walls requires a piece of film, similar to the one that is stretched. You will also need glue and scissors. Eliminate the visual flaw of the canvas is possible only by applying patches. So you have to cut and paste. There is no other way to repair stretch ceilings after a cut with your own hands.

The result of the work may not please. But this problem is also solvable. Today, there are many different, beautiful and light in weight, accessories for decorating walls and ceilings. Some of the most popular - showy butterflies. You can choose the one suitable for the interior design, and stick it to the place of the patch.
How to remove a cut on a stretch ceiling, found out. Now you need to understand what kind of glue to use in the work.
Types of glue for repairing stretch ceilings
Specialists from manufacturers recommend focusing on adhesive lines COSMOFEN or COSMOPLAST, and only with their help to restore the stretch ceiling, repair cuts and eliminate holes. The most suitable for these jobs are COSMOFEN CA 12 and COSMOPLAST 513, 500 , 500L.
The first one (COSMOFEN) is designed for use by window plastic installers. The COSMOPLAST series allows you to choose the adhesive that is most convenient in terms of setting time. This is a very important point, since the speed of work is different for everyone.
For those who are leisurely and focused on quality and accuracy, COSMOPLAST 500 or 500L. Their freezing time 3 and 4-5 sec respectively. If the job needs to be done quickly, but with possible further adjustment, it is recommended to use COSMOPLAST 513, the setting time of which is about 15 sec. Enough to make things right.
The masters who repair the stretch ceiling successfully eliminate the cut with the help of inexpensive types of glue. They consider it one of the best "Contact", and recommend that beginners use it. With the help of this glue, it is most convenient to do the repair of stretch ceilings with your own hands. "Contact" is absolutely transparent, it sets quickly, but there is time for adjustment.

Methods for repairing film tears
Film tear may have different consequences. The hole may be small, with a barely hanging edge of the canvas. Or it can be huge, curvilinear, with stretched edges. Each case has its own approach to troubleshooting.
Method number 1
A hole in a stretch ceiling can be repaired using a needle and thread of the appropriate color. That is, the film should simply be carefully sewn up. The seam seems terrifying only up close. From the height of a person standing on the floor, the problem area is not so noticeable.
This method will help not only in cases with small holes. Often in the elimination of large holes it is required to grab the edge of the canvas and fasten it with threads in the right place. Then they perform the work that is required by the technology.
Method number 2
How to glue a stretch ceiling, learned. This skill is also useful for fixing more serious defects. As it was said, this creative process requires imagination and ingenuity. In general terms, the technique for restoring the integrity of the film is as follows:
- using a needle and thread, in 2-3 places they grab the edges of the canvas so as to stretch the film as accurately as possible;
- a hole in the stretch ceiling will remain, but now, after fixing the edges, they can be carefully glued together at the gaps.
This is not a quick matter, but it is worth it: you do not have to buy a new canvas. And in the future, if a hole forms in the stretch ceiling, what to do with it is already clear. In addition to glue, scissors and a thread with a needle, nothing is needed. Only patience and accuracy. Experience is never superfluous, you can also teach your friends how to remove a hole in a stretch ceiling.
Ways to Fix Film Defects After the Flood

Beloved neighbors sometimes present surprises, and more often, unpleasant ones. When flooded from above the scale of the problems depends on where and how the canvas is fixed. If it is drawn to the main (concrete) ceiling by means of lighting pads, metal profile hangers or otherwise, water will accumulate in the recesses between the fixation currents.
This is good and bad at the same time. The advantage is that The film won't stretch much., and it will not need to be replaced with a new one. The downside is that to drain the water, you will need to alternately unscrew and remove all elements holding the film.
If the film is fixed only along the perimeter of the room, the degree of its stretching depends on the volume of water that has penetrated from the upper floor. In this case, doing small hole in baguette, the water is drained. After that, large-scale repairs to the stretch ceiling are not required. Do-it-yourself cuts are eliminated in any convenient way. In some cases, it is enough just to fill the harpoon back into the baguette.
Important! Before carrying out work, it is necessary to de-energize the room.
The sequence of actions to eliminate the consequences of flooding from above:
- turn off the machines on the electrical panel;
- prepare containers: buckets, basins, deep pans;
- take a screwdriver and unscrew the fasteners holding the ring or mortgage;
- hold the ring, pressing it to the ceiling, and bring a bucket or other container to this place;
- drain the water.
It is advisable to perform this task with an assistant who will bring the containers and move the “bubble” in the canvas to the place where the water is drained.
If the film is fixed around the perimeter of the room, you need to choose a place where it will be most convenient to drain the water, and remove the harpoon from the baguette at a distance of 15-20 cm. You can do this with a spatula. You need to work with this tool very carefully so as not to damage the canvas.

Remedy for sagging film
Film sagging can only be removed by stretching and dressing in a baguette. To do this, you will need to familiarize yourself with the technology of installing stretch ceilings. Next, trim the film, as in the case of eliminating cuts located near the walls of the room.
Method for eliminating film burn-through
If the canvas is accidental burned through, you get an unsightly hole with dark edges. They remember how to close a hole in a stretch ceiling, and perform this task. To eliminate a small defect, you can choose the method of patching or decorating with overhead accessories: flowers, butterflies, stickers.
Useful video
In the video, let's see an example of repairing a stretch ceiling puncture:
Repair and installation of stretch ceilings is a difficult and time-consuming process. Therefore, it is recommended to follow the rules for the operation of these structures that are unstable to mechanical damage. When cleaning or rearranging furniture, do not forget that in our small apartments the ceilings are low and therefore vulnerable.