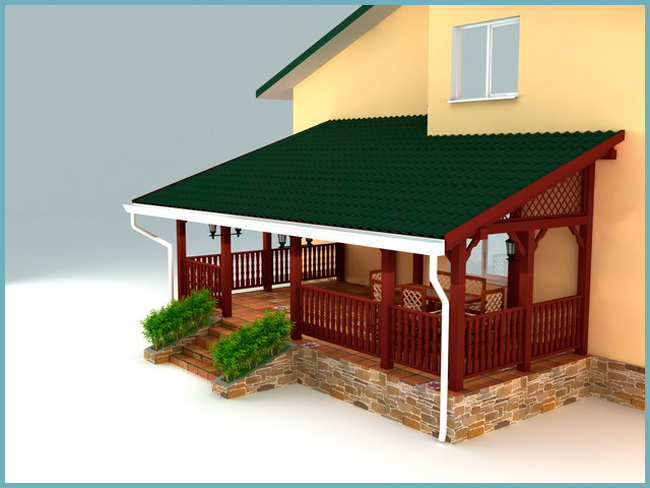
The veranda to the house is an excellent solution for those who want to acquire additional space not only for summer holidays, but also for full-fledged year-round use. After looking at the photos of these extensions, you can see for yourself their versatility, aesthetics and other advantages. And the fact that you can even build a veranda with your own hands, without the help of specialists, is especially attractive. We invite you to figure out how to quickly and efficiently attach a new room to your wooden house: what project you need to prepare, what foundation to fill, how to mount the frame and other components.
Preparation for construction
Before the direct construction of a wooden veranda, it is necessary to prepare a project. It must contain the following information:
- dimensions of the veranda - width and length;
- the location of the future veranda: from the facade, from the end or at the corner of the house;
- entry point: from the room, separate from the street or through, that is, through the courtyard into the house;
- door location.
Before construction begins, create a project for the future veranda and coordinate it with local authorities
After the project is prepared, take care of issuing a building permit. The construction of the veranda is officially considered a rebuilding of the house, so it must be coordinated with the local office of architecture. You must provide the following documents to the appropriate authority:
- House project;
- project of the future veranda;
- a document that confirms that you are the owner of the site;
- restructuring application.
As practice shows, the project approval procedure takes about two months - keep this in mind when planning construction work.
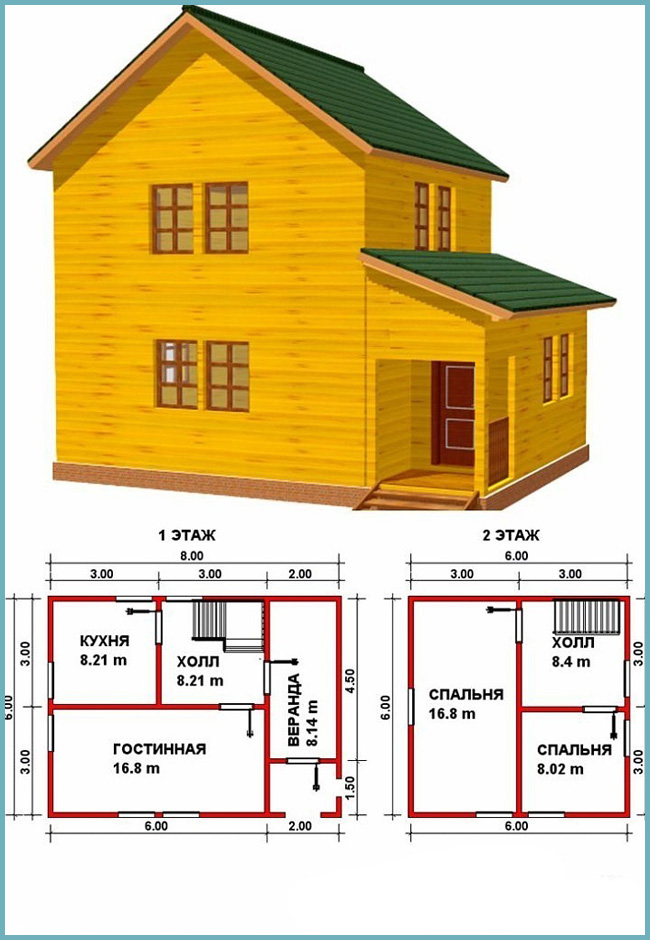
An example of drawing up a plan for a house with a veranda
What happens if you complete the building without permits? The veranda is included in the total area of the house, so its uncoordinated construction can be regarded by the BTI as an unauthorized change in living space, which will entail a fine.
When the issue with permits is closed, proceed to prepare the site for the construction of the veranda. In particular, you need to free the site from debris and all green spaces, as well as remove part of the turf. If you plan to attach a veranda to the facade of the house, you need to remove the canopy over the entrance and the porch.
Foundation pouring
The veranda, as a rule, is erected either on a strip or on a column foundation. How do they differ and how to equip them?
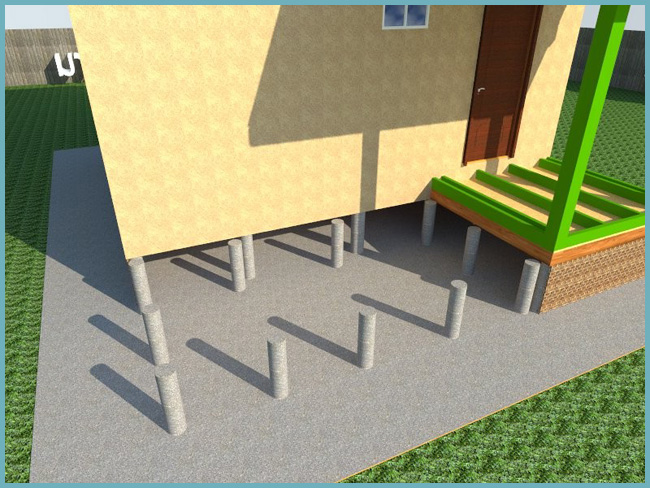
Pillar foundation for the veranda
The columnar foundation allows you to build a wooden veranda autonomously from the main foundation of the house, so this option is relatively simple to implement. First you need to mark up and dig holes for the posts. If a small veranda is planned, then four columns in the corners will be enough, but for an overall structure it is better to make holes around the entire perimeter in increments of 50 cm.
Advice. To prevent heaving of the soil, the depth of the pits should be slightly below the freezing level of the soil, that is, at least one meter.
Next, fill each hole with a layer of sand 20 cm and fill it with concrete to ground level. When the concrete dries, coat the resulting post with bitumen and, if there are gaps, fill it with sand again. The ground part of the column can be made from any timber. The height of this support must exactly match the height of the main foundation of the house.
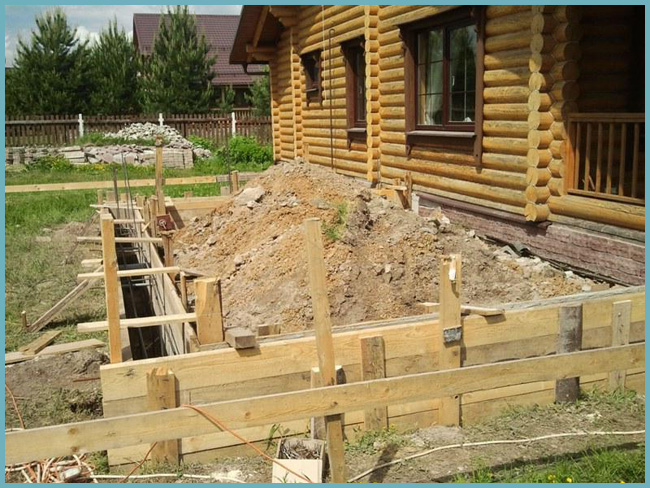
For large-sized verandas, it is better to fill in a strip foundation. It is built in several stages:
Arrangement of the subfloor and frame
Before you start working with the frame, you need to lay the subfloor. It is done like this:
- Fill the subfloor with expanded clay material for insulation.
- Cover the foundation with ruberoid.
- Prepare the logs, treat them with an antiseptic and fix them on the foundation.
- Lay cutting boards on top.
![]()
Subfloor installation
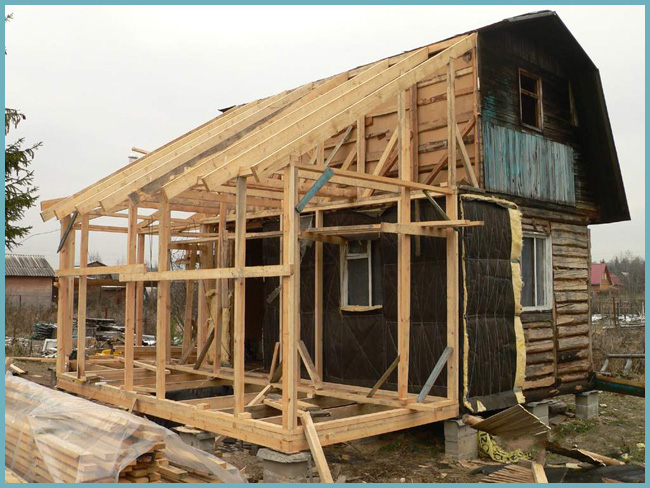
Next, grab the frame. It is better to build it from 10 x 10 cm bars. First, fix the bottom trim of the timber on the draft floor, connecting it at the corners using the “direct lock” method. Every 50 cm, cut small grooves in the beams for mounting vertical racks, and then install these racks, strengthening them with staples or nails for maximum fixation. The height of the supports should not be the same: the closer to the wall of the house, the higher the racks - this is necessary for the subsequent installation of a shed truss system. Also, when erecting racks, it is important to designate openings for doors and windows.
Then, on the received supports, it is necessary to fix the bars of the upper trim. This part of the frame will perform two functions at once: play the role of a base for the roof truss system and ensure the stability of the entire structure of the veranda.
Advice. In order to prevent the upper trim from deforming during subsequent construction work, it is better to fix it with temporary spacers.
Roof and floor installation
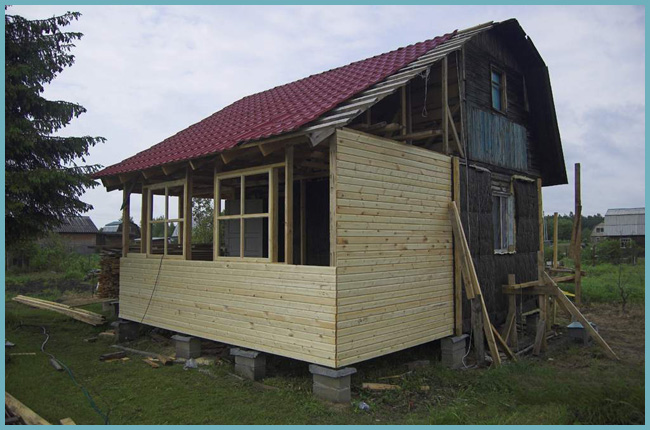
It is desirable that the roof of the veranda be flatter than the main roof of the house. And, as already mentioned, it is better to give preference to single-sided options. Such a roof is mounted as follows:
- On the already installed rafter system, fix a dense crate of unedged boards.
- Lay roofing material on the crate and secure it with clusters.
- Lay heat and moisture insulating material on top.
- Fix the main roof.
Veranda roof construction
As for the arrangement of the floor, on the veranda you can use both a traditional floorboard and solid wood. Especially if the room is closed, that is, fully glazed. The flooring must be laid on traditional logs, pre-installed on the bottom trim. At the same time, the boards themselves must be mounted perpendicular to the lags. The method of fixing the floor can be anything: self-tapping screws, bunches, the tongue and groove system - depending on what kind of finish you choose.
Frame sheathing
Wall cladding is the most important stage in the construction of the veranda, since the operational and aesthetic characteristics of the entire extension largely depend on the quality of the work performed and the quality of the finishing material itself. The frame stitching includes the following processes:
- In the area where windows are supposed to be placed, install a window sill - it should be located approximately half a meter from the floor covering. Attach the board to the vertical supports.
- Sheathe the frame on the outside with wood material that stylistically matches the decoration of the main house. Attach the tree to the supports with self-tapping screws or nails.
Wood frame cladding