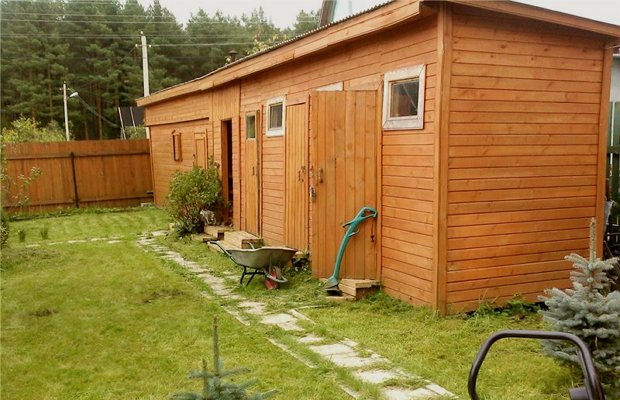
Having built a barn from a bar, you will gain invaluable experience in building frame structures with your own hands, save a lot of time and get an excellent one that will last you for several decades. Some advantages, right? So, to work!
1 Multifunctional wooden shed - the choice of location and purpose
The standard direction when choosing a place for a barn is a shaded area where nothing grows. However, we will not give such advice - barn to barn strife. In a shaded corner away from the front door and prying eyes, you can have a utility room for storing gardening tools, building materials and other things that you may need once a season, or even several years.
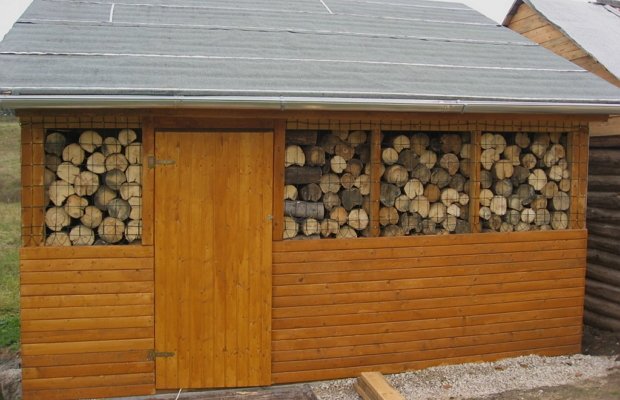
However, running to the farthest corner of the site in winter for firewood is not the best idea. Therefore, it is better to build a shed from a bar for storing firewood closer to the house. In this case, you will have to seriously take care of its appearance, but the costs justify themselves - together with a woodpile, you can build a small summer house or a modest wooden gazebo. In addition, in such a building you can safely store expensive machinery and equipment that could not be found in the house - it will be easier to protect them near the main entrance.
A barn can and should be built on the sunny side, in a well-lit place if you plan to use the building as a greenhouse. Of course, this requires some changes to the standard frame construction - windows on the south side, racks for pots with seedlings, a stove for heating. In such a room, you can start your own greenhouse, grow garden seedlings, store equipment and even vegetables. So with a place for a barn, not everything is so simple - it all depends on your intentions!
2 The foundation of everything is the head - building a reliable foundation
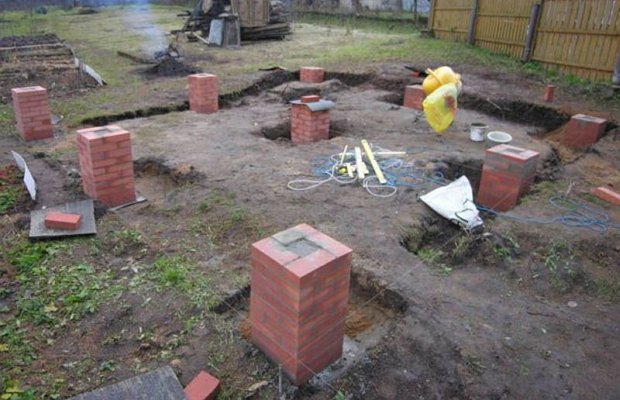
A timber shed is an exceptionally light and durable structure, but it also needs a foundation. But in this case, the task of the base is to isolate the room from constant humidity, to which wood is especially sensitive. Even a row of bricks can cope with the weight of the structure, however, for good stability, a columnar foundation is considered the best option. In this case, the columns are built at the corners of the future barn from a bar, as well as at a distance of one and a half meters from neighboring columns.
Of course, the height of the columns should be perfectly aligned in the plane, even if one corner has to be completely dug in, and the second half a meter raised above the surface - it should still go at least 70 cm deep. There are several ways. The choice depends more on the availability of certain building materials and equipment. So, if you have a lot of good bricks, you can build square posts out of them. In this case, be sure to make a good pillow of sand and gravel, which is carefully compacted at the bottom of the dug hole. The masonry is erected, guided by the level and plumb.
No bricks, but cement, sand and gravel? In this case, we dig pits with a depth of at least a meter with our own hands, construct a formwork in the pits, place a reinforcement frame inside the formwork, and pour concrete. Do not forget about the sand and gravel cushion - it protects the foundation from soil movements. Please note that concrete gains the desired strength in 7-10 days - it is better not to start building the frame ahead of time.
It is much easier and faster to build a columnar foundation with your own hands using large diameter asbestos pipes.
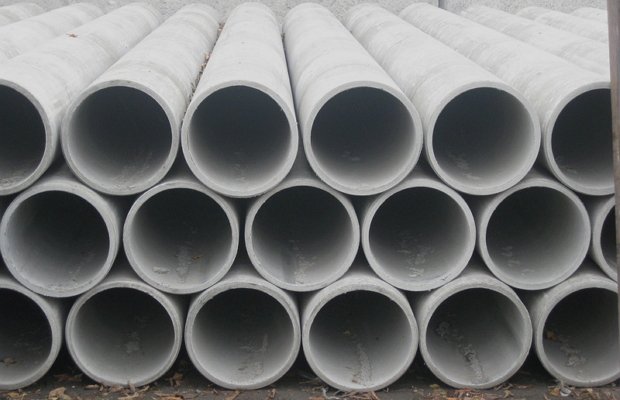
Of course, this will require additional costs, but on the other hand, you will be able to proceed with subsequent work immediately after pouring the columns - they perform both the role of formwork and the role of a temporary foundation until the main one gains strength. By pouring the columns, reinforcement can be placed in the center of the pipe, to which the bars of the lower trim will subsequently be attached. As in other cases, a sand and gravel cushion is required here, and waterproofing of the posts from the outside is also very desirable - for this you can use ordinary bitumen or special mastic, which is sold in every hardware store. The part of the posts that will rise above the soil is also covered with mastic. Instead of mastic, you can put pieces of roofing material on the heads.
3 Building a frame - what materials are needed?
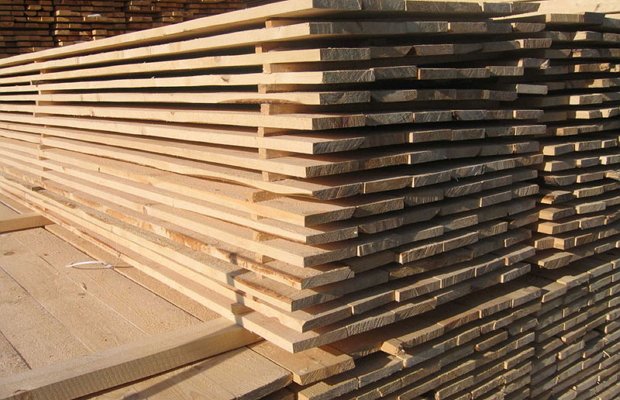
Building good starts with the purchase of building materials. In order for the frame to be strong and reliable, you need a good timber 100 * 100 mm - dried, without rot and cracks. In any case, all material must be impregnated with an antiseptic and flame retardant - the first protects against fungus, the second composition prevents fire. If the manufacturer did not do this, then do it yourself. It is desirable that the length of the timber corresponds to the long side of the shed - in this case, you do not have to make the lower trim from the pieces, and the room will be stronger.
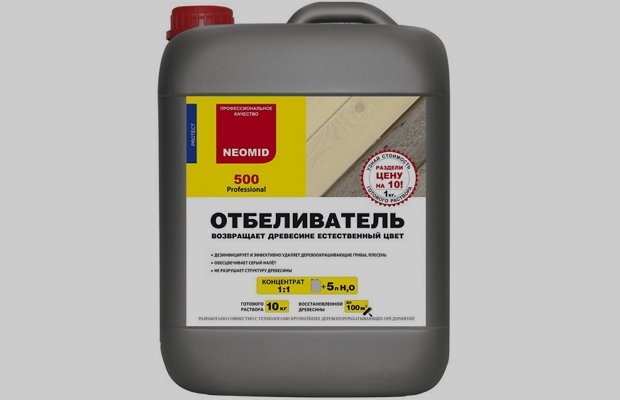
By the way, if the beam will be stored at the construction site for some time, provide reliable protection against getting wet. At the same time, it is important to ensure good ventilation - if you cover the material with a dense film on all sides, the moisture from the wood and soil will serve as an excellent base for the fungus. The wood darkened from dampness will have to be urgently saved with a special bleach - it not only returns the material to its previous appearance, but also destroys the pathogen.
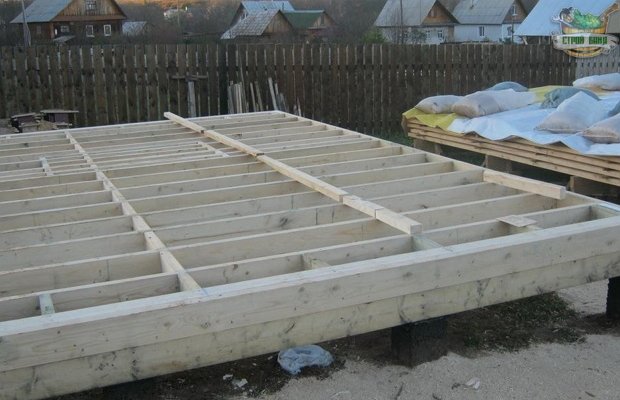
The bars of the lower trim are laid on the posts, having previously made an L-shaped cut with their own hands. For fixing, reinforcement rods protruding from the columns are also used - holes are made in the beams with a drill at the desired point and stuffed onto the pins. Thanks to the cut, the bars from different sides are securely joined to each other, and are additionally fixed with self-tapping screws and metal corners. If the width of the barn exceeds 2 meters, then another beam is laid in the center of the floor, which stands on the posts with its ends and docks thanks to the L-shaped cut.
Logs are laid on the lower harness - boards 100 * 50 mm, on which the floor will be held. The logs are laid on the edge, it is desirable that they be installed on the strapping bars, although some builders deliberately make them shorter with their own hands and fasten them with the help of corners and self-tapping screws, installing them between the bars. Thus, the floor will be slightly lower.
Next, corner posts are installed - for convenience, they are fixed with temporary jibs from ordinary boards and slats that are at hand. Racks are aligned with a plumb line or level - it is very important that they stand at a strictly 90 ° angle to the bars of the lower trim. Racks can also be strengthened from below with metal corners and self-tapping screws, although professionals recommend using strictly wooden pins - dowels. In truth, self-tapping screws and corners are no worse, especially in the hands of novice builders and can be found in any store. With their help, you can even adjust the angle of the beam, fix it so that it does not move even from a strong wind. And you need to be able to handle the dowel, and not every store will find ready-made fasteners.
Intermediate racks are installed according to the same principle - we adjust the angle, adjust and fix it. Do not spare temporary jibs - they will be removed later. The distance between the racks is about one and a half meters. For the convenience of further work on the logs, you can lay out the boards for the subfloor - you do not need to fix them, and it will become much easier to move around.
4 Top rail and roof - a difficult stage
If the shed is with, then on the front side we install the racks higher, by 50 centimeters. With a single-pitched roof it is much easier, but the utility building with a gable roof looks prettier, and if necessary, you can equip the attic with your own hands. In any case, before taking on the rafters, you need to equip the upper trim - horizontal bars, which are attached in the same way as the lower ones, only at the top of the racks.
It will be extremely difficult to do this work alone, you will need an assistant who will pull the bars up with you and hold them while you fix them with metal corners or dowels. There are no other features at this stage - the same beam, the same fastenings.
Since it is very simple to make a shed roof, we will analyze in detail how to make a gable roof. For rafters, you can use a board 100 * 50 mm. The boards will need to be cut - so that the cut comes out at the same angle on all boards, simply measure half of the width of the board, draw a straight line, and draw a diagonal in the formed rectangle along which the cut will be made. It is even easier to do this with a miter box, but this tool is not always at hand.
On the ground, fasten a pair of rafters with metal plates, self-tapping screws or nails, as well as using a cross board. The design will come out stable enough so that it can be lifted up and secured. In this case, you will need a partner and a stable ladder. In any case, collect all the rafters on the ground, guided by the template - this will go much faster. By the way, if you also want to build an attic, then you will also need to install logs on the upper crate, on which the attic floor boards will subsequently lie.
5 We hammer in the boards - the final stage
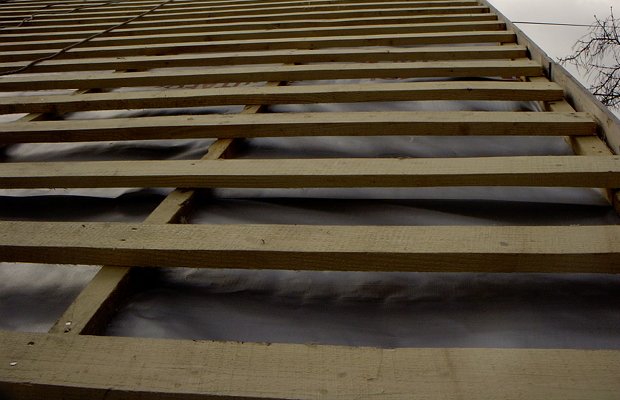
When the rafters are in place, we produce the crate. If the amount of material allows, then we make a continuous crate, stuffing the boards closely. If you decide to save money, then you can fill the boards in a checkerboard pattern. In any case, we recommend laying wind and hydro protection over the crate, which will make the shed much warmer, and moisture from above will not be afraid of it. A counter-lattice is stuffed over the insulation layers, this time you can use 50 * 50 mm bars, and keep the distance between them within 50 mm. They are needed so that the space between the roofing material and the attic is ventilated - this will eliminate the appearance of mold and rot.
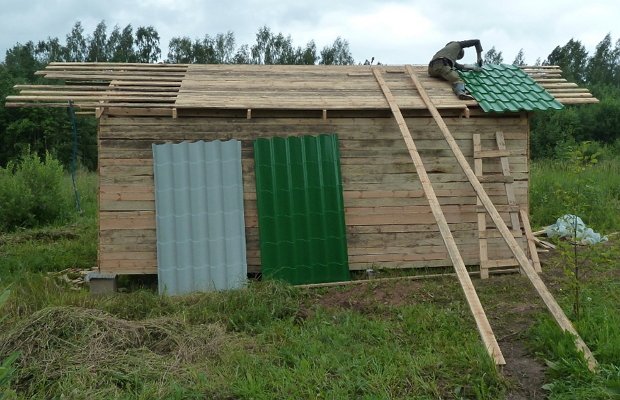
When the counter-lattice is ready, we proceed to the finishing stage - the laying of metal tiles or corrugated board. Do not forget about storm water - try to take precipitation away to the side. At this time, your partner can mount floor boards, board up walls. One important point - if you want the boards in the walls to fit snugly against each other without leaving gaps, then this can only be achieved by overlapping. The boards are stuffed in such a way that the top one goes on the bottom one by two centimeters. As a result, even if they dry out a little, not a single crack will appear in the barn, the wind will not blow and drafts will not walk.
It will not be superfluous at all from the inside with foam, or at least sheathe the walls of the chipboard. But this is if you plan to use it in the winter. In any case, the wooden frame and walls must be covered with protective compounds, or even completely painted. In general, it will take you a maximum of a week to build a barn, and if you devote all your free time to this process, then you can manage it in three days.