To build a bath, you can use various types of building materials. The most massive is the construction of the most ancient technology - from wood. You can build a bath from logs, or you can from a bar.
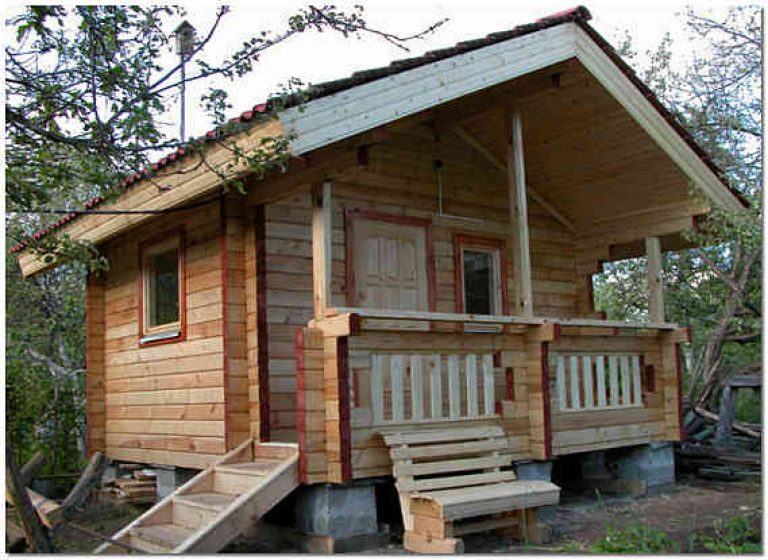
How to build the right bath from a bar with your own hands
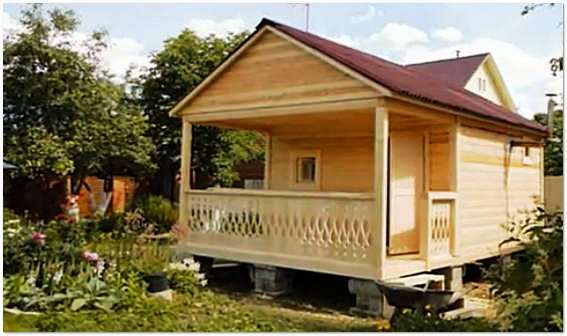
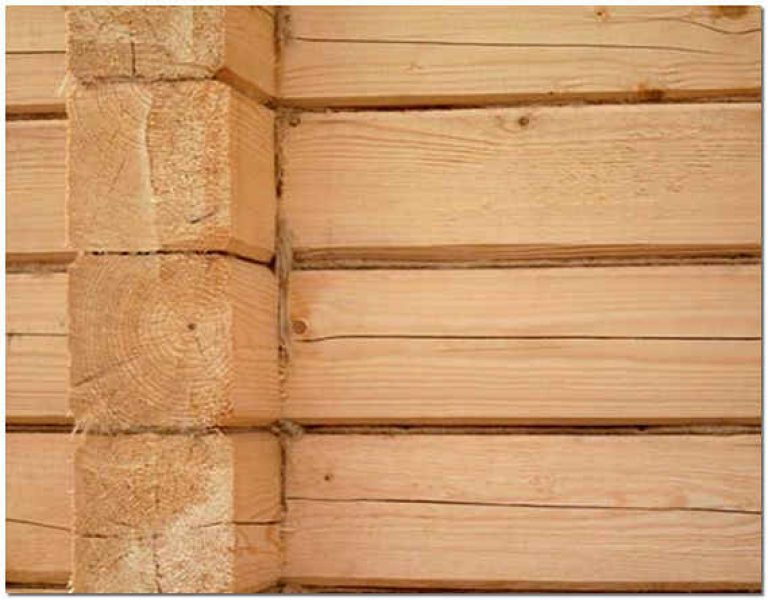
The beam fits perfectly in rows, looks beautiful, practically does not shrink, keeps heat very well. Timber walls are easier to build than log walls. They can be installed immediately on the finished foundation, unlike logs, which are first adjusted on the ground, and then transferred to the foundation and built walls from them.
This type of construction is the most cost-effective. Almost anyone with experience with power tools and a little desire can build a bath from a bar with their own hands.
I do not want to paint the disadvantages or advantages of building from certain materials. Each material has its pros and cons. Let's consider in more detail how to build a bath from a bar.
The technology of building a bath from a bar. Material selection
To build a bath from a bar with your own hands, you will need a profiled bar.
When laying the first few crowns (a finished row of timber along the perimeter is considered a crown), it is best to use larch timber, due to the fact that it rots less in a humid environment.
For subsequent crowns, starting from 2-3, you can take coniferous woods (cedar, spruce, pine), since they are warmer and have water-repellent properties due to the presence of resins.
The optimal size of the timber for the outer box is considered to be 150x150 mm, and the optimal size of the internal partitions is 150x100 mm.
As an antiseptic, the old-fashioned way is still considered the best. According to him, each beam is carefully processed with engine oil, and the very first crown (salary) should be processed from all sides, and all subsequent ones must be processed from three inner sides.
Bath construction preparation
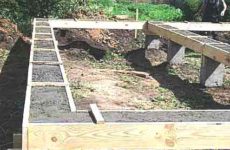
According to experts, the foundation for a bath is recommended to be done in the following most common ways:
- Strip foundation - concrete is poured along the perimeter of the building to a freezing depth, or to a depth of 55-70 cm, the soil around is then additionally insulated.
- Pillar foundation - columns are placed in the corners and along the perimeter, at a distance of approximately 1.5-2 m from each other. Usually it is made of bricks, and a concrete "cushion" is poured under each pillar.

In both cases, the waterproofing between the first crown and the foundation is made of two layers of waterproofing material, for example, roofing material.
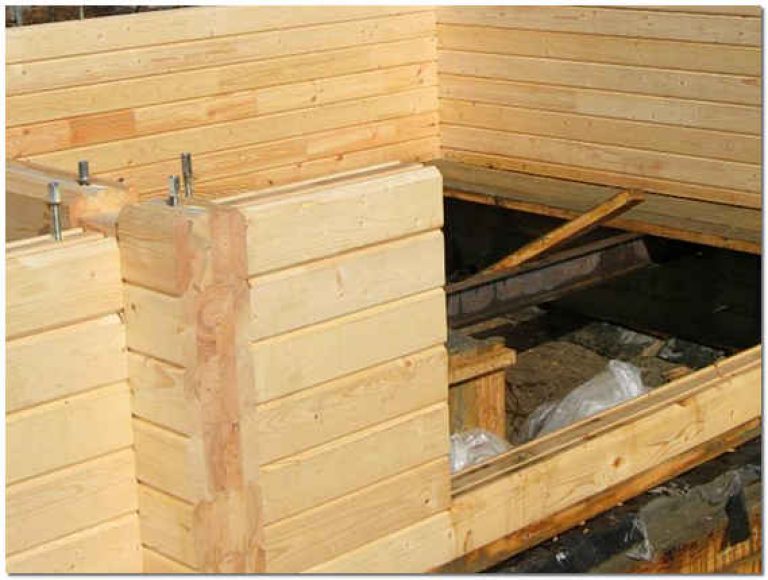
The height of the part of the foundation that protrudes above the blind area should not be less than 150 mm, and the width should be 100 mm more than the thickness of the beam.
When pouring the foundation, remember about the "mortgages" of the reinforcement, in order to then fasten it with the first crown (salary).
crown seals
Sometimes "dashing masters" are advised to use mounting foam as a sealant. I want to note, firstly, it will result in a considerable sum of money. Secondly, the polyurethane foam quickly turns yellow and collapses from external exposure to ultraviolet rays and internal exposure to moisture.
Foam is used guided by a certain technology, laying slats, but it is long and cumbersome, so it is more reliable to purchase ordinary seals for a log house.
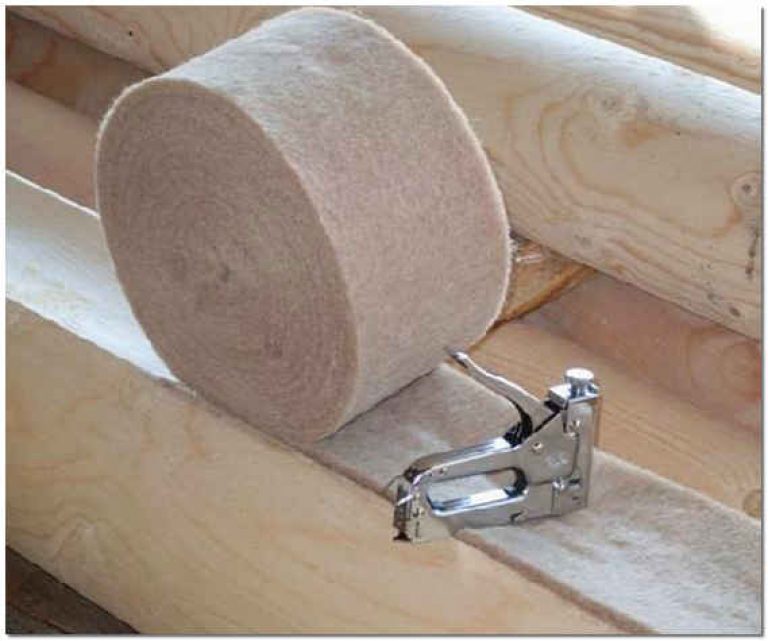
On sale there is a wide range of different heaters for wooden buildings. The easiest way to use is jute (tape insulation). It is rolled out along the entire length of the beam and fastened with small nails or a construction stapler.
Walls
Let's start assembling the constructor from a bar. It is important to remember that when assembling walls from timber, it is unacceptable to make a tight fit. The tree, drying up, will shrink in thickness, and the length will always remain unchanged. The space must be loosely filled with insulation.
The number and length of the beam for each wall is determined based on the plan of the bathhouse, while taking into account the overlaps on the corners and cuts for installing internal walls. We prepare a template along the length from a board or a rail, using an electric saw, according to the template we will prepare a beam for 2-3 crowns. We will markup the template in a way that is convenient and understandable for us.
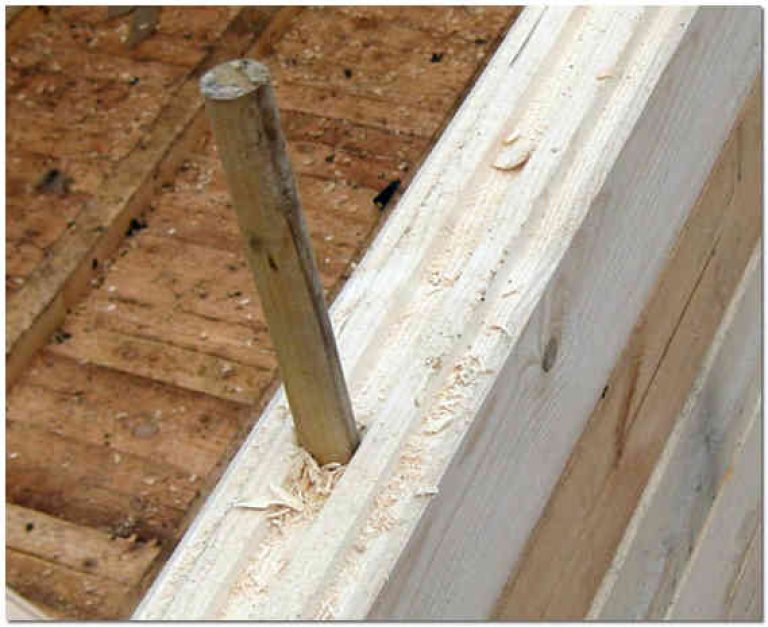
The fastening of the beam to each other is carried out according to the following scheme:
- we lay a new timber and adjust it in place;
- we drill holes in increments of 1.25-1.50 m, drilling the newly laid beam and half the underlying one;
- we remove the new timber, and drive a wooden dowel (dowel) into the hole of the lower one, the length of which is equal to two heights of the timber;
- we lay insulation along the length;
- we put the beam in place, check the horizontal position, combine the holes and pins and hammer it into place until it fits snugly.
We will put the door blocks on a row of strapping, which is located in the washing compartment above the floor level, and the window block at the level we need. Blocks must be set on plumb lines, then fastened. Over the window boxes and doors you need to leave a gap of about 80 mm for shrinkage, then it must be filled with insulation.
Preparing the structure for the shrinkage period is the last step in the question of how to build a bath from a bar with your own hands. It lasts 6 months or more. At the end of this period, you can begin finishing work inside the building and arranging the bath.
P.S. And for dessert, I suggest watching a video clip: Building a bath from a bar