When, for various reasons, it becomes necessary to expand the living space of a private house, the most economical and technologically simplest option is a frame extension. Its advantage is the speed of construction with your own hands with a minimum skill in working with a carpentry tool. Step-by-step instructions for the construction stages with photos will help you make a useful and beautiful extension like in the video, which will last for many years.
Appointment of the extension
So that the extension does not subsequently have to be transformed, even at the planning stage, you should consider the nuances of the design. First, decide on the purpose of the new premises.

With an extension, you can expand the area of \u200b\u200bthe house
- Additional room. The construction of an additional room is tantamount to building a house with a small area. All structures of the new building must be thoroughly insulated, otherwise the heating of such a room will be inefficient due to the large heat loss. You should not save on waterproofing, otherwise dampness and mold on the walls will make it impossible to live in such a room.
- Kitchen or bathroom. Take care of the engineering communications before you start building the foundation. The places where water or sewer pipes pass through the foundation must be well insulated. This is easier and cheaper to do at the construction stage.
- The veranda is a light extension to the house of an open or glazed type. Used for summer holidays. The building is not heated, so the design is extremely simple: flooring, walls and roof on supports. Do not forget about harmony, the veranda should be combined with the house in terms of scale, style and construction materials.
We select the base
The veranda can be attached or built-in. If the second one is planned at the stage of building a house, then for the first one you will need to build a separate foundation. With a gap from the wall of about 40 mm. Otherwise, during shrinkage, the monolithic base will collapse due to the different weights of the veranda and the house. The seismicity of the soil and the weight of the future building are taken into account. A lightweight foundation erected on soil prone to heaving will “lead”, and the extension will move away from the house. Such a base is designed for light walls; shrinkage is inevitable under the weight of brickwork.
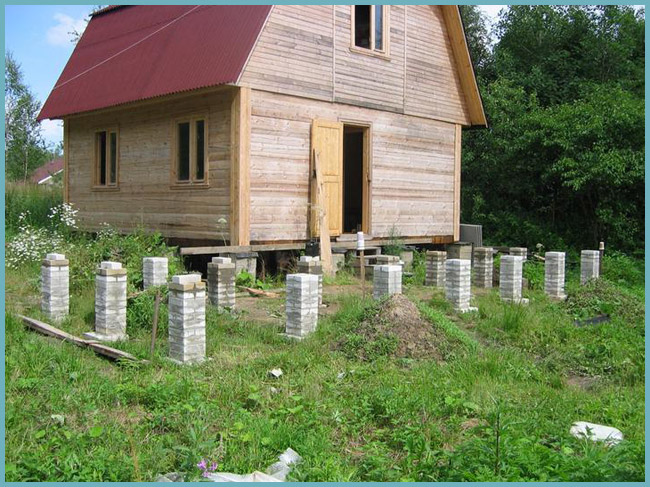
Pillar foundation made of bricks
Different materials are used for construction: concrete, brick, stone, piles made of wood, metal or concrete. It is important to choose the right depth and type of foundation for the extension:
- tape;
- slab;
- columnar;
- pile;
- pile-grillage.
In private construction, when erecting a base for a veranda, a columnar or tape structure is most often used. Let us consider in more detail the step-by-step instructions for arranging the foundations.
Strip foundation
For large and heavy buildings, a tape type of foundation is chosen. It is advisable to perform it from concrete in this sequence.
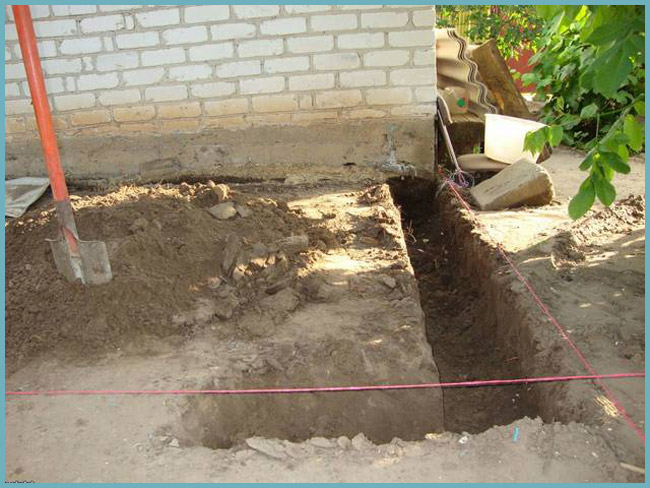
Important. Before erecting walls on the foundation, it is necessary to apply waterproofing. Use roll materials or mastic.
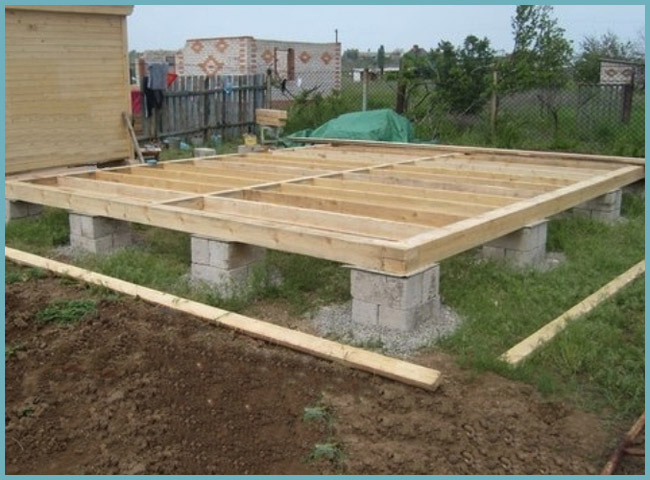
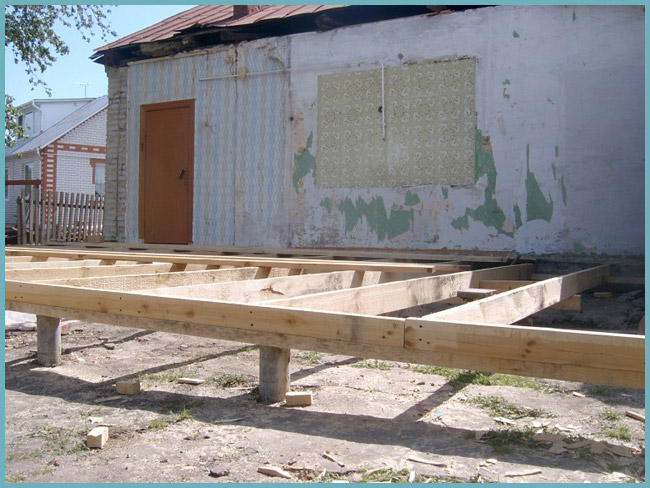
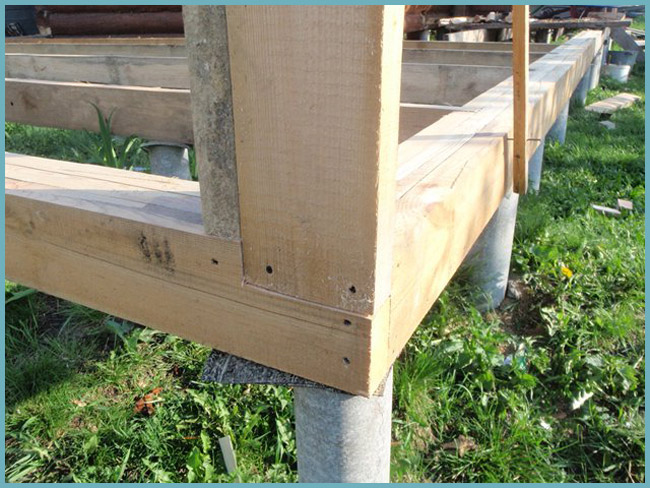
Column Foundation
For a light frame veranda, it is appropriate to erect a columnar base, which is built of brick, rubble stone or concrete. Or a combination of these materials. Pits under the pillars are dug to a depth below the freezing of the soil. The step between the posts is about 60 cm. The sequence of work:
- dig square holes 50 x 50 cm. Sand is poured into the bottom and carefully compacted;
- a layer of concrete mortar is laid, and after complete setting, they begin to erect brick supports. Use the level so that the masonry is strictly vertical;
- the concrete support is made in the same way as the tape type foundation: the inside of the formwork is wrapped with waterproofing and a reinforced frame is inserted. The form is filled with concrete, and the top is leveled. Wet concrete a couple of times a day to avoid cracking;
For a veranda, a columnar foundation is enough
- after complete drying, the formwork is removed, waterproofing is applied to the pole, covered with several layers of roofing material on top - the material will protect the wooden beam of the floor from getting wet;
- the remaining voids are filled with backfill: soil mixed with crushed stone is poured, its ramming is carried out every 15 cm of the layer.
Important. The height of the foundation pillars is calculated so that the distance to the finishing floor of the extension is 30 cm.
Floor: wood or concrete
A concrete or wooden floor is arranged on a tape type foundation. The base on the pillars is obviously calculated for arranging a wooden floor. Let's take a look at both technologies.
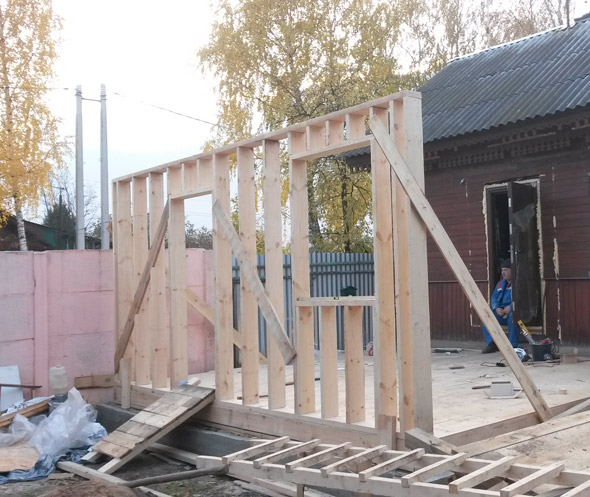
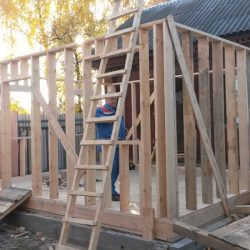
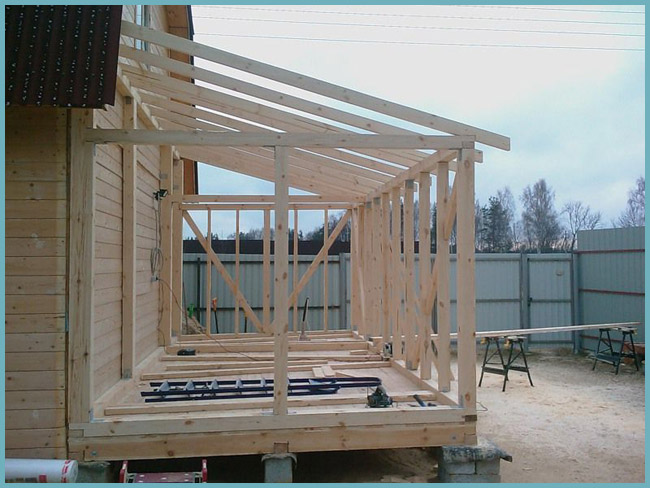
Construction of the frame and walls
Wall structures are erected from timber, fastened to previously assembled crown beams of the strapping. Wall elements are assembled on a flat area in a horizontal position, and then the finished wall shield is mounted in a vertical position, or each beam is connected to the beam in series. Step-by-step instruction:
- On the lower strapping bars, every 50 cm, make a cut for vertical racks.
- Mount the racks, fixing with corners and screws.
- Assemble the top harness.
Frame erection
- The veranda is connected to the house by attaching a vertical beam to the wall.
- Fix all racks adjacent to the house with anchor bolts.
- It is better to immediately sheathe the finished "skeleton" of the veranda from the outside with plywood, boards or OSB. This will give the structure rigidity.
- After erecting and insulating the roof, insert windows and doors.
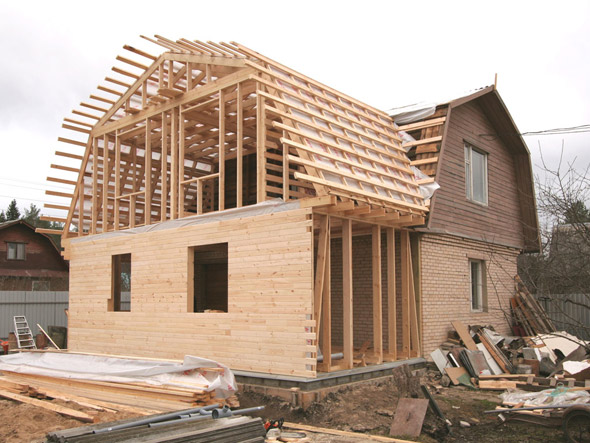
Covering and roofing
Shed type of roof is combined with almost any roof of the house, therefore it is the most common configuration. Let's consider it.
Wall and floor insulation
Mineral wool is used as an insulating material for walls. The mats are easily and quickly laid between the frame bars, as can be seen in the photo. When laying insulation in several layers, the mats are shifted relative to each other in order to exclude heat loss through the connecting seams. The insulation is covered on both sides with a vapor and wind insulating material that will protect the material from the accumulation of moisture, and sheathed with a finishing material on top. Internal walls can be sheathed with chipboard, drywall and covered with wallpaper or lined with clapboard. For the exterior wall, use wood, siding, or materials that match the finish of the home.
The wall cake towards the outer wall looks like this:
- internal lining;
- vapor barrier;
- insulation material;
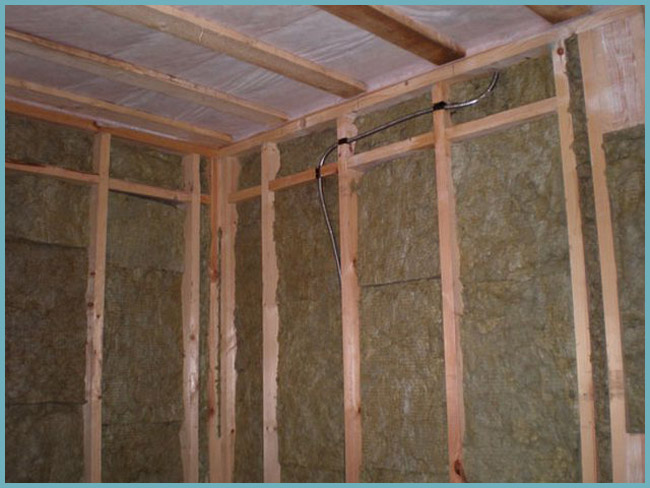
Wall insulation
- wind insulation;
- outer lining.
The floor on wooden logs is insulated in the same way as walls: mineral wool is laid on the subfloor between the logs, having previously covered the boards with a waterproofing membrane. A second layer of waterproofing is laid on top of the insulation, and then leveled with plywood. After that, a fine floor covering is mounted.
A concrete floor can be insulated in the same way as a wooden one, apply a dry screed, make a concrete screed and equip water or electric heating.
Home craftsmen often overlook the need to comply with safety regulations. Use personal protective equipment and a well-functioning reliable tool, and then you will have only the warmest memories from the construction of the extension.
Frame extension on piles: video
Frame extension to the house: photo